Creative Photography Project Ideas
36 Ideas To Inspire And Spark Your Creativity
As much as you love photography, there are times that you just won’t feel creative, or be inspired to get out with your camera.
This Creative Photography Project is designed to motivate you to grab your camera and start taking more photos with a purpose. Each of the 36 projects are based on a composition ‘rule’, a theme, or a photography technique.
Whether you want to learn new photography techniques, understand your camera’s features better, or just put your passion for photography into action, this project is for you!
Why Do A Creative Photography Project?
Doing a photography project can be a great way to spark your inspiration and creativity.
A creative photography project is a great way to improve your skills as a photographer.
Each project offers an opportunity to focus and grow your creative eye. By encouraging you to practise it will help you stay motivated and inspired.
By following the ideas, you’ll be able to track your progress and build on your techniques as you go. It can also push you to try new things, giving you new ideas, subjects and tech;niques to try.
Also, completing a creative photography project will give you a great sense of achievement. Simply completing each project will help build your confidence and encourage you to keep going.
“Sometimes all you need is a little inspiration.”
~ Unknown
How The Creative Photography Project Works
There is a list of photography ideas that you work your way through – either choose one a day, a week or a month.
So while you can certainly use it that way, you can also randomly choose a topic that takes your fancy. You can then focus on that until you’re happy. That could be a day, week, month, whatever works for you.
Each project encourages you to take photos based on a subject, theme or photography technique – It’s totally up to you how you execute this.
All projects can be done using any camera and whatever equipment you choose to use.
There are no rules and only one goal: to help you stay inspired with your photography.
The more you practise with your camera, and the more projects you do, the more your photography will also improve. It really is a win-win!
Below are 36 ideas for you to choose from. Each one encourages you to either photograph a theme or use a photography or composition technique.
Each idea has a brief description, but there are no rules, and the theme is general for a reason. You are encouraged to interpret them however you like.
Where relevant, I’ve included links to helpful articles you can check out for further explanations, and ideas if you need inspiration.
The topics have been chosen so each idea can be completed without editing required. However, it’s totally up to you if you choose to process your images. It’s your project, so the only limitations are those placed by you.
So dive in anytime and pick an idea whenever you feel the need to be inspired.
The Creative Photography Project Ideas
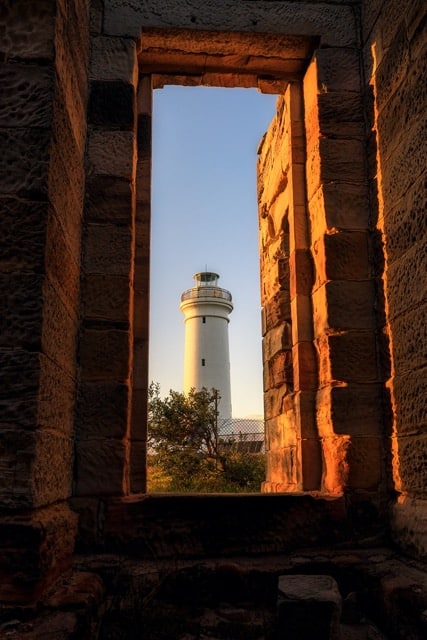
1 – Framing
By adding a natural frame to your image, you add depth and isolate your subject. Elements like trees, arches and windows are great to frame your main subject; and it helps direct the viewer’s eye to the subject.
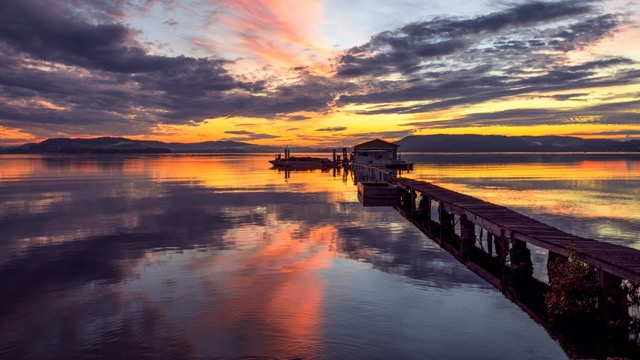
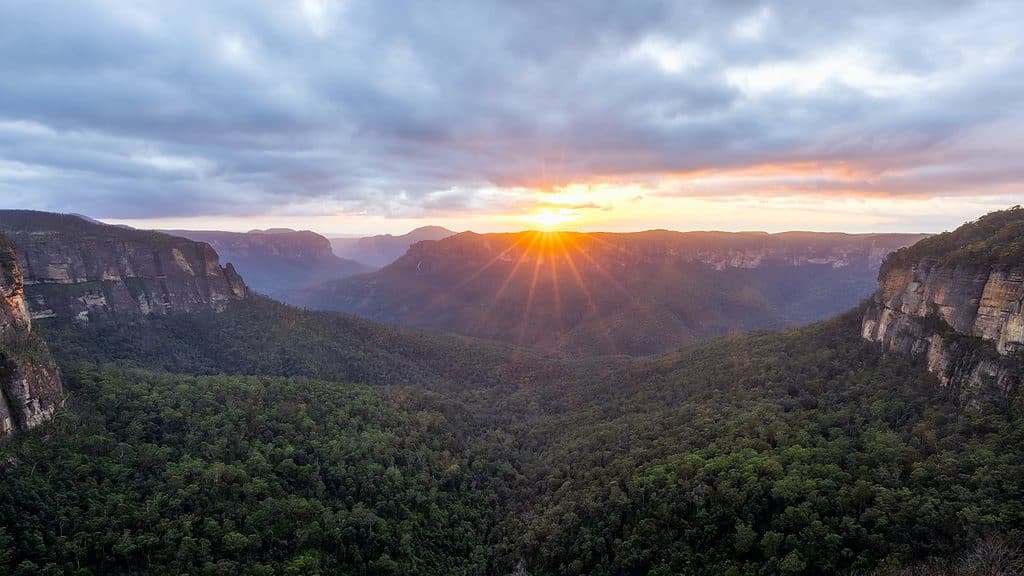
2 – Sunrise/Sunset
Sunrise and sunset are magical times of the day for photography – and for good reason! The light is beautiful and there is no better way to start or end your day.
Sunrise and Sunset Photography – Your Complete Guide
3 – Water Movement
This all comes down to your shutter speed. Whether you want to create silky smooth water, show flow or freeze the action, you will get to practise here with different shutter speeds. Note: you will also need a tripod for the longer exposures.
4 Simple Steps For Awesome Waterfall Photography

4 – Lines
Using lines to draw your viewer through your image is a classic, yet very effective, composition technique.
Some examples include weaving rivers or long roads that lead to the horizon. They can be curved, straight, diagonal, there are just so many options.

5 – Patterns
There are endless options for using patterns in photography. Simply, patterns are elements in your scene that repeat themselves. They can be lines, shapes, colours, textures and more. All will draw your viewer into your picture, but don’t forget about your composition.
They can be a bit tricky to see to start with, but once you start noticing them, you will see them everywhere!

6 – Black And White
Time to strip back the colour and focus on form, shape, textures and contrast to create an interesting image.
This is not just about converting your images with editing, it’s about learning to ‘see’ in black and white.
If you can, set your camera to black and white and shoot exclusively in this mode for a week or two.
I’m such a colour person, I find this very challenging, but it’s great for developing your eye for composition. Give it a go!
7 – Negative Space
This is the amount of space that surrounds your main subject. It can be sand dunes surrounding a person or animal or a single boat floating on the water.
It can be a really powerful composition tool to use in your images.

8 – Textures
Similar to patterns, textures can be found everywhere when you go looking. From manmade to nature.
Some examples include: walls, roofs, fences, trees, fabrics, water and so on.
Understanding Texture in Photography
9 – Depth Of Field
Depth of field basically refers to the area of your photo that appears sharp and focused.
Determining your depth of field depends on a number of factors. The two most critical are the aperture you use, and the distance between the subject in focus.
Adjusting your camera settings and composition, you decide how much is in focus, and it is often a very effective way to get creative with your photography.

10 – Symmetry
Using symmetry in your images makes for a strong composition. Look for symmetry around you. It can be found in buildings and the landscape, but don’t forget smaller details either.

How to use Symmetry in Photography Composition
11 – Architecture
While this theme is fairly self-explanatory, don’t just limit yourself to buildings. It can also expand to any man made structure such as sculptures and monuments.
Don’t forget to consider the inside of buildings either.

Guide to Architecture Photography
12 – Long Exposure
Long exposure photography is a technique in which the camera’s shutter is left open for an extended period of time than usual.
By allowing more light in, it can capture motion, and blur parts of your image where there’s any movement.
This can create a number of interesting effects, such as smoothing out moving water, making clouds appear to streak across the sky, or creating ghostly trails of moving subjects.

Step by step guide to Long Exposure Photography
13 – Curves
Another strong compositional tool, curves are a great way to lead the viewer’s eye through your image.
They can be soft, graceful and add strength to an image. Curves can be used to separate elements, connect them, or just create balance in your image.
How to Create Compelling Compositions with Curves
14 – Seasons
Each season brings its own unique qualities and characteristics that can have a significant effect on your photography.
Regardless of the season you’re in when doing this project, you can highlight the individual beauty of that season:
Spring: nature comes back to life and the landscape is filled with vibrant colours and new growth.
Summer: typically a time of bright, warm light and long days, which can be great for landscape photography. Usually better early or late in the day, as the midday light can be very harsh.
Autumn: known for its beautiful colours, as the leaves on trees and other plants change colour and begin to fall to the ground. (My favourite time to photograph).
Winter: with colder temperatures and shorter days, this can be a bit of a challenge. However, it can also be a beautiful time of year, with sparkling frost and snow adding texture and interest to the landscape. Depending on where you live of course!
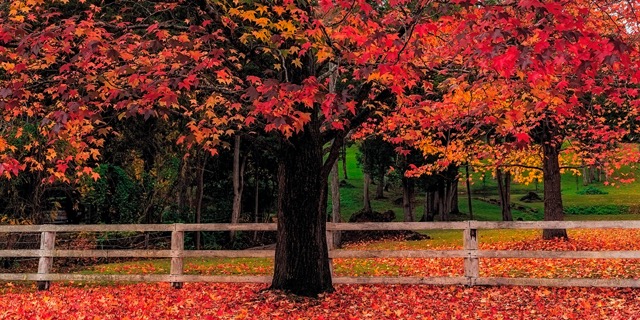
Tips For Awesome Autumn Images
15 – Silhouettes
A silhouette is created when the subject is backlit with the sun behind it, so the outline or shape of the subject is visible but the features and details are concealed.
The result is an image that is largely featureless, with the subject appearing as a dark shape against a brighter background.
The best silhouette images are when it’s a more minimalistic image. The photo will be more powerful by focussing more on outlines, contrast and shape.
Silhouette Photography 101: Master The Basics
16 – Rule Of Thirds
The rule of thirds is a basic composition technique where you divide your image into nine equal parts by two equally-spaced horizontal lines and two equally-spaced vertical lines.
The four points where these lines intersect are where you would try to place your main points of interest for the photo.
You can usually set this up on your camera to help you when composting your scene.
The idea behind the rule of thirds is that by placing the subject off-centre, the image will be more balanced and more interesting to look at.
It also helps to create leading lines and visual pathways that guide the viewer’s eye around the image.
While the rule of thirds is a helpful guideline, it is not a hard and fast rule, so use this theme to either master it, or find creative ways to break it.
17 – Elements
The power of nature’s elements: fire, water, wind, ice, snow …
The elements of fire, water, wind, and ice can all add incredible interest and drama to a photo, and also to convey a wide range of emotions and themes.
Some ideas to get started –
Fire: energy, intensity, heat, light
Water: tranquillity, peach, power, reflections, movement
Wind: movement, power, force
Ice: cold, isolation
Incorporating the elements of nature can add interest, help tell a story, or create a mood or emotion.
18 – Colour
This topic clearly doesn’t need much introduction I’m sure.
Colour is such a significant element in photography, as it can affect every aspect of your image.
Use this topic to do more than just take any image. Consider using a limited colour palette, or even get creative with some editing.

19 – Perspective
Perspective is an important aspect of photography that refers to the way in which an image shows depth, distance, and relationships between the elements in your photo.
Some ways to use perspective in your photos include:
- Moving your camera and yourself around
- Zooming in or out, or using different lenses
- Shooting from above or below
By simply altering your perspective, you can create completely different images from the same scene.

Play with perspective photography
20 – Minimalism
This creative project idea is all about stripping away any busyness and keeping it simple.
The opposite of fitting as much as you can in an image, feature only a minimal number of elements in your scene to let your subject truly stand out.
Implementing the rule of thirds and a shallow depth of field can make your minimalist photos even more compelling.
10 Tips For Minimalist Photography
21 – Sunstars
I love sunstars, and I’m sure I’m not the only one!
Sunstars are a great way to enhance your images. They can completely transform a photo and they are quite easy to create once you know how.

Creating Beautiful Sunstars In Your Images
22 – Reflections
Reflections in photography can add depth and interest to an image, and can be used to create a sense of symmetry, balance, and visual intrigue.
Choosing your ideal location really is the foundation of finding opportunities to photograph reflections.
Reflections can be created by shooting subjects that are reflected in mirrors, windows, or other shiny surfaces, or by shooting subjects that are reflected in water or other reflective surfaces.
They are best usually photographed when the air is cool and still, and don’t forget about puddles!
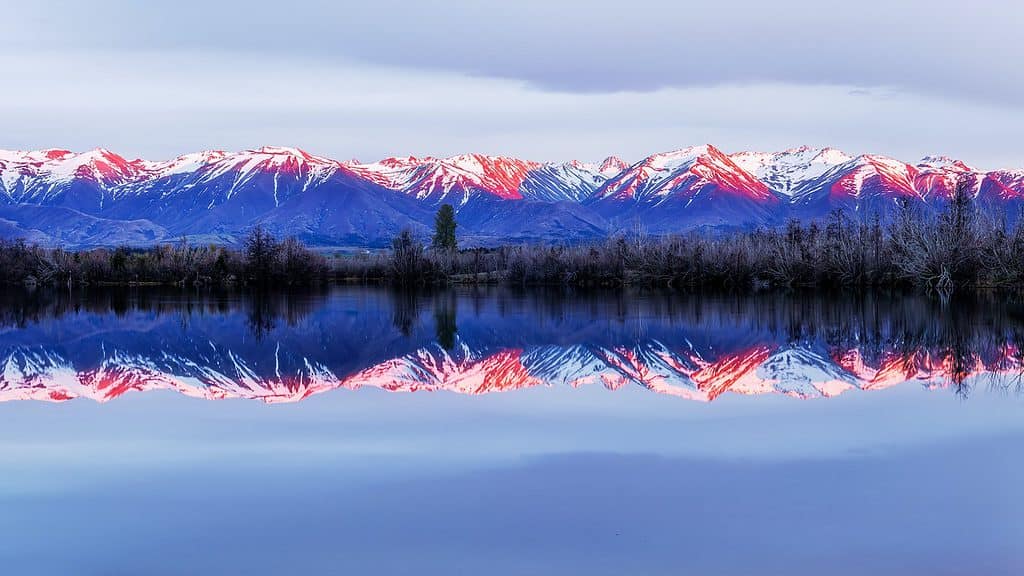
Try reflection photography to find unique perspectives
23 – Landscapes
Landscape photos are typically a wide angle view of a natural environment such as mountains, forests and beaches.
Composition is key to capturing a compelling landscape photo, along with shooting in the right light.
Things to consider include the placement of the horizon line, the use of leading lines, and the balance of positive and negative space.
More intimate landscapes are also becoming very popular, so don’t discount zooming in, or getting closer and focussing on a smaller aspect of the grand scene as well.
24 – Intentional Camera Movement
Intentional camera movement (ICM) is a technique in photography where the camera or lens is moved (hopefully deliberately lol) during the exposure to create movement in your image.
ICM can be used to create a variety of effects, such as creating streaks of light, blurring the background or foreground, or distorting the subject.
ICM can be a fun and creative way to add interest and movement to an image, but it can also be challenging to master. Be prepared to take way too many images to get just one that you might be happy with!
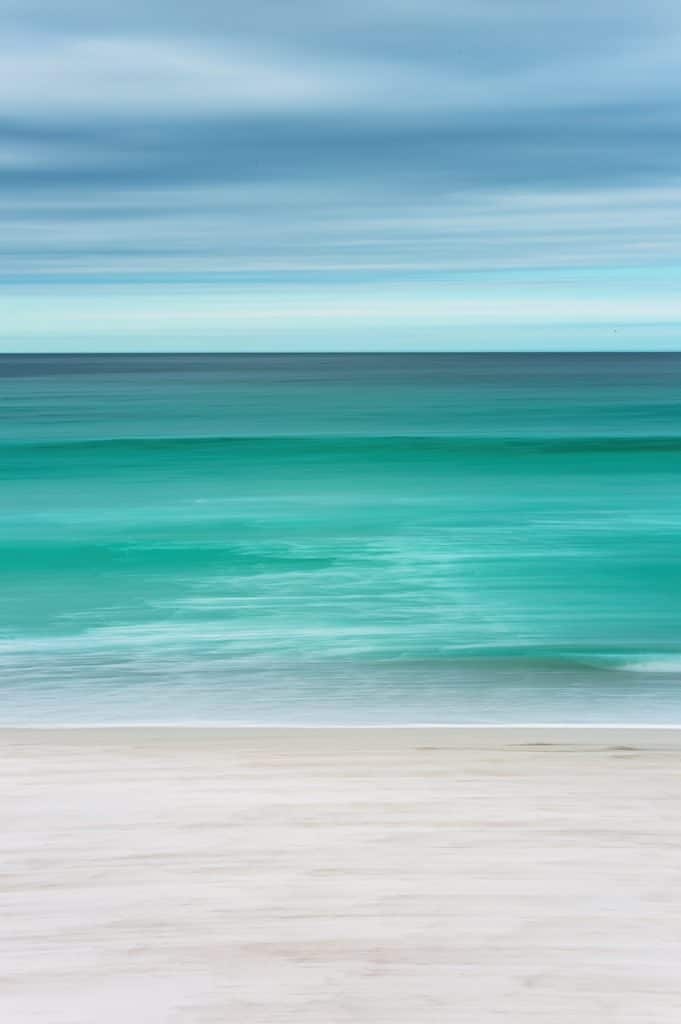
Intentional Camera Movement: An Intro to ICM Photography
25 – Balance
Balance in photography refers to the way that elements are arranged in an image so they relate to each other, and provide overall harmony to the scene.
It is a critical compositional part of any photograph, and you can consider the following as to what you’d like to achieve:
- Balanced or imbalance
- Symmetrical or Asymmetrical
- Left to right or right to left
- Top to bottom
- Cool to warm
- Big to small
- Contrast
26 – Shadows
Shadows can add depth, contrast, and interest to a photograph. As photographers we don’t always welcome shadows in our scenes, but you can be creative and make them your focus to make really compelling images.
Remember to pay attention to the composition of the photograph, as well as the direction and intensity of the light. These elements will all contribute to the appearance of the shadows in the photograph.
Photographing The Perfect Shadow

27 – Bokeh
Bokeh is basically where your subject is sharp and the background is out of focus, creating a lovely soft blur.
Bokeh is usually achieved by using a wide aperture. This creates a shallow depth of field where a part of your image is in focus and the rest is blurred.
Fun fact: the term comes from the Japanese word boke, which means blur.
It is used widely in portrait photography to make the subject stand out, but it can be used in so many other creative ways.
How to add bokeh backgrounds to your photography
28 – Centred
This project goes directly against the rule of thirds; placing your subject in the middle of your frame instead of on the intersections as suggested above.
All rules are made to be broken, and sometimes the best image is created when the subject is in the centre.
The challenge, then for this project, is to experiment and find examples where placing the subject in the centre of your image makes for a strong photo.
Central Composition is Brilliant
29 – Weather
Taking photos in bad weather can produce incredible images. Who doesn’t love seeing those amazing lightning shots!
Storm photography is not for everyone, so other conditions to include here are cloud formations, fog, snow and rain.
You will need to be patient, prepared and protected, but you can capture some fantastic photos if you’re brave enough to face the elements.

A Guide to Lighting and Weather Conditions in Photography
30 – Macro
Macro photography is a hugely specialised genre once you get beyond simply photographing small subjects.
But that doesn’t mean you can’t play with it and capture some amazing images, even in your own backyard.
Commonly photographed subjects are insects, flowers and plants, but also consider small objects, and even close up shots of human or animal elements.
31 – Horizontal Versus Vertical
The orientation of a photograph, whether it is horizontal or vertical, can greatly affect the composition and impact of the image.
Horizontal, or landscape images are wider than they are tall and generally used to capture those wide grand scenes.
Vertical, or portrait images are taller than they are wide, and are most often used for people and buildings.
When deciding on your orientation, consider the subject and how you want to convey them in your scene.
If you find a composition that works one way, try to remember to flip it the other way and see which one works better – you could be pleasantly surprised.
Landscape Vs Portrait Orientation In Photography
32 – Part Of Whole
Looking to add a bit of mystery to your images? Only showing part of the whole subject or scene is perfect for this.
It not only provides mystery though, it can create a really intimate image as you are only focused on a small section of the scene.
It can be a very powerful compositional tool to add to your toolbox, and one that can be a lot of fun.

Part of a whole as a composition tool
33 – Wide Angle
A standard in landscape photography, using a wide angle lens, or taking panoramic images allow you to capture everything in the scene before you.
While photographing part of a whole like in the idea above can produce an interesting image, capturing the complete beauty of a scene is something else.
They can be challenging to photograph as you really need to decide what to include, and what to exclude in your image.
34 – Fill The Frame
As the name implies, filling the frame means to fill the entire frame with your subject – no negative space here!
It’s a great way to create an intimate photo by truly making the subject the centre of attention – there is no question as to what the viewer should be focussing on.
So, get super close to your subject, use a telephoto lens, or zoom right in, and fill that frame.
This is a great technique to use with flowers: either get up close or zoom right in to fill your whole frame.
Fill the frame for better photography composition
35 – Scale
Creating scale in your composition refers to showing the size of your subject in relation to the other elements in your photo. This can have a considerable impact on the overall look and feel of your image.
A classic example of this can be seen all over instagram: think people standing in front of a waterfall, or at the top of a mountain looking out over a grand scene.
It can also be used to show a sense of drama. Shooting a subject from a low angle can make it appear larger and more dominant, while shooting from a high angle can make it appear smaller and more vulnerable.
You can also use scale to show a sense of distance such as a road leading off to the horizon.
Don’t forget about your composition here – it is paramount in conveying the story you are trying to create.
36 – Layers
Using layers in your photography adds dept and interest to your images. It can also help to draw the viewer’s attention to specific elements within your photos.
Layers simply refer to the way that you arrange elements in a photo so they relate to each other and the viewer.
Ways to introduce layers into your photos include:
- Use defined foreground, midground and background elements
- Leading Lines
- Frames
- Colours
- Reflections
- Fog and shadows
Using layers to make better photos
Looking For More Inspiration?
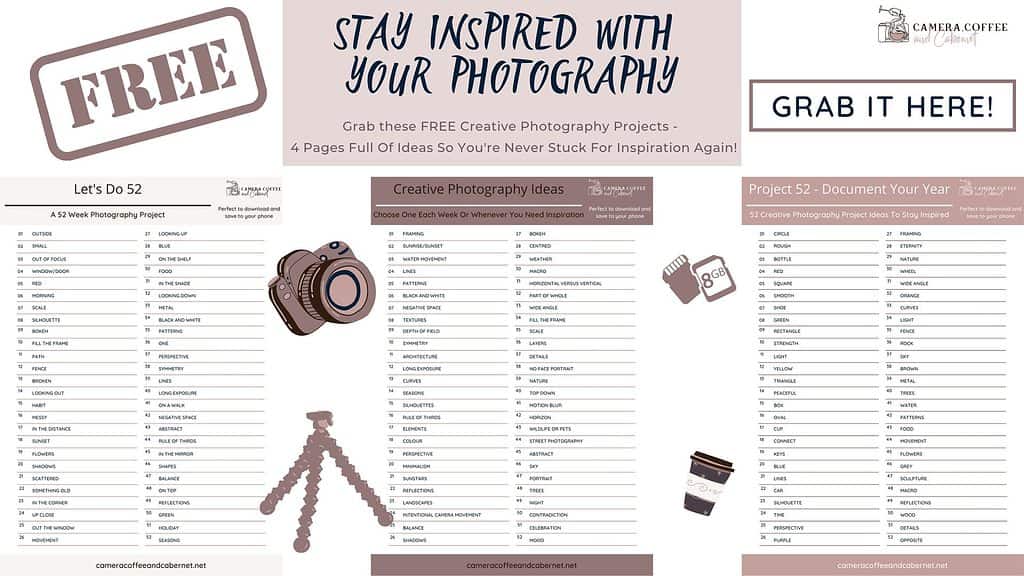
Here’s another 16 ideas so you can turn this into a 52 Week Photography Challenge if you like.
- Details
- No Face Portrait
- Nature
- Top Down
- Motion Blur
- Horizon
- Wildlife or Pets
- Street
- Abstract
- Sky
- Portrait
- Trees
- Night
- Contradiction
- Celebration
- Mood
I’ve also created a downloadable version of all the topics so you can have them all in one place.
As a bonus, I’ve included three more 52 week creative photography project sheets so you never run out of ideas!

Conclusion
The creative photography project is a great way to learn new techniques, improve on what you already know, and keep you inspired.
I totally believe in photographing what you love, but sometimes you don’t know what you don’t know. Who knows, by trying something different, you could find something totally new to fall in love with. Please let me know below if you do!
Don’t forget that photography is like any other skill: the more you do it, the better and more creative you will become.
With regular practice and dedication, this project will help you improve as a photographer and produce some stunning images along the way!
Why not set yourself the challenge of creating a beautiful photo book showcasing your projects, or check out these other creative photo printing ideas.
Were there any of these ideas that really resonated with you? Let me know in the comments below.
I’d also love some of your ideas to add to my list!
That’s it for now – Keep clicking and stay caffeinated
Like this post? PIN it so you can save it for later
Don’t miss a post – sign up Here if you haven’t already.
Note – This post does not contain any sponsored or affiliated links. All suggestions and opinions are mine. Unless otherwise stated, all photos are mine and remain my copyright images – Sam Wilson Photography.