Golden Hour Landscape Photography: 10 Tips To Capture Beautiful Light
This article is all about golden hour landscape photography and learning how it can make for beautiful images.
Even if you’re brand new to the wonderful world of landscape photography, I’m pretty sure you would have heard of the ‘golden hour’.
But what is this golden hour and why is it so important to your photography?
The “golden hour” is a truly magical time cherished by photographers worldwide for its ability to transform ordinary scenes into extraordinary beauty.
During this special time around sunrise and sunset, the warm, soft light casts a magical glow that elevates landscapes to breathtaking levels.
In this article, we’ll explore the art of golden hour landscape photography, providing practical tips to help you make the most of this special time.
Whether you’re new to photography or looking to enhance your skills, we’ll uncover the significance of light during the golden hour and how it enhances the beauty of landscapes.
We’ll cover essential topics such as how research and planning, gear selection, camera settings, creative techniques, composition ideas, and post-processing can be used to enhance your images.
So, let’s dive in and discover the alluring magic with this guide to golden hour photography!

1 – Know Your Light
Regardless of all the technical advances in photography gear, light reigns supreme.
It wields the power to shape your images, evoke emotions, and determine the success of your shots. As a photographer, grasping the nuances of light and its various forms is essential to creating remarkable photographs.
Different lighting conditions can make or break your composition.
Even with a well-framed shot, unsuitable light can leave your photos looking lacklustre. On the flip side, when you strike gold with the perfect lighting, your pictures can become truly exceptional!
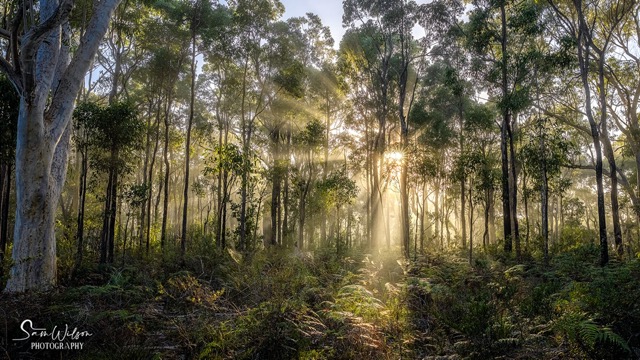
So, when do these enchanting moments occur? It’s during the hours just after sunrise and right before sunset – often referred to as the golden or ‘magic’ hours.
During these time frames, nature gifts you with soft, warm light that has the potential to elevate your photos to new heights.
When Is Golden Hour?
The Golden Hour is the period shortly after sunrise and just before sunset when the sun is low on the horizon, casting a warm, golden glow over the landscape.
During this magical time, the light becomes diffused, creating soft and flattering illumination that enhances colours, textures, and shadows. This makes it an ideal window for capturing breathtaking and emotive landscape shots.
Then there are the twilight phases that occur before sunrise and after sunset. Often commonly called blue hour, these times make for more emotive and atmospheric images with a stronger blue colour cast.
Twilight consists of three phases: civil twilight, nautical twilight, and astronomical twilight.
Civil twilight happens just before sunrise and after sunset when there’s enough natural light for most outdoor activities.
Nautical twilight follows, with a serene bluish hue in the sky, perfect for calm and soothing scenes.
Astronomical twilight is the darkest phase, ideal for astrophotography and capturing stars and celestial objects.
Understanding these phases helps you to plan your shoots and make the most of natural lighting to create those stunning images we all drool over on our socials.
I’m far from an expert on the science of these times, but this in-depth guide by Photopills can give you all the details if you’d like to delve into all the science.
Direction of Light
When you want to take amazing photos of landscapes during the golden hour, it’s important to know how the sunlight is shining. This special time happens when the sun is low in the sky, giving the landscape a warm and lovely glow.
But here’s what you need to know:
Where the sun is can change how the landscape looks. This creates cool lighting effects that can make your photos really special.
There are three main ways the light can shine: front, side, and back.
Front light is when the light is in front of the scene, making it bright and clear. This way shows the landscape as it is.
Side light is when the light comes from the side. This makes pretty shadows, brings out textures, and makes the scene look more interesting.
Backlight is when the light comes from behind the subject. This is a cool choice that makes the pictures captivating and artistic.
For me, I just want to know the best times and conditions for when I plan my shoots, which brings me to the next section; research and planning of course!
2 – Do Your Research
Honestly one of the favourite parts of photography for me is the planning and research.
You can’t always be out shooting (unfortunately), so this is the next best thing – after all, getting good shots does not usually come down to luck.
It’s all the time and effort that goes into making sure you’re at the right place at the right time that makes the difference.
To make the most out of your golden hour shoot, you need to plan ahead. Here are a few tips to help you plan for your next golden hour shoot:
Location
The first step in planning for a golden hour landscape photography shoot is to choose the right location.
While you can get good photos just about anywhere, for golden hour photos you really want a location that has a great view of the horizon such as a high viewpoint or near the ocean. This will help you make the most of the gorgeous light at this time.
Also, try and scout the location ahead of your shoot to scope out the best spots and your composition so you’re not scrambling as the light changes.
When aiming for an early morning photography session, the art of scouting takes on an even more crucial role. It can be extremely difficult to nail your composition in the dark!
Taking some time to visit the location before your photo shoot is a smart move.
You can do this a few days in advance or even just a few hours before your evening shoot.
During this visit, look around carefully and notice things that catch your attention. Imagine how the soft morning light will make the scene look beautiful, bringing out textures and making interesting shadows.
When you know the area well, you’ll feel more confident when the special golden hour comes.
This confidence will help you take pictures that are truly amazing.
Weather Forecast
Keep an eye on the weather before you plan to head out for your golden hour shoot.
You really want to avoid totally cloudy or overcast conditions as they will block the sun and reduce the golden hour effect.
Look for conditions where there are some clouds predicted as they will create a stunning backdrop for your photos.
Trusty Tip:
Want to take breathtaking photos during the golden hour? Clouds can be that special touch that turns your pictures from regular to amazing.
They have a unique power to make a dull image into something stunning and dreamy.
But, remember, there can be too many clouds! If the whole sky is covered, your photos might not look as vibrant.
What you’re aiming for is a sky with some clouds, not too many, and not too few.
This will make your photos full of excitement and enchantment, just like Goldilocks!

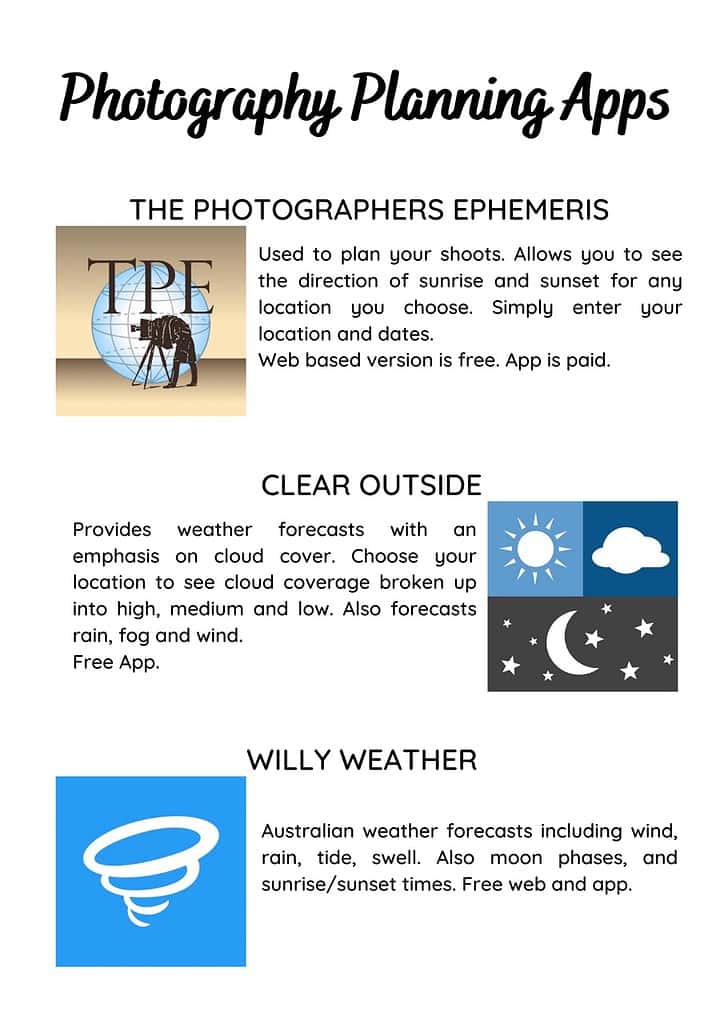
PhotoPills and The Photographer’s Ephemeris (TPE)
These are your best friends when it comes to planning your golden hour photography shoots.
Both of these apps provide you with all the information you need including: the sun’s position, direction of light, and the times of the golden hour so you can be at the right place at the right time.
Head here for Photopills: PhotoPills
Head here for The Photographer’s Ephemeris: TPE
3 – Grab Your Gear
While you don’t need any special gear to capture beautiful golden hour landscape photos, there are a couple of things to consider that can really elevate your photos during this magic time.
The Essential Tripod
Because the sun is hanging low in the sky, you’ve got a choice to make for great pics: either bump up the ISO or let the exposure time stretch a bit.
Option one – nudging up the ISO – sounds okay, but it can bring in noise and grain to your shot. Your camera might pick this when on auto mode, but lower-end cameras struggle with higher ISOs. And yeah, it can mess up a picture. On the bright side, you can get snappy shots with a faster shutter speed.
Now, option two – sticking to a low ISO and slowing down the shutter speed. That keeps your pic quality crisp, but there’s a catch: slow shutter speeds are a no-go if you’re holding the camera by hand.
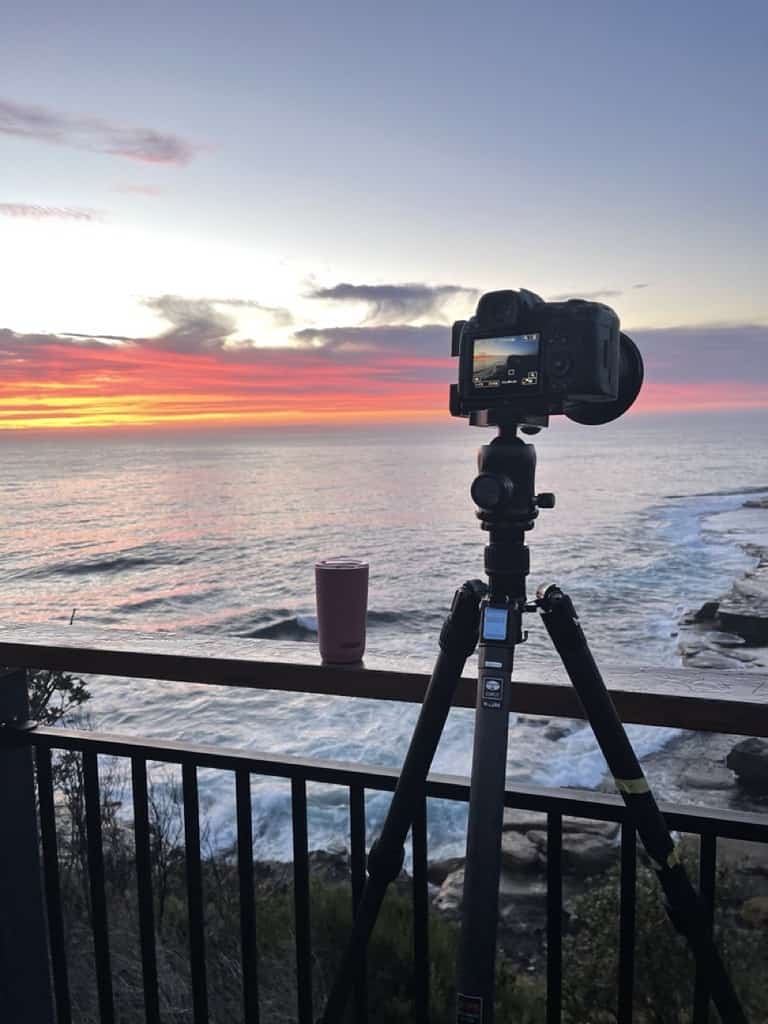
So here’s where a tripod comes into play for that golden hour magic. With a tripod, you can keep a low ISO and go for a longer exposure time – that’s the secret to sharp shots.
When you’re all set to capture that magical golden hour glow, a sturdy tripod is like your sidekick. As the sun makes its way down, the light gets weaker. That can mean underexposed pics unless you tinker with your camera settings. One fix is extending the shutter speed, but without a solid tripod, your photos could get all blurry.
Now, I know lugging a tripod around sounds like a pain, and yes it can be.
But let me tell you, the good stuff far outweighs the hassle. Aside from keeping your shots on point, tripods make you slow down and really think about your shot.
Honestly, you really will find that using one actually makes your whole photo journey a whole lot more rewarding.
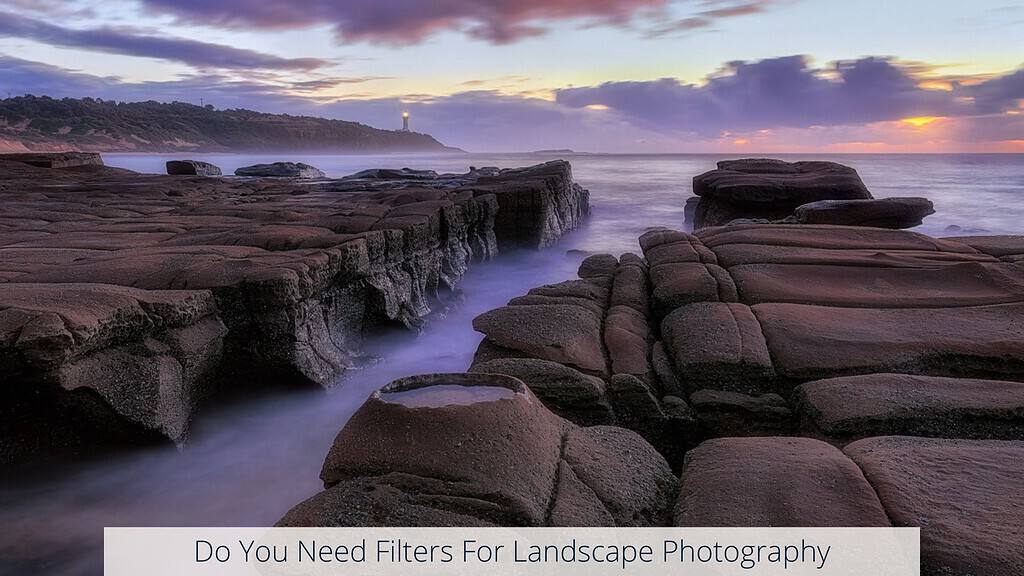
Consider Adding A Filter To Your Kit
When you’re soaking in those magical golden hours, you’re likely to come across scenes that play with shadows and light in a significant way.
Picture deep shadows mingling with radiant skies – a real test for your camera’s sensor.
Capturing all those intricate details in one shot? Well, that can be a bit of a challenge.
The sky’s still beaming with light, while the landscape is transitioning into its evening hues, growing darker by the moment. It’s a delicate dance to capture both aspects beautifully.
That’s where filters come in.
Let’s start with the first one: Graduated Neutral Density (GND) filter.
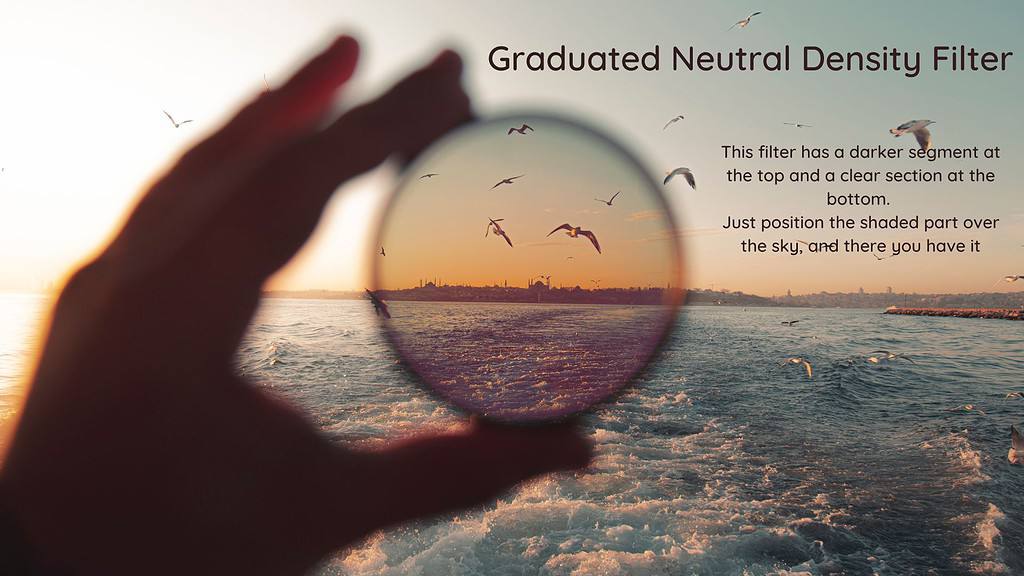
These filters are like your exposure maestros, especially when it comes to striking that perfect balance between the sky and the foreground. All you need to do is position the darker part of the filter over the sky area.
This filter has a darker segment at the top and a clear section at the bottom. It easily attaches to your lens. Just position the shaded part over the sky, and there you have it – a well-exposed image right then and there! It’s like a shortcut to stunning shots.
Voilà! The brightness levels even out, and your foreground gets its fair share of attention. These filters work wonders, although they might require a bit of patience to set up just right.
While many photographers, pros and amateurs, rely on these filters, they are not the way I choose to shoot.
They really must be placed perfectly in your shot or they can cause a dark line across your photo, or cause darker areas where you don’t want them to be.
You also have to remember to adjust them every time you adjust your composition, and as the light changes.
The light can change quite quickly during golden hour and it’s something I honestly agave messed up too many times.
My personal choice is to take multiple exposures and blend them later in Lightroom, and I’ll go into this further on in the article.
Filters I do use during golden hour include Circular Polarising Filters and Neutral Density Filters.
More on those here:
Trusty Tip: Make sure you have a torch or headlamp. Don’t rely on your phone for this as it’s just another power drainer for your phone that you don’t need.
4 – Don’t Be In A Hurry
This is one of my favourite golden hour photography tips.
Arrive early and stay late: this applies to both sunrise and sunset for magical golden hour landscape photography.
Popular spots can be bustling during the day and still pretty lively at sunset. But guess what?
Rising early for a sunrise is your golden ticket (pun intended) to beat the crowds and have the place all to yourself.
Stick around as the light takes on different stunning phases until it mellows out.
And yup, the same goes for capturing the sunset magic.
Arrive ahead of time, scope out your spot for when the light works its charm.
And don’t just be there for golden hour; the blue hour has its own charm – equally picturesque!
Now, let’s talk about evening magic. Golden hour might end, but the enchantment doesn’t disappear with the sun.
Right after the golden hour wraps up, something truly mesmerising happens. The sky turns this lovely cool blue, and a calm, soft light paints an ethereal vibe. That’s the blue hour, another winner for landscape shots.
Sure, the blue hour brings its own set of challenges, but it’s a whole new kind of landscape magic. The light is gentle and delicate, washing scenes with a serene mood.
And here’s a gentle reminder: never forget your trusty tripod. Dimming light means a steady base is your hero to keep the blur at bay.
So, when the evening’s golden chapter closes, don’t pack up just yet.
Allow that extra time and dive into the spellbinding allure of the blue hour.
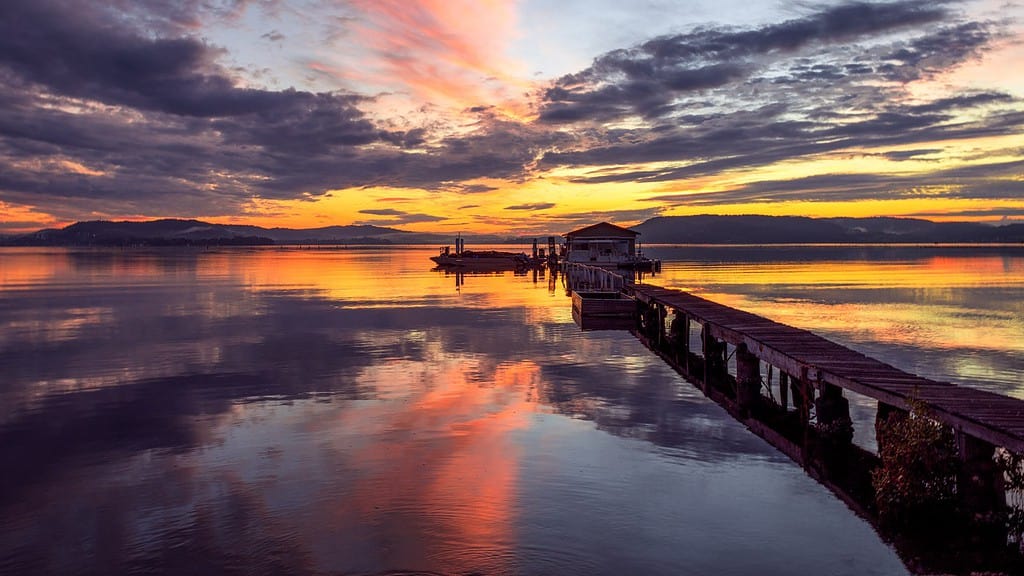
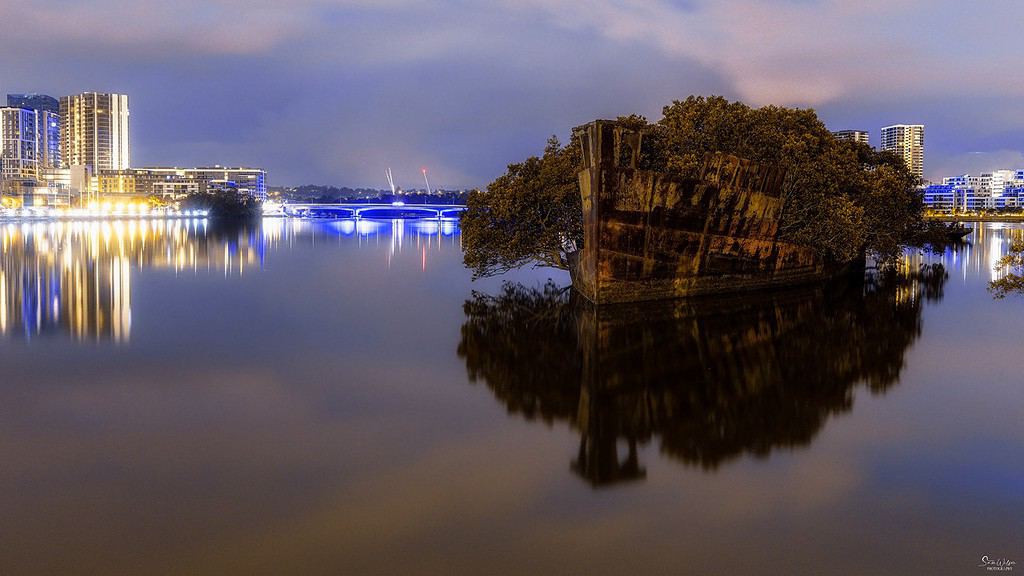
The Magic of Blue Hour Photography
While the gorgeous golden hour may be considered the best time for landscape photography, make sure you also shoot the blue hour.
The blue hour is the time just before sunrise and just after sunset when the sky takes on a well, deep blue hue – who would have guessed?
This time is often overlooked by photographers, particularly those wanting a few extra minutes of sleep in the mornings, but it can be just as magical as the golden hour for landscape photography.
During the blue hour, the light is soft and diffused, creating a moody and atmospheric feel to your photos. The contrast between the blue sky and the warm tones of the landscape can create beautiful and unique images.
Capture that tranquil essence, and let your photos spin a tale of serenity and enchantment!
5 – Composition and Framing
When it comes to putting together your shot, the golden hour holds no exclusive secrets over other scenic moments.
The usual composition techniques still apply – scouting for your main subject and its supporting elements, maintaining balance, identifying leading lines, and following the rule of thirds.
Yet, during the process of framing your photographs, consider opting for a focal point that captures the inviting warm tones.
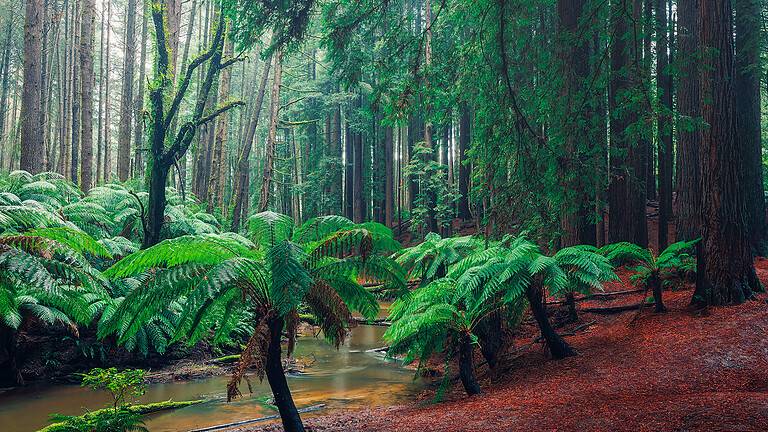
If you’re by the coastline, embrace the opportunities presented by the gentle sunlight, which can unveil captivating textures.
Getting up close to foreground elements using a wide-angle lens can yield impressive results.
Also, don’t forget to infuse your photographs with a feeling of depth and perspective, allowing the rest of the landscape to gracefully extend into the background.
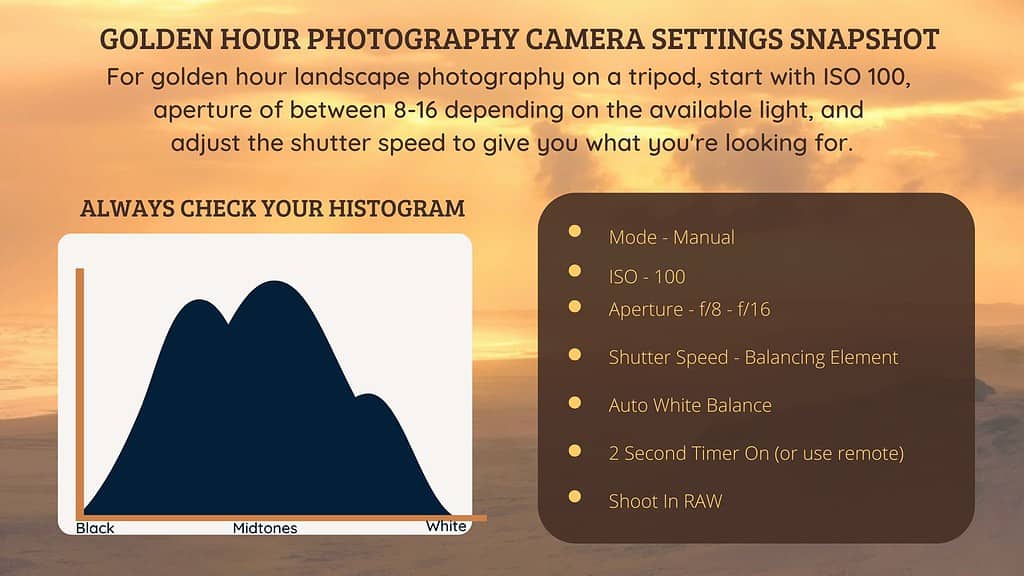
6 – Optimal Golden Hour Camera Settings
Getting your aperture and shutter speed just right is key to capturing those breathtaking golden-hour landscapes. Here’s my recommended approach:
For sharpness throughout the entire scene, go for a narrow aperture.
Typically, f/8 does the trick when you’re not dealing with elements extremely close to the camera. Yet, if you have striking foreground details, consider pushing the aperture to f/11 or beyond. Just exercise caution and avoid surpassing f/16 to steer clear of unwanted blurring caused by diffraction.
As for shutter speed, the dwindling light during the golden hour often calls for longer exposures.
You should have your trusty tripod at hand, so you can confidently embrace extended shutter speeds without fretting about camera shake.
In Manual mode, it’s up to you to set the shutter speed. Alternatively, if you’re more comfortable with Aperture Priority mode, your camera will pick a suitable shutter speed to ensure a well-exposed shot once you’ve dialled your aperture in.
Remember, the golden rule when shooting during the golden hour is to shoot in RAW.
This gives you the freedom to adjust the white balance during post-processing. Alternatively, you can manually set the white balance while steering clear of Auto White Balance (AWB) settings. AWB often cools down the warm natural tones that you want to emphasise, resulting in bluer-than-life outcomes.
For those starting out, most cameras will have settings like “cloudy” or “shade” that beautifully capture the authentic golden hues. This tip comes in especially handy for beginners.
And here’s the thing: whatever white balance setting you choose in-camera, you can still fine-tune them while editing your raw format photos in Adobe Lightroom Classic or Photoshop.
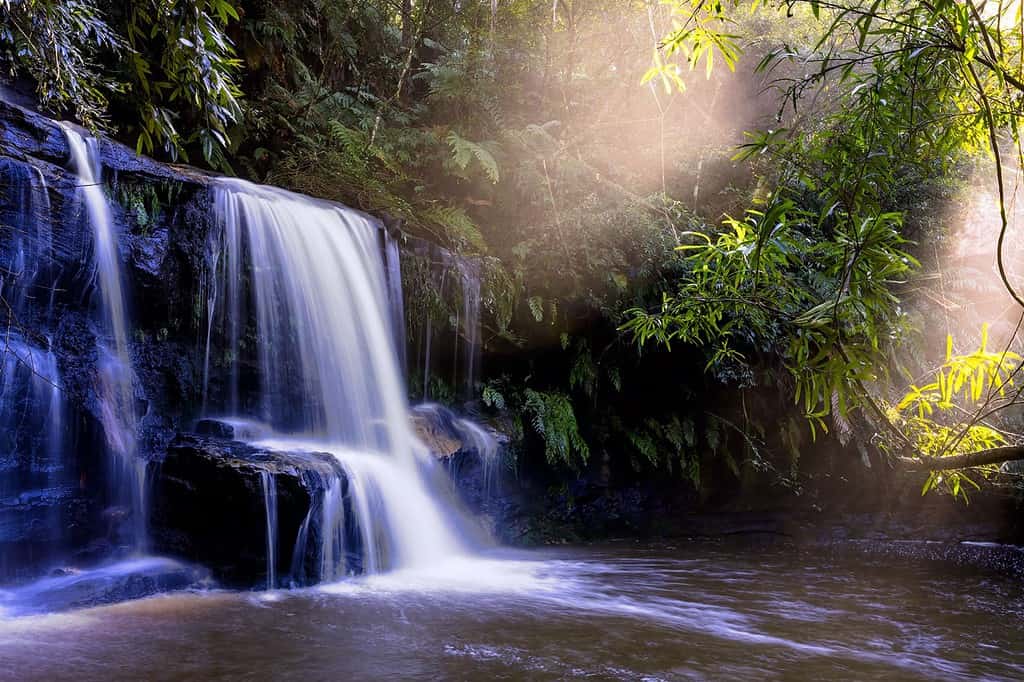
Trusty Tip: Embrace the adventure of experimenting with long shutter speeds to capture the mesmerising dance of water or the graceful flow of clouds. By dialling your aperture down to around f/16 and sticking to an ISO of 100, you’ll easily achieve those lovely long exposure images during both sunrise and sunset.
Lastly, if you’re aiming for even longer shutter speeds or find yourself snapping shots when the sun is a bit higher, a neutral density filter can be your secret weapon.
This handy tool reduces the amount of light getting in, helping you to prevent overexposure and enabling you to play with extended exposure times for truly magical results.

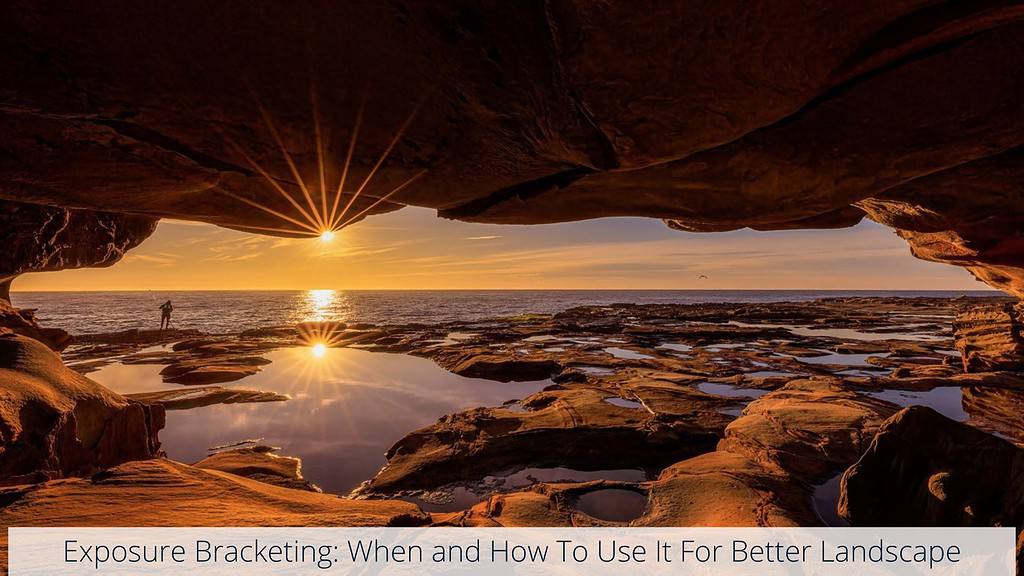
7 – Perfect Your Exposure Bracketing
As beautiful as golden hour is, it can be tricky to photograph. You are often faced with high contrast scenes where the difference between the brightest and darkest parts of your scene is too large for your camera to manage in a single exposure.
You might end up with either blown-out highlights in the sky or an underexposed, murky foreground.
Yes, you can use a Graduated Neutral Density Filter to help balance this but my preferred method is to use exposure bracketing.
Exposure bracketing in landscape photography is a technique where multiple photos are taken of the same scene with different exposure settings. This is done to capture a wider range of light and dark tones in the image, which can then be combined in post-processing to create a final image with more detail and dynamic range.
Learning this technique really was one of those ‘lightbulb’ moments in my photography journey, and it’s not that difficult.
Head over here for a step-by-step guide on how to do exposure bracketing. It really is a game changer for your golden hour landscape photography.
8 – Get Creative
Golden hour photography is one of the most magical experiences a landscape photographer can have.
The warm, soft light that occurs during the hour before sunset and after sunrise creates a stunning glow that can transform even the most ordinary landscapes into breathtaking scenes.
It’s also a fantastic time to get creative and make some unique images.
Here are some ideas and inspirations to help get you started to creating beautiful photos during golden hour.
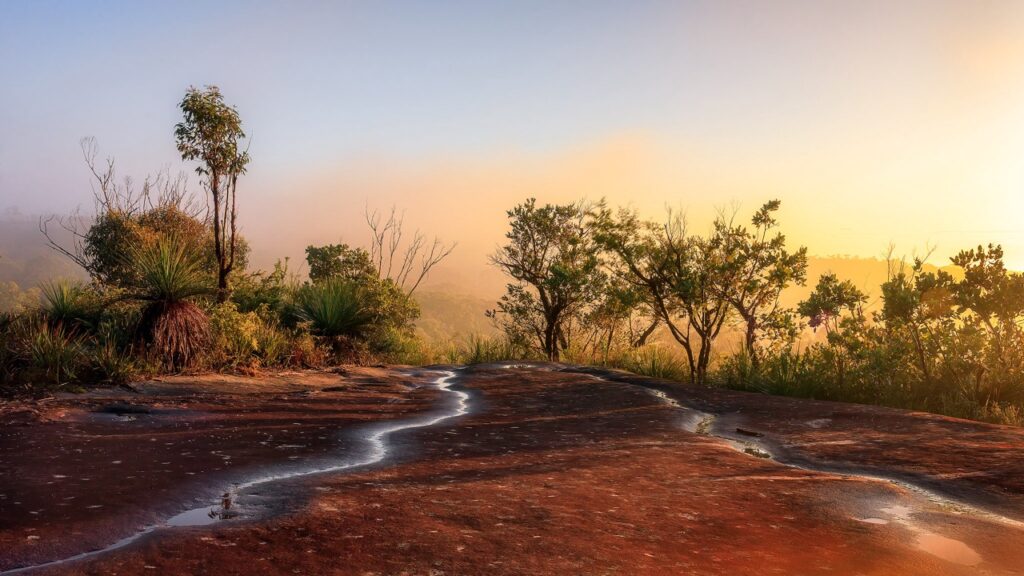
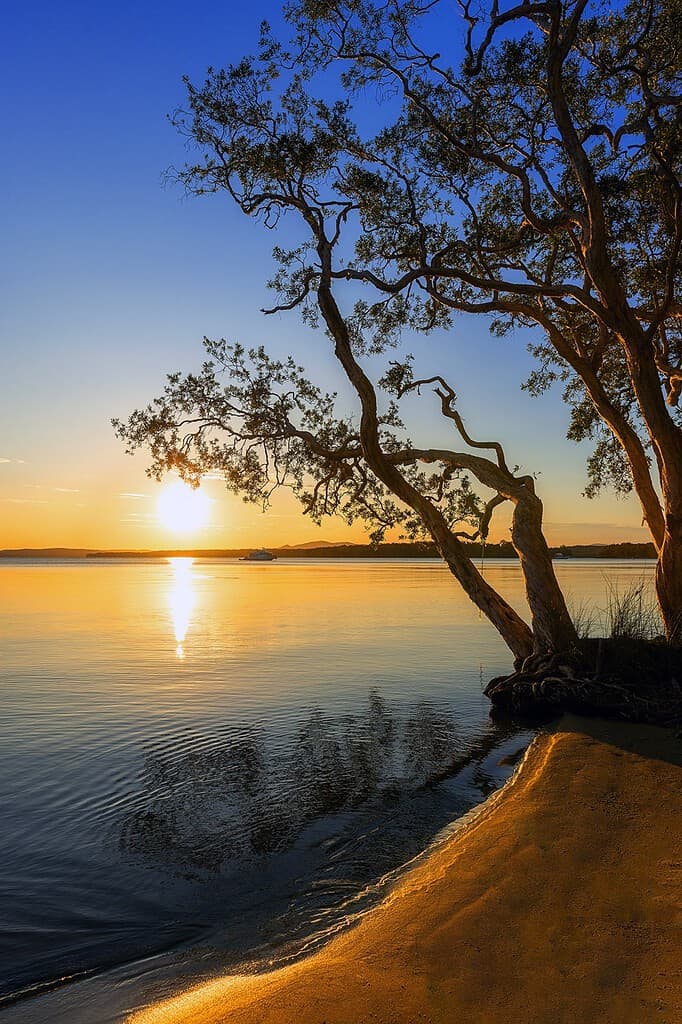
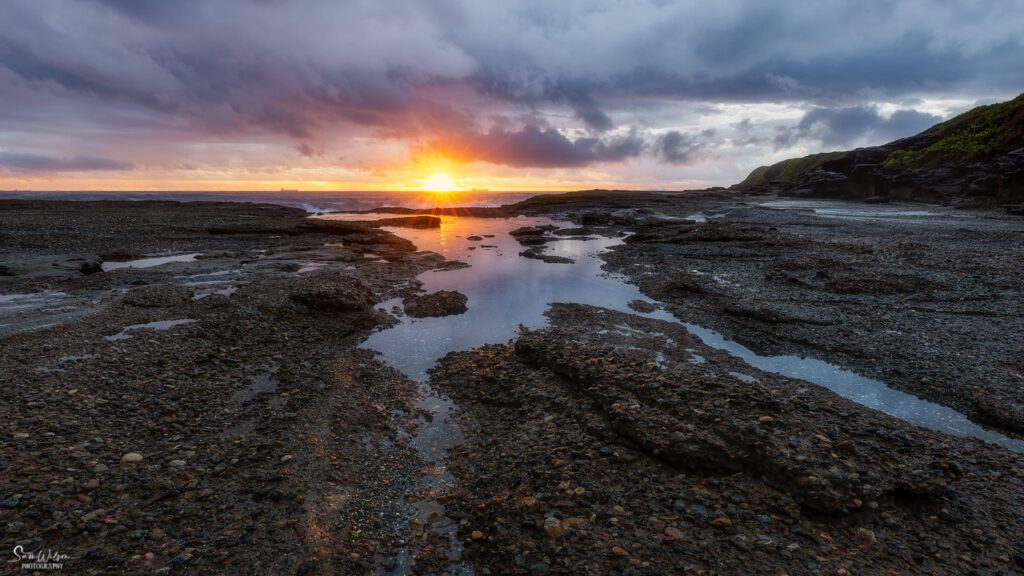
Reflections
One of the best ways to capture the beauty of the golden hour is to use reflections.
Water, whether it’s a lake, river, or even a puddle, can create stunning reflections of the sky and surrounding areas.
The twilight and golden hours are also when waters can tend to be a bit calmer, making it an ideal time for reflection images.
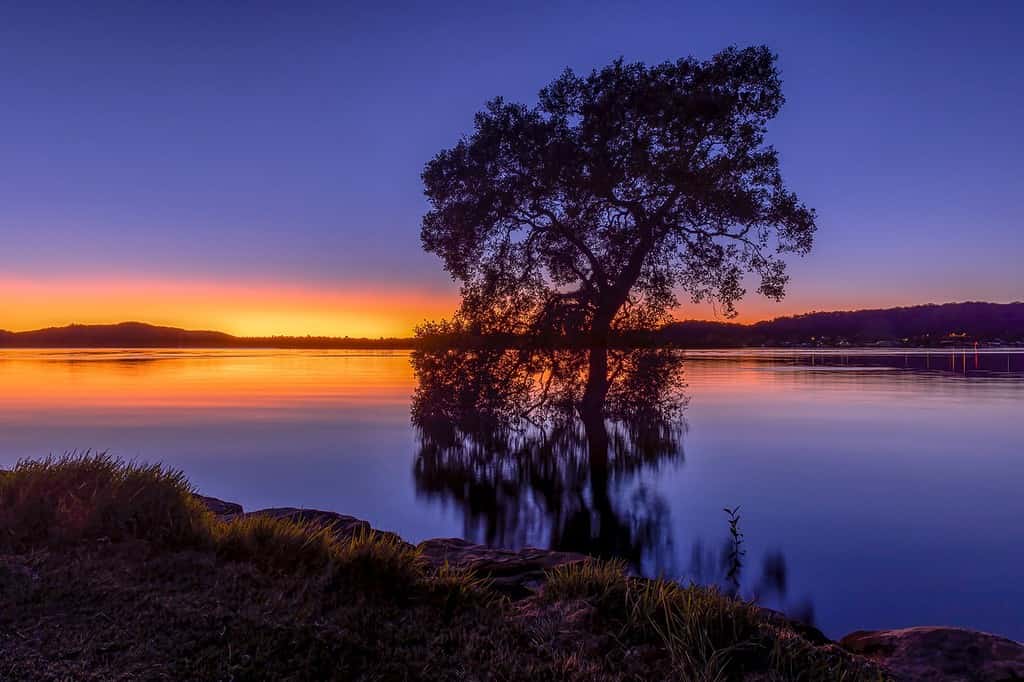
Silhouettes
Silhouettes are a great way to add drama and contrast to your golden hour photos.
To create a silhouette, position your subject in front of the sun, and expose for the sky to create a dark shadowy outline of your subject.
This technique works particularly well with trees, buildings and people.
Sunstars/Starbursts
Starbursts can really make your golden hour photos pop, and they are fun to create.
Simply set your aperture to a high number (usually f/16 – f/22) and adjust your shutter speed so your image is slightly underexposed. This will keep the flare from being too overwhelming.
Sunstars and starbursts work best when the sun is partially blocked by a subject such as a mountain or buildings.
9 – Stay Safe
Photographing the golden hour at either end of the day will likely mean you are arriving or leaving your location in the dark, so you need to consider your safety.
If you’ve been able to scout your location beforehand you will have that advantage of knowledge. If not, be extra careful and take note of your surroundings.
Here are a few simple safety tips to consider before heading out on your golden hour landscape photography shoot:
- Plan ahead and share your plans with someone else
- Scout the location in daylight beforehand wherever possible
- Use reliable light sources like a good torch or headlamp
- Wear appropriate clothing and footwear
- Stay on established paths and trails
- Beware of Wildlife
- Take a Fully charged phone
- Carry basic First Aid supplies
- Be cautious near bodies of water
Finally, trust your instincts: If something feels unsafe or uncomfortable, don’t hesitate to adjust your plans or leave the area. Your intuition can be a valuable safety guide.
Remember, safety should always be a top priority when engaging in any outdoor activity, including photography.
By following these safety tips, you’ll be better prepared to capture stunning golden hour landscapes while minimising risks.
10 – Finishing Touches – Editing Your Golden Hour Images
The magic of golden-hour light is amazing, but to make your landscape photos truly shine, you need to do some extra work after taking them.
This is where you can make your already great pictures even better.
First, when you’re editing your golden-hour landscapes, start by adjusting the white balance. This means changing the temperature and tint settings to make the colours look more natural or even warmer or cooler to set a specific mood.
Next, focus on the details in the bright and dark parts of your photo. Golden-hour pictures often have very bright skies and dark shadows, which can hide some details. Luckily, you can use editing tools to bring back those hidden details, so everything looks just right.
You can also change the colours in your photo to make it more exciting. This is called colour grading. By playing with the colours, you can make your picture look even more unique and special. Try out different colours to find the ones that make your picture feel just the way you want it to.
Lastly, think about adding a vignette around your picture. This can help guide people’s eyes to the main part of your photo. But be careful not to add too much – you want it to look natural.
Remember, editing photos is an art, and there’s no one way to do it.
Take your time, try different things, and make your photos match what you imagine. It’s your chance to show your style and vision.
Trusty Tip: Planning to capture the golden hour? I’d strongly suggest shooting in RAW. RAW photos have more information than JPEGs, giving you more freedom to edit them later. This way, you can tweak your pictures without losing quality and bring back any hidden details if needed.
If you’re completely new to editing, or post-processing your images, this article will help to get you started:
Conclusion
This article delved into the world of golden hour landscape photography, exploring how the right light can make all the difference.
While good lighting can be found throughout the day, there’s something truly special about the moments just before sunrise and just after sunset.
The enchanting golden hour light adds a touch of magic that photographers can’t resist.
Photographing during this time might present a few extra challenges, but with some extra preparation, the rewards are worth it.
So, there you have it! We’ve shared a wealth of golden-hour landscape photography tips that will elevate your skills to new heights. Make these tips a part of your photography toolkit and put them to use during your next sunrise or sunset shoot.
Remember, the golden hour is fleeting, so seize every moment.
Rise early, chase sunsets, play with settings, and don’t hesitate to try innovative techniques that break the mould.
And even when the golden hour gives way to the tranquil blue hour, keep shooting.
Watch as the world transforms into a realm of serene, ethereal light – you won’t want to miss it.
Now, it’s your turn: Is there a golden-hour landscape tip that we didn’t cover?
Share your insights in the comments below!
Your contributions could help fellow photographers create even more breathtaking images.
That’s it for now – Keep clicking and stay caffeinated
Like this post? PIN it so you can save it for later
Other Helpful Articles:
- Landscape Photography Guide
- Camera Settings For Landscape Photography
- Understanding Exposure: Landscape Photography Exposure
- Improve Your Landscape Photography Composition
- Landscape Photography Composition: The Power of Leading Lines
- Sunrise Photography: Best Camera Settings and Tips for Beautiful Photos
- Sunset Photography for Beginners: Tips and Best Camera Settings
- Timing Your Landscape Photography: 7 Tips For Getting Great Shots
- The Importance Of Clouds In Landscape Photography
Don’t miss a post – sign up Here if you haven’t already
Note – Unless otherwise stated, all photos are mine and remain my copyright images – Sam Wilson Photography.