Landscape Photography Composition: How to Use the Rule of Thirds
This article is all about understanding the rule of thirds and how to use it to improve your landscape photography.
Landscape photography isn’t just about capturing what you see; it’s about presenting it in a way that resonates.
A key player in this game of visual storytelling is the Rule of Thirds. It’s not a flashy trick, but a reliable old friend in the world of composition.
It’s one of the most commonly used composition techniques by not just beginners, but also professionals.
In this article, we’ll look at how you can use the rule of thirds and get you started on improving your composition.
So, let’s dive in!

A Note on Composition
Just before we get into the Rule of Thirds specifically, I just wanted to touch on how important composition is in landscape photography.
Composition is basically where you place the elements of your scene in your photo. It’s one of the key ingredients to telling a story with your image.
To quote Photography Life, Composition is “simply the arrangement of the elements in your photo.”
It’s often argued whether light or composition is more important for making compelling images, and there’s no simple right or wrong. As far as I’m concerned, both are game changers when it comes to taking an image from ok to great.
You can have great light, but you’re not telling a story with your composition, then the image will just be ok.
The same with composition. You can’t always be photographing with great light, but you still can make a compelling image with your composition.
It’s one thing to have a photo that’s perfect from a technical perspective. Your image can be well exposed, and you have an interesting subject, but it’s the composition that can have a huge visual impact.
There are various compositional techniques that you can either use alone or combine for more interesting images. This article focuses on the Rule of Thirds, but check out this article for more composition tips and techniques:

So, back to the Rule of Thirds …
What is the Rule of Thirds in Landscape Photography?
First up, I didn’t call it the ‘Rule’ of thirds and at the end of the day there really aren’t any ‘rules’ in photography, but that’s what it’s called, so I’ll go with it.
So please look at the Rule of Thirds as a guideline. Photography after all is a creative art and you don’t want to have that creativity stifled by rules. More on that later.
Having said that, it is a powerful technique that will help you create images.
So, how does it work?
Picture your frame split into a grid of thirds, both horizontally and vertically, creating four points of interest.
These are your anchors.
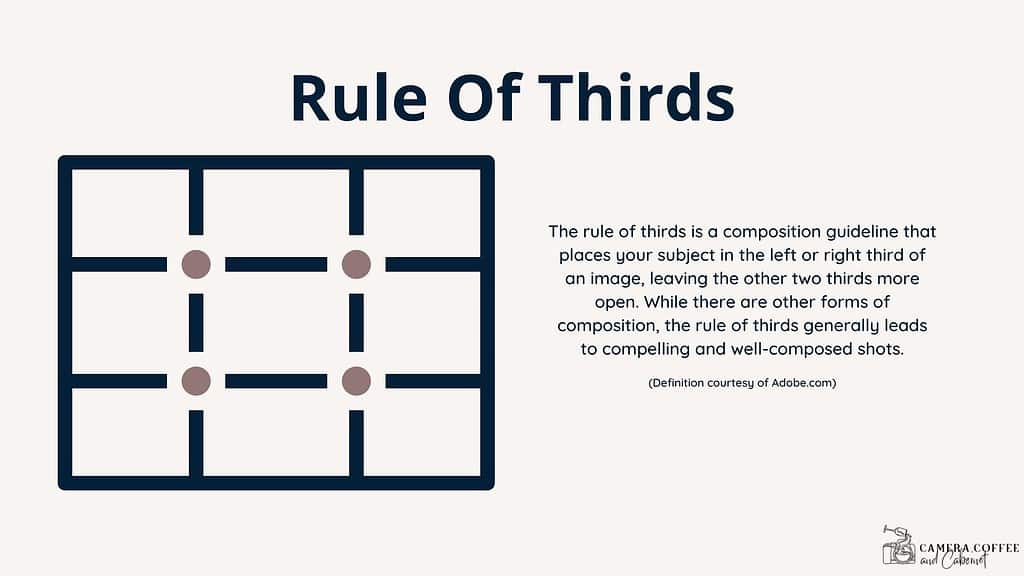
Placing the key elements of your landscape – maybe the rugged silhouette of a mountain or the gentle curve of a coastline – at these points or along these lines, can turn a flat scene into a story with depth and feeling.
The goal is to avoid placing elements in the centre of your frame. Instead, your subject, or hero ‘should’ be placed at one of the points where these lines intersect.
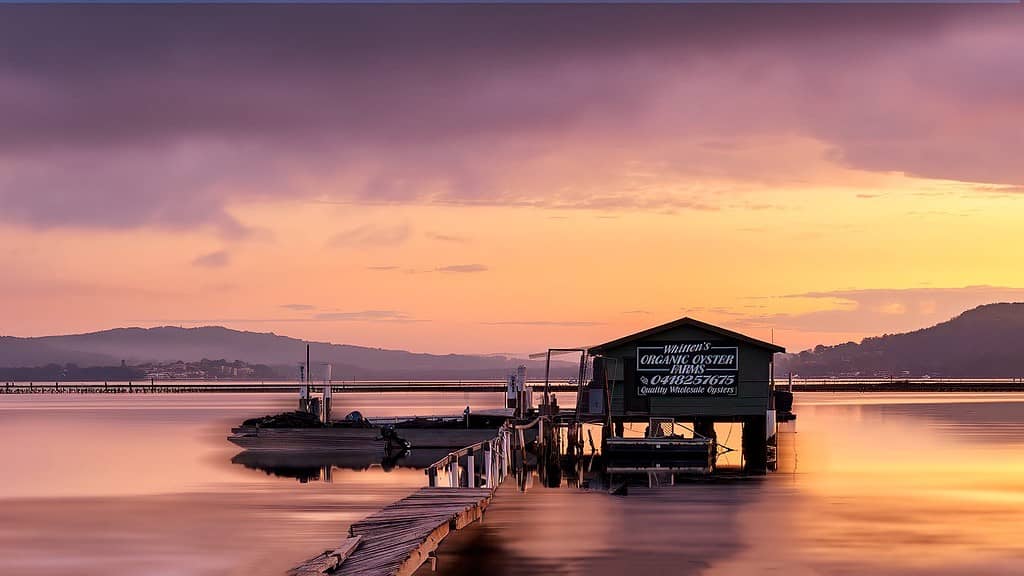
Just like this:
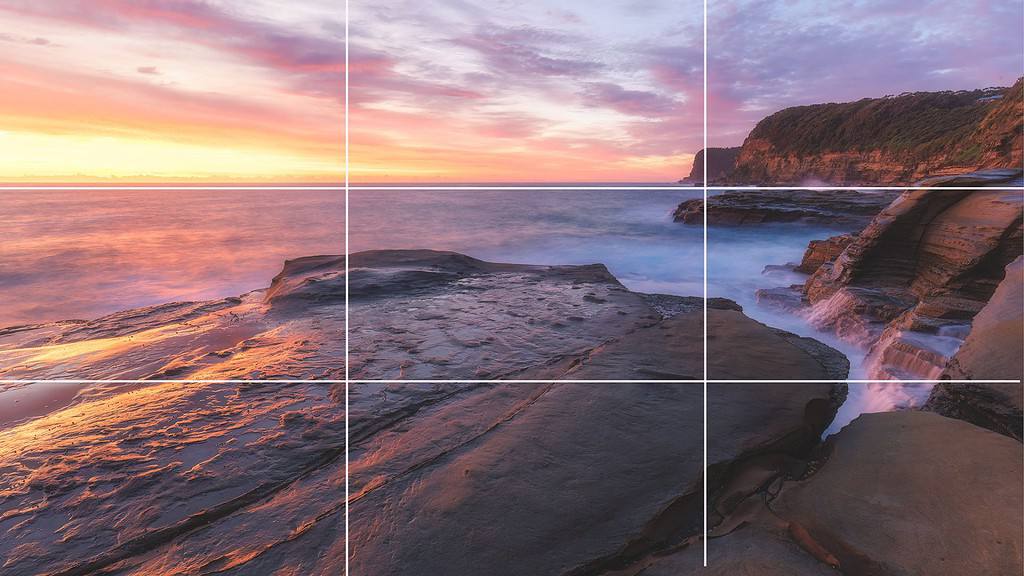
Please note though that it’s not an exact science, so no getting out your measuring tape!
It’s about placing your elements in these ‘areas’ so they create a more visually pleasing image that guides the viewer through your image.
Why is the Rule of Thirds Important?
The Rule of Thirds is important mostly because it helps to create a well-balanced and visually appealing image.
Here are a few reasons why:
- It makes for pleasing aesthetics for lack of a better term. By placing your subject off-centre, the image becomes more dynamic and interesting.
- It can create balance when you have a lot of negative space in your image. The key elements can take up a third of your scene, while balancing out the ‘empty’ areas in the rest of your image.
- It helps you to take the viewer on a ‘visual journey’ through your image. The viewer will be immediately drawn to the subject, and then looks throughout the rest of your image. If the subject was to be in the middle, their eye would simply see that and not know where to look next.
Working With the Rule of Thirds
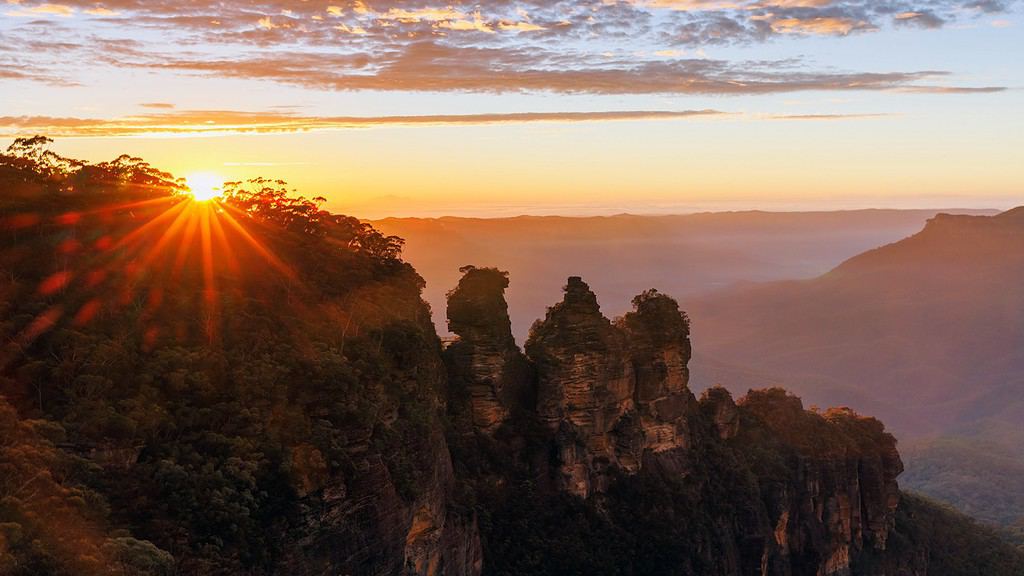
Just reading about how the Rule of Thirds works may not be very helpful, so let’s work through an example of how it actually works.

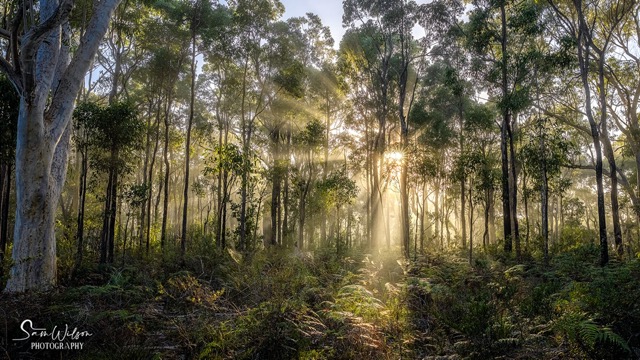
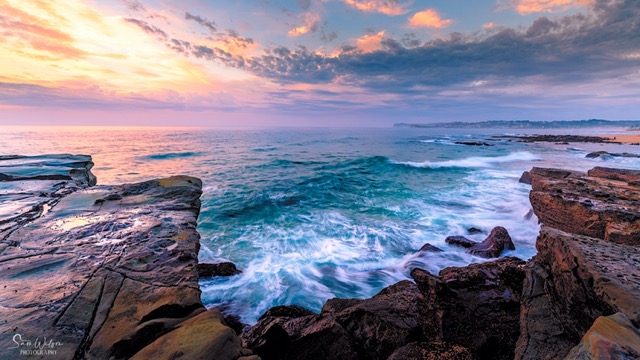
The image above is an example of when the Rule of Thirds has been applied.
Hopefully you can see that the base of the tree has been placed at the bottom right intersection. In order to avoid too much negative space, I’ve framed the tree so that parts of it are also crossing over into the sunrise.
In order to achieve a better-balanced image, the lower left corner has been left relatively. Anything placed there would take attention away from the lone tree.
One more thing with this image is that the horizon is also placed on the lower third horizontal line, just at the base of the tree. This was also done to place it along the intersecting grid.
You usually want to avoid placing the horizon or your main subject in the centre of your image.
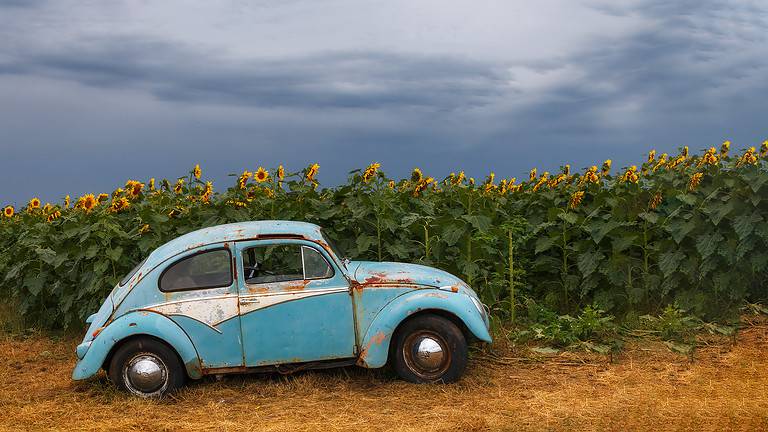
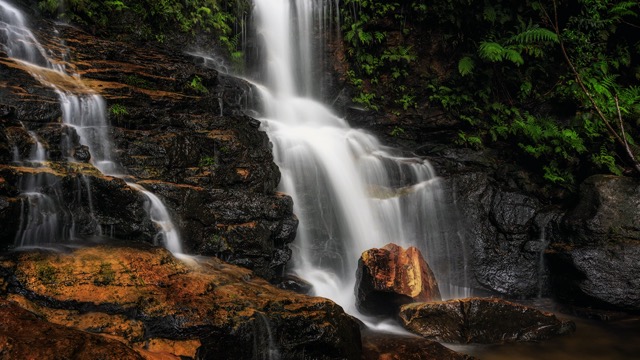
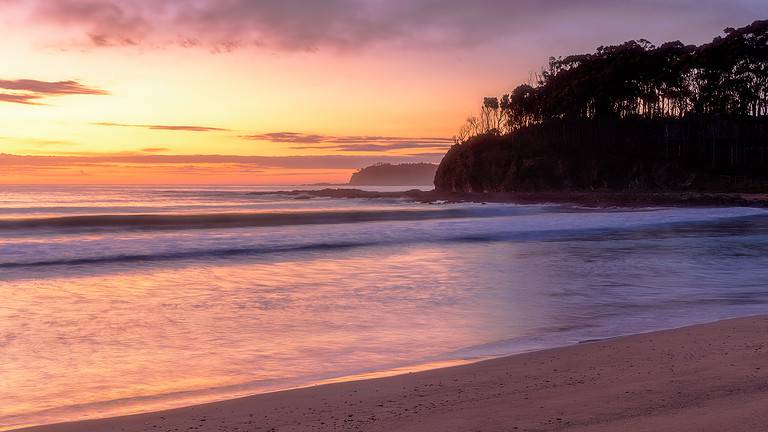
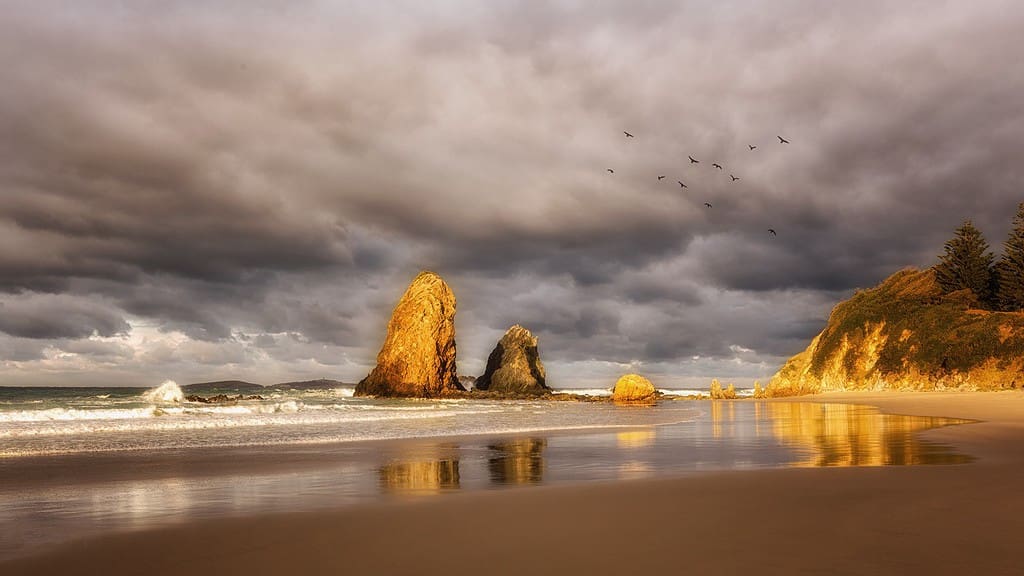
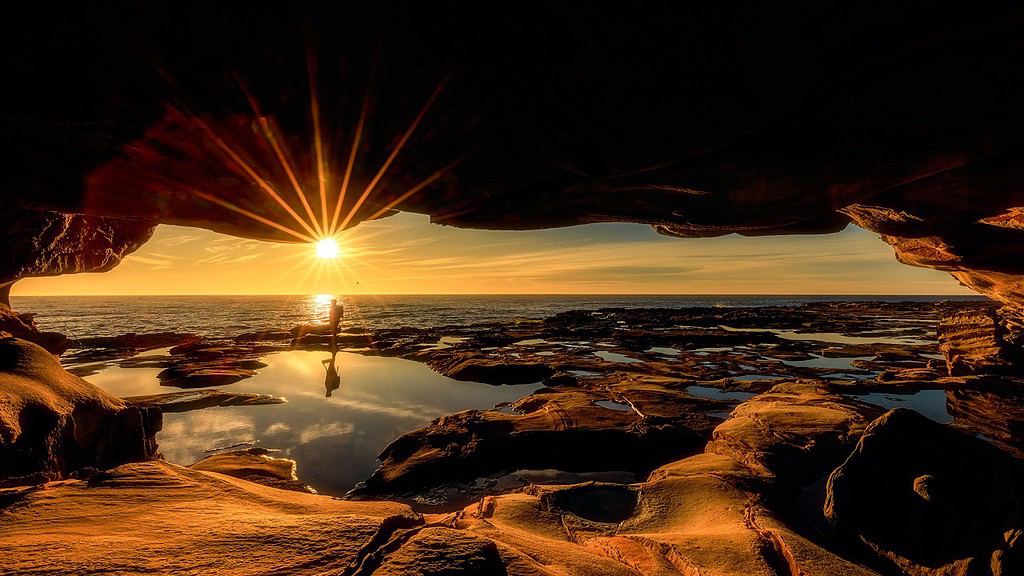
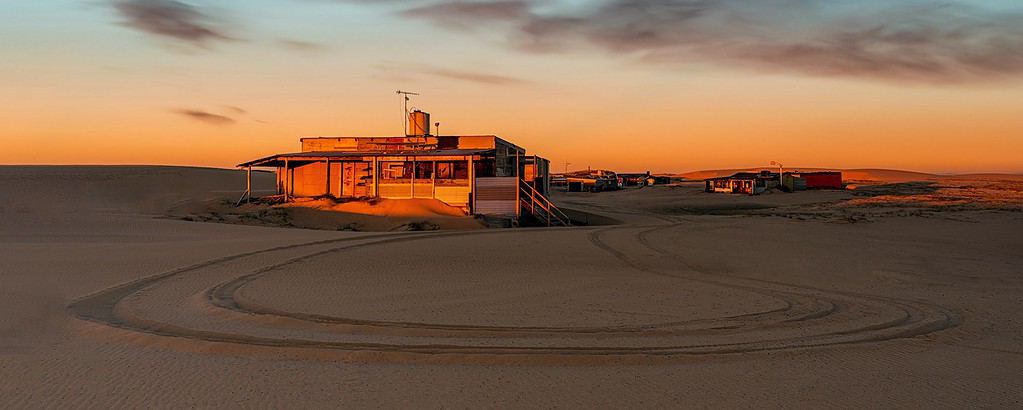
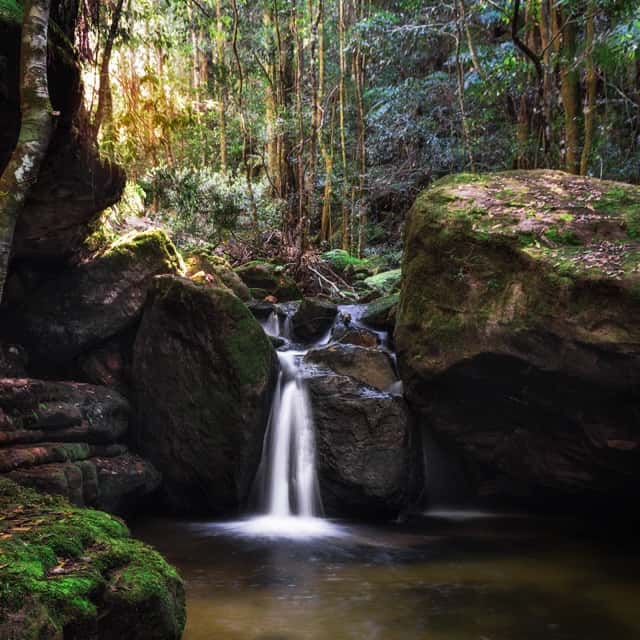
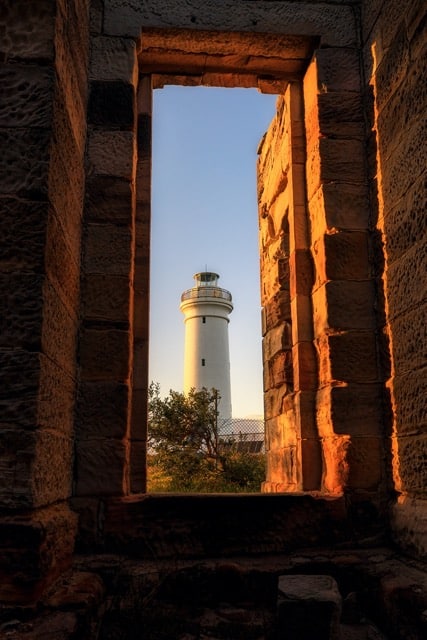
Here’s a few more examples where the Rule of Thirds has been incorporated in images:
Using the Rule of Thirds Practically on Location
Now that we’ve covered the basic concept of the Rule of Thirds and how you can use it to create more compelling images, let’s look at using it practically on location.
Most cameras come equipped with built-in grid guides, a practical feature that helps you integrate this composition technique seamlessly into your photography.
Usually found in the camera’s menu, this grid helps you align key elements of your scene, like a captivating horizon or an architectural detail, with its intersections or lines. This can subtly enhance the visual appeal of your photos.
For landscape photography, this grid is especially useful.
Positioning the horizon off-centre, in line with the top or bottom third, can add depth and interest to your images.
The grid lines, visible in your viewfinder or on your screen, assist in achieving this balanced composition.
It also helps you to ensure your horizon line is straight – bonus!

Embracing the Rule of Thirds in Post-Processing
In the world of digital photography, what we capture in-camera is just the beginning.
Sure, we strive to get our composition spot on at the moment of capture, but sometimes the true potential of an image reveals itself later, in post-processing.
For instance, while I often use Lightroom Classic, most editing software today offers similar features.
One of my go-to tools is the Rule of Thirds grid overlay, particularly useful when cropping. It’s not just about correcting compositions; sometimes, it’s about reimagining them.
Your camera might capture in a 2:3 ratio, but what if your image looks more striking as a square?
Cropping can be a creative choice, not just a fix.
But here’s a piece of advice: when you’re cropping, keep an eye on the details.
Over-cropping can lead to pixelation and might highlight any small issues like camera shake or focus imperfections.
This is especially crucial if you’re thinking of printing your photos large.
While post-processing offers great creative freedom, it’s all about using it wisely to enhance your image, not to compromise its quality.
In essence, post-processing with the Rule of Thirds is about refining your vision.
It’s an opportunity to transform a good photo into the exact image you envisaged, whether that means a slight tweak or a bold re-crop.
1 – Balancing the Horizon: In your landscape shots, think about where you place the horizon. Instead of the centre, aim for the top or bottom third of your frame.
Which part of your scene is more captivating? If it’s the sky, let it dominate by placing the horizon lower. If the ground holds the intrigue, lift that horizon up. This simple shift can dramatically change the feel of your photo.
2 – Positioning Your Subject: When it comes to your main subject, avoid dead centre. Use the vertical lines of the thirds grid as your guide. Placing your subject on these lines, preferably at the points where they intersect, creates a more natural and engaging composition.
3 – Giving Space to Movement: If your subject is on the move – say, a bird in flight or a person walking – position them with room to move into.
Place them towards the edge of the frame that they are moving towards. This not only adds a sense of motion but also tells a story of where they’re headed.

Do you have to follow the rule of thirds?
Let’s get one thing straight: you don’t always have to stick to the Rule of Thirds.
Photography isn’t about rigidly adhering to rules, and sometimes, following them too closely can actually take away from your images.
I got into photography, and I bet you did too, for the freedom and creativity it offers.
That’s why knowing when to bend or even break the rules can be just as important as following them.
Understanding these guidelines, like the Rule of Thirds, is crucial because they do have the potential to enhance your images significantly.
But it’s the knowing and understanding of these rules that empowers you to step beyond them when the situation calls for it.

When Not to Use the Rule of Thirds
There are moments in photography when the Rule of Thirds might not be your best bet.
Take, for example, scenes with striking symmetry. Centering these objects can often create a more powerful impact than offsetting them would.
And then there are those times when your image revolves around leading lines or natural frames within the scene.
In these instances, deviating from the Rule of Thirds can lead to some truly captivating shots.
Some of my personal favourite images feature the main subject right at the centre or the horizon line slicing the frame in half.
The key is not to let the Rule of Thirds confine your creativity.
Relying on it too heavily can stifle your photographic growth. It’s about striking a balance: know the rules well enough to use them effectively, but also know when it’s time to step out of that framework and let your creativity lead the way.
Make these choices deliberately, guided by your artistic intuition, not by mere chance.
The Rule of Thirds is a great starting point, but it’s just one part of the composition story.
It’s well-loved for its simplicity and effectiveness, but remember, there’s a whole array of other techniques out there waiting for you.
The Rule of Thirds is a nice and simple way to bring a new level of interest to your photos, guiding the eye and enhancing the overall composition.
If you’ve typically centred your subjects, trying out this rule could be a real eye-opener.
It’s also interesting to apply it to some of your older photos and see the difference it makes.
But it’s crucial to remember that the Rule of Thirds is just a guideline.
It’s there to serve your vision, not to limit it.
Embrace it, get familiar with it, and then, when you feel ready, don’t be afraid to let your creativity lead you beyond it. Some of the most memorable images are created when we step outside the usual boundaries.
I hope you’ve found this piece helpful and that it sparks some new ideas in your photography journey.
I’d love to hear about your experiences with the Rule of Thirds, whether you’ve stuck to it or decided to break free from it, so please share in the comments below.
Keep clicking and sipping 📷 ☕️🍷
Like this post? PIN it so you can save it for later
Other Posts You Might Like:
- Improve Your Landscape Photography Composition
- Landscape Photography Composition: The Power of Leading Lines
- Frame Within A Frame: Easy Ways To Improve Your Composition
- Layers and Foreground Interest In Landscapes For Better Photos
- Camera Settings For Landscape Photography: Complete Guide
- 15 Helpful Landscape Photography Guides For Beginners
Don’t miss a post – sign up Here if you haven’t already
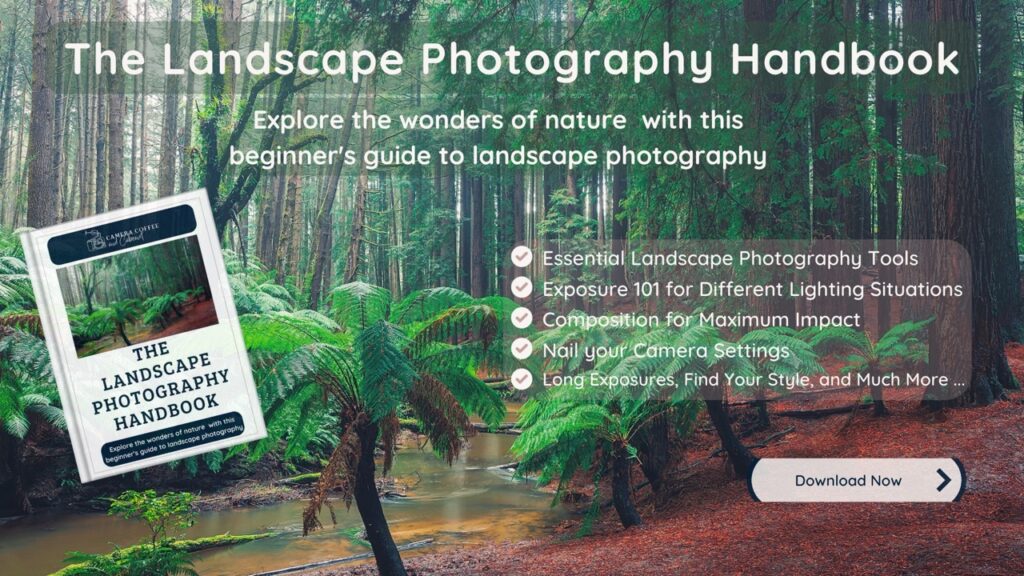
Are you a beginner landscape photographer looking to improve your skills and capture stunning photos of nature?
If so, “The Landscape Photography Handbook – Exploring the Wonders of Nature” is the perfect guide for you.
In this 90-page ebook, you’ll learn everything you need to know to get off auto mode and start using manual settings to capture stunning photos of nature.