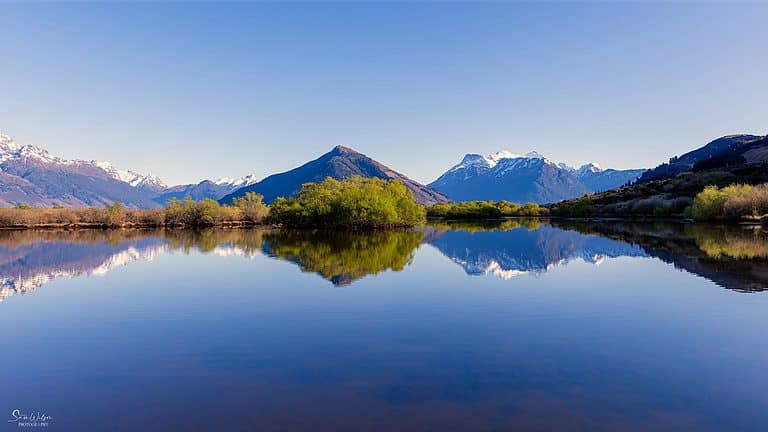
Landscape Photo Editing – Tools, Tutorials And Tips
Five Things To Get Started With Editing Your Photos
What does the phrase ‘Editing Your Photos’ mean to you?
Is it a no go, or just part of your photography workflow?

When I first started this photography caper, I thought there was no way I was going to edit my photos. I was going to learn how to take them properly – surely professionals didn’t edit their photos!
Or did they …
I quickly learned that editing your photos did not necessarily mean making them look like they belonged on another planet. It didn’t mean they had to have neon rainbows or grass that looked like it was radioactive.
What I learned is that every photo you see is edited in some way. Whether it’s taken on your phone, or camera in Jpeg it has been edited.
Let’s step back a bit as I’ve done some research on this.
I’ll start with a definition of what photo editing actually is –
What Is Photo Editing
Definition courtesy of Masterclass –
Photo editing (also called post-processing or postproduction) is the process in digital photography of making adjustments to photographs in a photo editing program. It’s digital photography’s version of a darkroom, where photos can be tweaked after a photography shoot.
According to Wikipedia the first known example of photo editing was in the 1860’s to a photo of Abraham Lincoln. Yes, over 160 years ago! It took a little longer for it to become digital, and the first version of Photoshop was released in 1987.
Why Should You Edit Your Photos
Let’s start with file types.
If you take photos with your camera you will end up with a Jpeg file. Camera for the purpose of this article also includes your phone as that’s exactly what it is.
This is a file that has already been edited. The phone or camera has processed it to produce what it ‘thinks’ is the best looking image.
The alternative is to shoot in Raw format. This simply means that you are capturing ‘raw’ data that is not altered by your camera.
Neither file formats ever replicate what you see when you are there. The difference comes in when you try to reproduce what you saw.
One of the most common things I do is crop images so I can really zone in on what I want to highlight.


To do this is the next step in your photography – editing your photos so that what you end up with is what you saw. Or, what your vision of what you’d like it to but that’s a whole other story. Let’s stick with trying to reproduce what you saw.
Editing your photos gives you the opportunity to make the best of what you captured. This can be as simple as cropping to improve your composition, improving your exposure or removing distractions that you couldn’t when taking the image.
This is where the file format that you shoot in becomes important.
If you shoot in Jpeg the files are smaller, but you are limited when it comes to editing.
Shooting in Raw makes for bigger files, but the options you have with editing your photos increases exponentially.

Editing Is Not A Dirty Word
Yes, absolutely try to get it right in camera as much as you can. This makes the editing process much easier, but I’d rather shoot in Raw and make the final decisions rather than letting the camera decide.
This is where the software, programs or tools that you will use for editing your photos comes in.
I will only focus on desktop programs (some of which have mobile apps) as that is where I do my editing. Phones and tablets are just too small for my eyes!
Basic Photo Editing Workflow
YouTube is absolutely your friend here, but if you do find someone that you like and learn from, please consider purchasing from them as well. A lot of work goes into what they share, and if you like their free information, their paid content is usually well worth the cost.
This is NOT a tutorial on how you should be editing your photos. Firstly that could never be put into one post, and secondly I don’t claim to be a teacher. I have, however, learned a lot so thought I’d share some basics to get you started and some recommendations. These are people that I’ve learned from and think they offer valuable content.
I have learned a lot of my editing on YouTube – no surprises there. For beginners I would totally recommend Anthony Morganti. He has numerous Lightroom editing tutorials.
This one is a nice short video showing basic adjustments in Lightroom in under ten minutes.
Colin Smith of Photoshop Cafe is another one worth watching. Don’t let the Photoshop name fool you, he has lots of great tutorials on editing your photos for other software programs as well.
Even from the very beginning I learned that having a standard workflow is incredibly important. I always start with Adobe Lightroom Classic so that is what I will focus on here.
Most editing software will also have the same adjustments available.

Every image is of course different, but these are the steps that I always start with –
Lens Corrections
- Lens Correction – This corrects any distortion that happens in your lens, particularly with a wide angle lens.
- Remove Chromatic Aberration – This is something that can occur on edges of objects in your image. It can look like a purple or green ‘fringe’. A simple click gets rid of this easily.
Crop Tool
- Crop and Straighten Horizon – Super important to have your horizon straight so this is one of the first things I look at. Cropping is also something I do to a lot of images. This is mostly as my camera shoots in a 4:3 ratio and I often use 16:9 or 1:1 for social media. It’s also useful to get rid of any distractions you may not have noticed around the edges of your image. A simple crop really can transform your image.
Light Source and Temperature
- Correct White Balance – this is used to adjust the overall colours of your image to match the light source you were photographing in at the time. It’s a setting that you can use when you take your photos but I tend to use auto when shooting and then adjust in Lightroom. Note that you cannot do this with a Jpeg file, it’s only when you are editing raw photos. Often the camera will appear purple or blue, and adjusting the white balance will correct this to reflect the actual scene.
Basics – Exposure, Contrast and Colours
- Correct Exposure – Adjust this to alter the overall brightness or darkness of your photos.
- Contrast – this is the levels of whites and blacks in your image. Raw images tend to be a bit flat and the contrast adjustment will help with this. It can make your whites ‘whiter’ and your blacks ‘blacker’. Don’t overdo it though. This is definitely an adjustment that less tends to be better.
- Highlights and Shadows – This is where you can adjust the brighter and darker areas in your images. The highlights are the brighter parts, while the shadows are the darker areas. These sliders are a great way to bring back details to those areas in your photos.
- Whites and Blacks -These are similar to the highlights and shadows. Adjusting these can help remove areas that are either entirely white or entirely black.
- Vibrance and Saturation – These sliders, as the names suggest, can really help make your colours pop. Vibrance tends to affect those colours that aren’t already over-saturated, whereas saturation will boost every colour. Be careful with these sliders, and start with vibrance.

These simple adjustments are not even scratching the surface of what photo editing can do for your photos. They are also often all a photo needs to give you the results you saw when you were in the field.
All editing software that I’ve seen has all the above adjustments available. To go any further you will need to decide on what tools or software you are going to go with.
Editing Tools or Software
Now onto which software to choose for your photo editing.
Navigating the technology really was a surprise to me when I started this journey back in 2017. It’s something that I’ve embraced and grown to love. I believe it’s good to keep that learning happening for the brain.
There are so many available now and it can be overwhelming which to go with.
Number one consistently is Adobe’s suite of programs including Lightroom and Photoshop. That is also the one I use. It is a pay by the month subscription and is updated regularly.
I started with Photoshop Elements and still think that’s a good option for new photographers to consider. It is a one off payment but you’ll need to repurchase as updates are made available instead of a monthly fee.

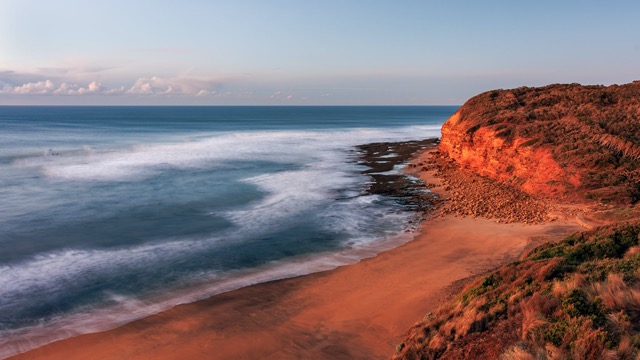
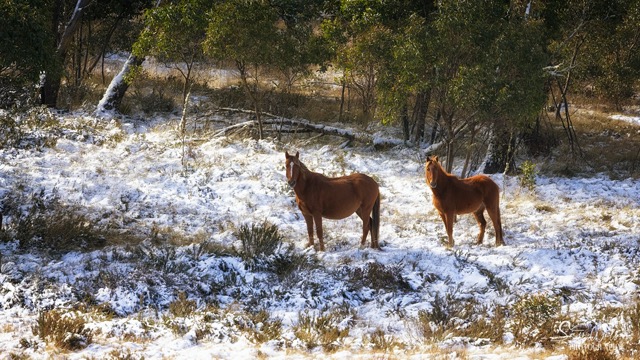
A re-edit of an older image once I had learned more editing techniques and decided on a better crop. Koolewong, NSW, Australia
Paying a monthly subscription versus buying programs outright
I belong to a number of photography groups and I see this argument regularly.
Yes, you pay a monthly subscription for Adobe (Photoshop and Lightroom) versus paying a ‘one off’ fee for programs like Luminar and Nik.
The catch here is that any updates are included in your subscription with Adobe. With the other programs you have to pay regularly when updates are released.
Without looking at the maths too closely, I don’t believe there really is a significant cost difference. It’s more important to find one that suits your needs and that you can learn.
Most programs have a trial period, or even if not, give each of them a go, and decide which you like best and which one (s) work for you.
They all come with costs involved so it just needs to be considered in your photography journey. This is one of the many things I was unaware of when I started this journey, but have come to accept, and really enjoy.
This is an article I found that should help you get started – Digital Camera World Round Up Of Best Editing Programs.
One other thing to consider when purchasing your software is the ability to organise your photos for you. I use Lightroom to keep my photos organised and you can easily catalogue and tag your images in a system that suits you. This is something that not all programs have but I feel is an integral part of my photography workflow.
Final Words
There are many styles of editing and it really has no creative limits. This post refers to editing landscape photos to ‘keep it real’ but if you’re interested in the more creative styles of editing, I can highly recommend Sandra D Imagery to explore this further.
Sandra has some excellent Photoshop Tutorials and breaks it down so well. Many of her tips can relate to your landscape photos as well, not just creative composite photography.

Don’t be afraid to play! Anything you can do there is always the undo button. In Photoshop if you are using layers you can just delete the layer (s). And in Lightroom there is a magic button called reset. I don’t know how many times I’ve used that over the years.
There really is no better learning than from your mistakes.
As with many things, there is no right or wrong way to edit your images. There is always learning in both photography and editing – and I absolutely love that!
“Which of my photographs is my favourite? The one I’m going to take tomorrow.”
~ Imogen Cunningham (American Photographer)
So get out there with your camera and do what you love.
Now over to you: What is your opinion on editing your photos? If you do, what software is your favourite?
That’s it for now – Keep clicking and stay caffeinated
Like this post? PIN it so you can save it for later
Recommended Reading: Developing a Successful Landscape Photography Post-Processing Workflow

Don’t miss a post – sign up Here if you haven’t already
Note – This post does not contain any sponsored or affiliated links. All suggestions and opinions are mine. Unless otherwise stated, all photos are mine and remain my copyright images – Sam Wilson Photography.