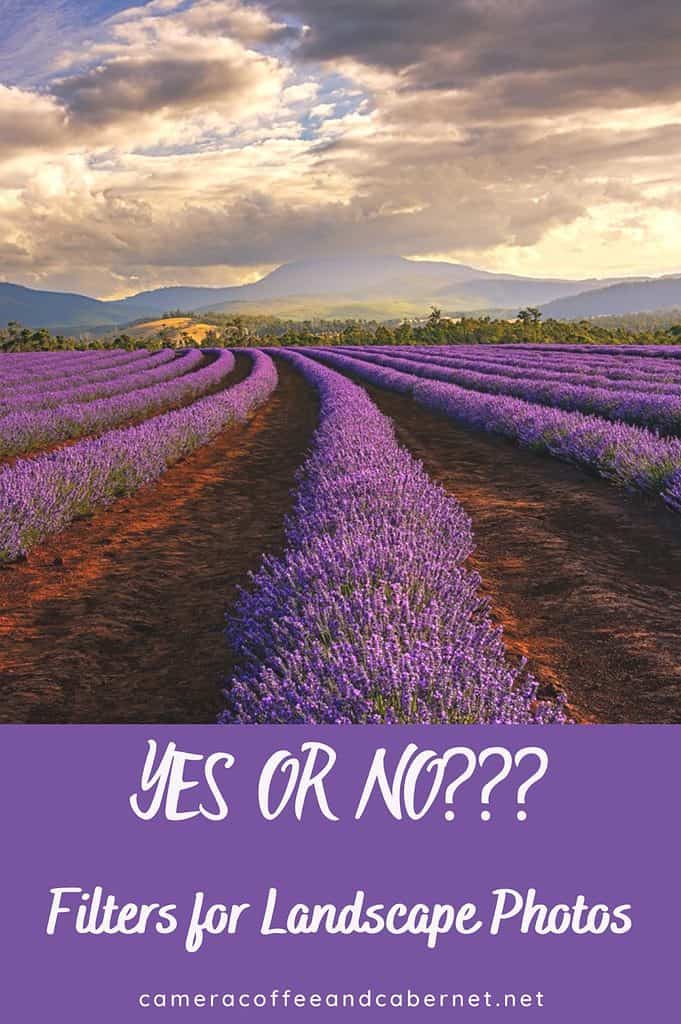
Filters For Landscape Photography: How To Choose What’s Best For You
Filters for landscape photography; everything you need to know.
Photography can be an expensive hobby and it can get daunting when you read about all the things you ‘need’.
But if you’re new to landscape photography, or just want to improve your images, you really do need to consider adding some filters to your photography kit.
Filters are an essential part of a landscape photographer’s kit, but you may not know why, and how they can improve your photography. This article about filters for landscape photography filters will answer these questions.
Here you will discover what filters are, how they can improve your photos, what types of filters are available, which filters to buy, and how and when to use your landscape photography filters.
Let’s dive into the world of filters for landscape photography, so you can get out there and start using them to take better photos.

What are Filters for Landscape Photography?
Filters are basically pieces of glass that are attached to your lens to adjust the light coming into your camera.
Filters can be used to control light, create visual effects, and enhance the overall look of your images. From neutral density filters that help to reduce the amount of light entering your lens, to circular polarising filters that help to enhance the colour and contrast of the sky, there are a wide variety of filters to choose from.
Understanding the different types of filters and when to use them can make a big difference to the quality of your images. While some filters may be optional, others, like a Circular Polarising Filter, are considered essential for many landscape photographers.
In this article, we will delve into the different types of filters for landscape photography including when and how to use them. You will also get the pros and cons of each filter so you can decide for yourself.
Why you Need Filters for Landscape photography
There are three main reasons to use filters:
1 – Create ‘movement’ in your images by changing the length of time you can leave your shutter open. Think moving water or clouds
2 – Adjust the effects of light on your subjects such as cutting out reflections and saturating colours
3 – Manipulate the amount of light in specific areas of your image; usually darkening an area of your image where the light is really bright such as at sunrise or sunset.
Some may tell you that you can achieve the same effects as filters in editing software such as Lightroom or Photoshop, so they are no longer needed. However, it is difficult to simulate some effects such as cutting glare and reflections, so I think this is still some time off.
With the increasing abilities of editing software though, this could very well change!
But how do you know which filters you need?
There are an ever-growing number of different filters on the market, but this article will keep it simple and cover the essentials you should consider when starting out:
- Circular Polarising Filters (CPL)
- Neutral Density Filters (ND), and
- Graduated Neutral Density Filters.
Circular Polarising Filters
A Circular Polarising Filter (CPL) is used to reduce glare and reflections on surfaces such as water and glass. They can also enhance the colour and saturation of the sky and any foliage in your image.
I like to think of them as a pair of polarising sunglasses for my lens. When positioned correctly, they also darken down parts of your image and as such, can reduce your shutter speed. In this respect they are wonderful for waterfalls, and as that is my favourite thing to photograph, I feel one is an essential part of my kit.
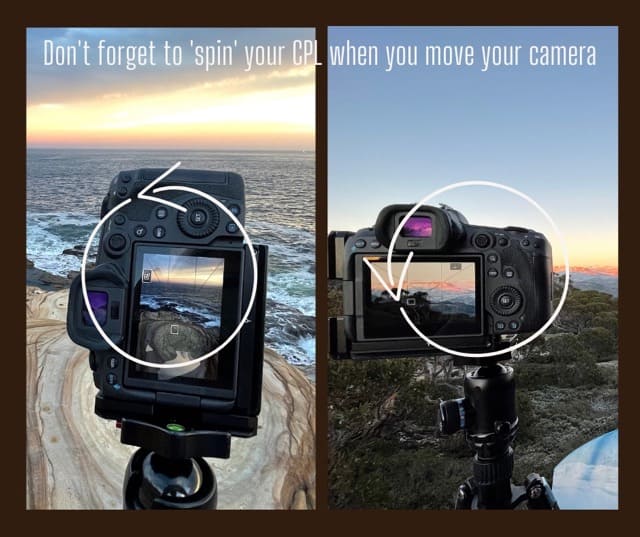
When you put a CPL on your lens, you need to rotate it to control the amount of polarisation effect that you’re looking for.
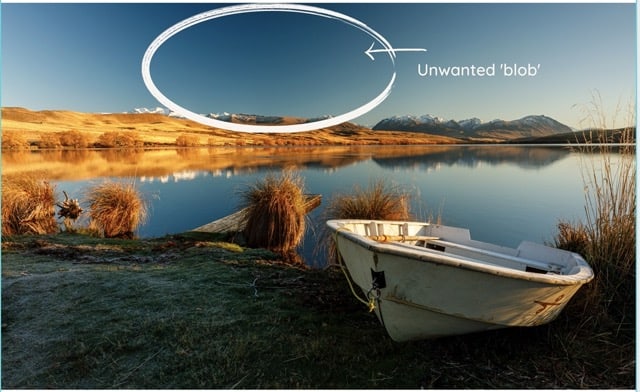
If you don’t position it correctly, you can end up with parts of your photo looking too dark or having strange colour effects. My favourite term for this is ‘blobs’.
And trust me, I’ve had this happen to me more than once.
So, be aware, and make sure you keep an eye on this. Particularly when you change your orientation. Rookie mistake I know. But I also know that I’m not alone here.
Pros Of Circular Polarising Filters
- Reduces glare and reflections on surfaces such as water and glass
- Enhances the colour and saturation of the sky
- Improves the contrast and saturation of foliage
- Can make clouds appear more dramatic
Cons Of Circular Polarising Filters
- CPL’s can darken the overall image. This can be both a pro and a con depending on your situation. If you’re photographing a waterfall and using a tripod, this can be helpful to achieve the waterflow you’re looking for. But if you’re shooting handheld, it could mean you need to adjust your aperture or ISO if it slows your shutter speed down too much.
- Constant awareness is needed when using one as I’ve mentioned above. It is very hard to correct any mistakes you make with a CPL in post processing.
- Some lenses may cause vignetting when using a CPL. This tends to be on very wide angle lenses, so something to be aware of.
Can The Effects Of Circular Polarising Filters Be Replicated In Post-Processing?
The effects of a CPL can be replicated in post-processing to some extent by adjusting the saturation, contrast, and clarity settings,
But it can be difficult to remove glare and improve colour saturation as effectively as using a circular polarising filter in the field.
Therefore, using a circular polarising filter in-camera is the most convenient and effective way of achieving the desired results.
Do You Need A Circular Polarising Filter
While not essential, a circular polarising filter really can make your landscape images pop, and the way they reduce water glare is second to none.
If you had to choose only one filter, I would definitely recommend starting with this one. The easiest way to start is to buy one that is suited to the size of your lens. With this option it just screws onto your lens and you’re good to go.
Related Post – Why And How To Use A Circular Polarising Filter

Neutral Density Filters
Neutral Density Filters (ND’s) are used to reduce the amount of light that enters your lens. This gives you longer exposure times, which can be used to create a sense of movement in water and clouds.
Allowing less light into your lens gives you flexibility with your exposure, assuming you are using a tripod. This can be particularly important if you are photographing in the middle of the day and want to reduce the brightness a bit.
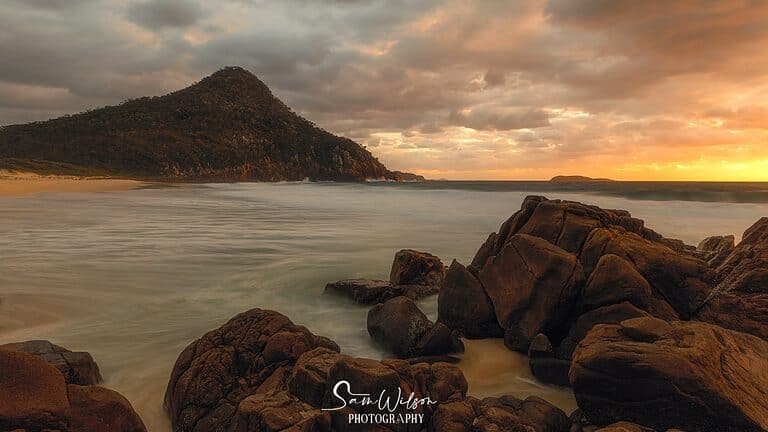
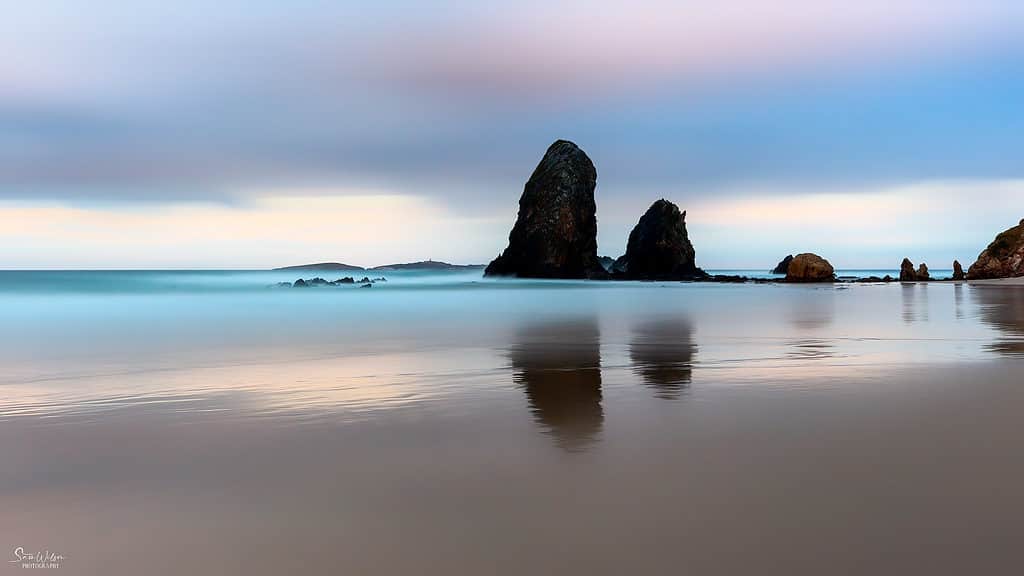
When you see nice silky flow in waterfalls, or smoothed out ocean images taken in the middle of the day, it’s a fair assumption that ND’s were used.
Pros Of Neutral Density Filters
- Allows for longer shutter speeds to create motion blur in moving water or clouds
- Allows for wider aperture to be used to create a shallow depth of field
- Can be used to balance exposure between bright and dark areas in a scene
Cons Of Neutral Density Filters
- Can darken the overall image – as with CPL’s this can be a pro or con depending on the situation and if you’re using a tripod
- Not always necessary depending on the lighting conditions
- Can reduce the amount of light entering the lens, requiring a longer shutter speed or higher ISO
Neutral density filters come in a variety of different strengths. The higher the number, the darker the filter is and therefore the longer exposure you can achieve.
The most popular strengths are the 3-stop, 6-stop and 10-stop, and depending on the system you are using, you might be able to stack them for even longer exposures.
For a more in-depth look at nd filters for landscape photography, this article by Peta Pixel is great if you’re just getting started.
Now could be a good time to discuss the exposure triangle if that is something new to you. I would guess that if you’re looking at filters, you would know this, but if you’re like me when I started out, maybe not …
The foundation of all photography is the exposure triangle. Basically, to create a correct exposure, you need to have the correct balance of three elements: Aperture, Shutter Speed and ISO.
These three elements all work together to give you correct exposure. There is no right or wrong as it’s different for every scene, but when you have your settings all good to go, and it doesn’t work, you need to figure out what to change to get it right.
If you need a bit more info on how this all works, check out my complete guide on Landscape Photography For New Photographers for a deep dive on how it all works. And don’t stress, it’s not that scary.

Can The Effects Of Neutral Density Filters Be Replicated In Post-Processing?
While the effects of a neutral density filter can be replicated in post-processing software to a certain degree, it can be difficult to slow down water or cloud movement in post-processing.
This really is done more effectively using a neutral density filter in-camera. Additionally, using a neutral density filter in-camera can provide more consistent and accurate results.
Do You Need Neutral Density Filters
A neutral density filter can be useful for creating motion blur, but they are not always necessary. It’s worth having one in your bag if you frequently shoot in bright light conditions, but it’s not a must-have for every landscape photographer.
Having said that, I love capturing different movements in water, both at waterfalls and for seascape photography. ND’s really do help with this.
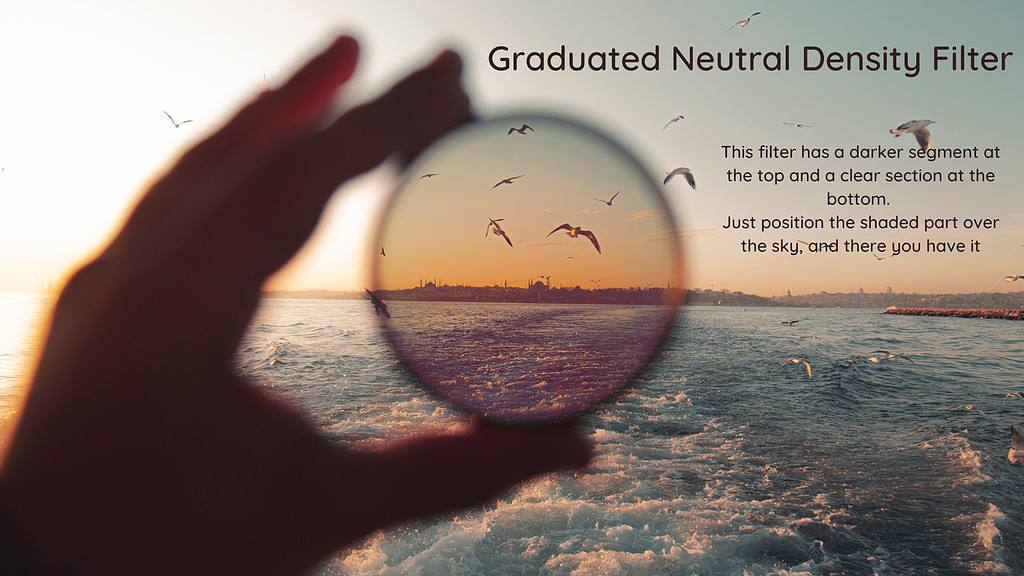
Graduated Neutral Density Filters
Graduated neutral density filters, also known as GND filters, are similar to ND filters, but with a gradient effect. The top of the filter is dark, gradually transitioning to clear at the bottom.
GND filters are used to balance exposure between the bright sky and darker foreground in landscape photographs. They are available in both hard and soft edge versions.
Pros Of Graduated Neutral Density Filters
- Allows for better balance between bright and dark areas in a scene
- Can be used to reduce the exposure of the sky without affecting the foreground
- Can be used to create a more natural-looking image
Cons Of Graduated Neutral Density Filters
- Can be hard to align correctly, specially with wide angle lenses
- You may need to purchase more than one depending on the strength of the effects you are looking for. This can get expensive very quickly!
- May not be necessary in all situation, specially when you can use post-processing software to achieve the same effect
Can The Effects Of Graduated Neutral Density Filters Be Replicated In Post-Processing?
The effects of a graduated neutral density filter can be easily replicated in post-processing by adjusting the exposure of specific areas of the image.
However, it is important to note that if an error is made in the field while using this filter, it can be difficult to fix in post-processing. As such, I’m more likely to not use a filter, preferring to make any necessary adjustments in post processing.
TRUSTY TIP: Exposure Bracketing
It is quite common in landscape photography for the sky to be a lot brighter than the foreground, making it difficult to get the correct exposure in one image.
Rather than using a GND, I tend to take different shots of the same composition, usually one exposed for the sky and one for the darker foreground. These two images can then be blended in an editing program such as Photoshop or Lightroom.
It is not a particularly difficult technique to learn once you’ve mastered some post-processing basics. This article should help you get started – Exposure Bracketing: When and How To Use It For Better Landscape Photos
Do You Need Graduated Neutral Density Filters
A graduated neutral density filter can be useful for balancing the exposure between bright and dark areas in a scene. However, it’s not a necessary piece of equipment for every landscape photographer.
If you frequently encounter high-contrast scenes or you shoot with a wide-angle lens, it may be worth considering adding one to your kit. Due to the cons, however, I would recommend learning exposure bracketing first.

Further Important Considerations for Deciding on Filters
If you’re just starting out, you need to think both about your budget, and the effects you are trying to achieve with your photography before investing in filters.
Consider The Scene And Light
You will need to think about when and where you are planning to take your landscape photos. Will you be shooting at sunrise or sunset where you may need to enhance your exposure time?
Are you planning on trying to shoot different flows of water like seascapes and waterfalls? Then you may consider a polariser and ND Filters.
If you’re planning on travelling light without a tripod, then you may not need any filters at all.
Decide What You Would Like To Achieve
The final thing to think about before buying filters, is to decide on the type of photos you are trying to create. Think about the mood and atmosphere you want to create, and if you need filters to help you achieve that.
Think about the technical aspects of your photography such as your exposure, shutter speed and aperture. Work out whether filters are going to help you control these better.
What About UV Filters?
You may have heard about UV filters, and even purchased one when you bought your camera like I did.
Ultraviolet, or UV filters have been around for a very long time, and I personally don’t use them.
They are meant to block ultraviolet light, but cameras for at least the last ten years are not as sensitive to this as they once were, so they have become pretty redundant.
There are many advocates still from those who use them to protect their lenses. The reasoning being that if you drop your lens, you only scratch the filter and not your much more expensive lens.
However, if you buy quality glass (that is not as easy to scratch as some would have you think), why would you put another piece in front of it that doesn’t really add any value to your images?
This is something you of course have to consider when considering which filters you need for your landscape photography, but they are not something I would recommend.

The Different Filter Systems
Now that you’ve got an idea of which filters you need, you need to decide on a filter system.
Not only are there numerous types of filters available, there are also different systems.
These control how they connect to your lens and how you use them.
The following are the three main types of lens filters for landscape photography.
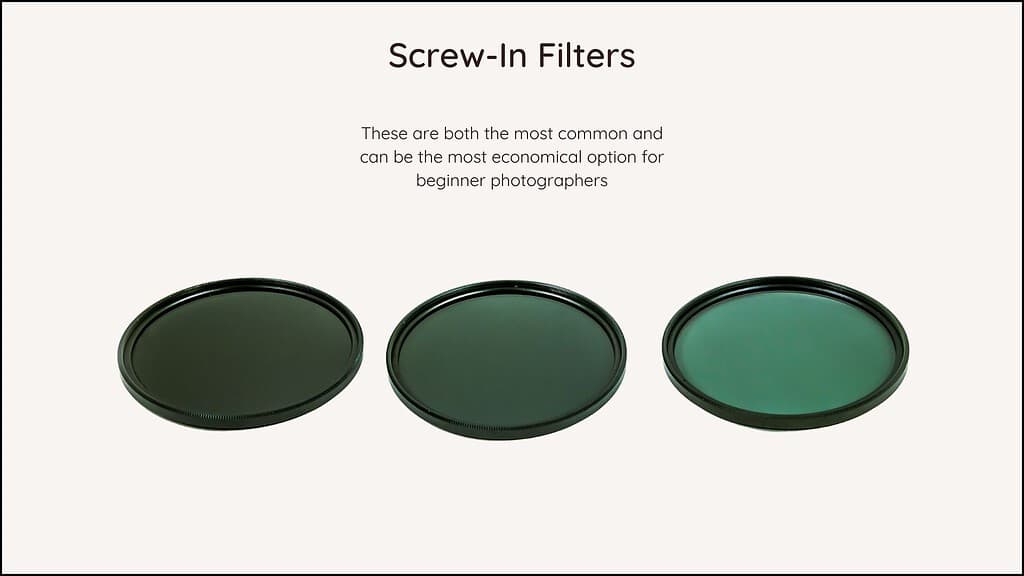
Screw-On Filters.
As the name implies, these are individual filters that screw onto the front of the lens.
This is the traditional way of using filters and is often the most economical option.
However, it is difficult to ‘stack’ filters with this system.
Stacking filters is when you combine more than one filter on your lens to take your images.
An example could be using a CPL as well as an ND filter to create the exposure you’re looking for. Doing this with screw-on filters can cause darkening on the edges of your photos known as vignetting.
Also, it can be time-consuming to screw and unscrew filters, especially when switching between multiple filters during a shoot.
Although they can be more economical in the first instance, over time I believe you would want to upgrade so these are my least recommended of the systems.
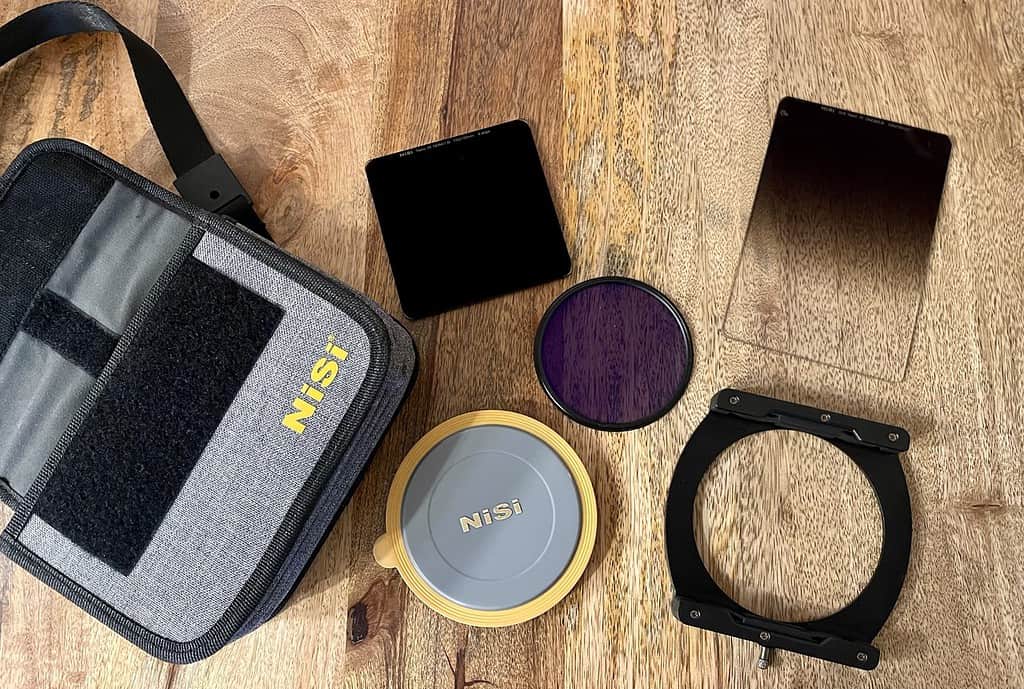
Square and Rectangle Filters
This system involves the use of a holder that is attached to the lens and holds square or rectangular filters in place with a locking mechanism.
These are popular with many photographers as you can stack your filters without any issues.
You can get various adapters to match your lens size: then they come with a filter holder and filters that you can use on any lens.
While there is definitely more versatility in terms of using different types and combinations of filters, they can be bulkier and require more time to change filters compared to the magnetic system, which is my favourite by far.
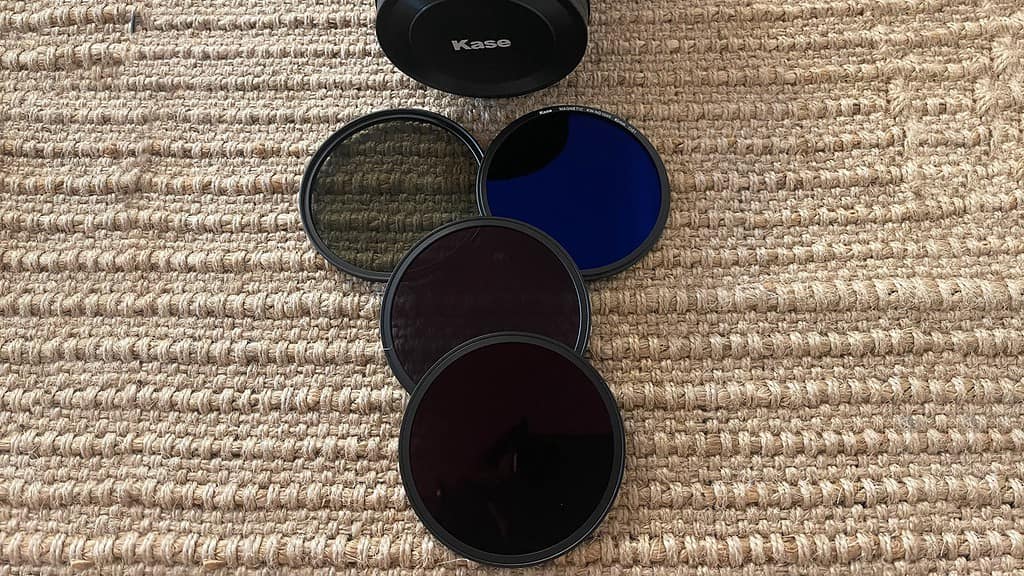
Magnetic Filters.
Magnetic filter system involves the use of magnetic rings that are attached to the lens.
These have only been around recently and I’ve seen a lot of photographers transfer from the holder system just like I have.
This allows for quick and easy changing of filters without the need for screwing and unscrewing.
You can also stack your filters without any concerns whatsoever – I often combine a CPL with an ND filter and no vignetting.
I changed over from the square holder system a while ago and I couldn’t be happier – such a time saver and much less bulky, so this is the system I would definitely recommend if you can’t decide.
All systems are specific to the size of your lens, so you may need to purchase adaptors for each of your lenses in addition to the filters, so keep this in mind.
Recommended Filters
Landscape photography can certainly be an expensive hobby, so if you’re just starting out and want to know which filters for landscape photography to get you going (and with better images), these are my recommendations in order of priority:
Circular Polarising Filter
If I had to choose only one filter for landscape photography, it would definitely be a circular polarising filter.
It is just so handy and versatile – it’s great to enhance colour and you can use it to slow down your exposure a little bit if that’s all you had.
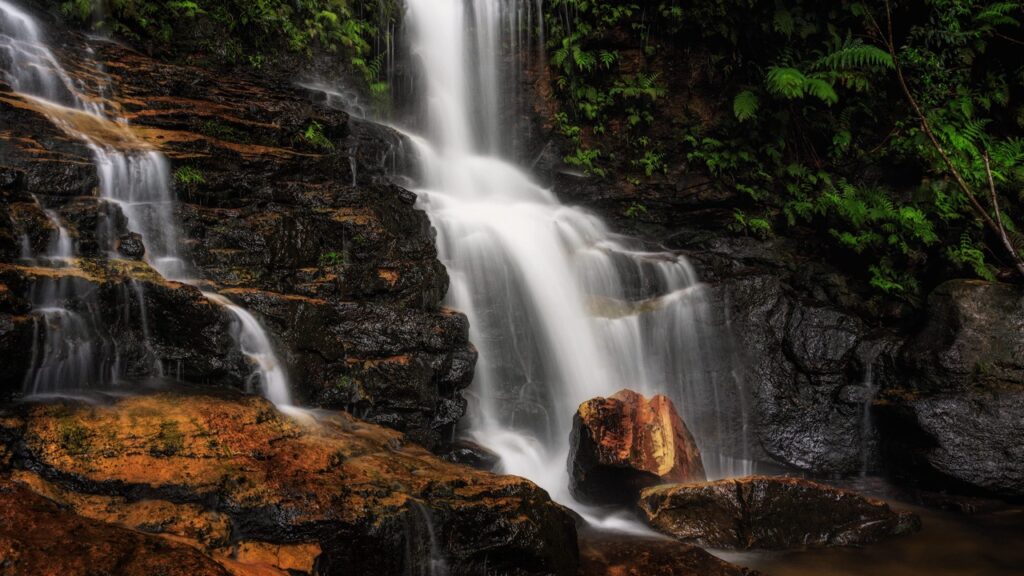
Neutral Density Filters
Neutral density filters are also considered an essential for most landscape photographers, including myself.
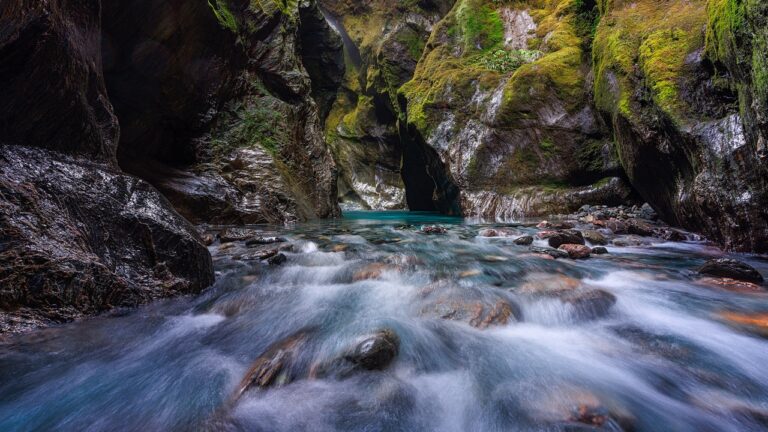
They are necessary for beautiful long exposure photos that I, and many love, and are essential for waterfall photography in my opinion.
Here is an example of a waterfall that I captured with a neutral density filter:
If you do decide to purchase filters for your photography, consider purchasing a good quality starter kit.
I would recommend either the magnetic filters or the square system with a holder.
While cheap options may seem like a good option to start with, they can cause a colour cast on your images, and you will want to upgrade in no time.
It is a good investment if you’re keen on your landscape photography. I honestly wouldn’t be without mine.
Recommended Reading: My Complete Gear Recommendations Page
Conclusion
This article has been all about choosing the best filters for landscape photography – for you!
In conclusion, filters can absolutely be a useful tool for landscape photography. A circular polarising filter can help reduce glare and enhance colours, a neutral density filter can help create motion blur and control depth of field, and a graduated neutral density filter can help balance the exposure between bright and dark areas in a scene.
While these filters can be useful, they are not always necessary. There are plenty of photographers out there that are able to produce incredible images without using filters.
Also, many of the effects that can be achieved with filters can also be replicated in post-processing. This can come down to deciding what you want to try and do in the field, and whether you want to invest in learning more about post processing.
Ultimately, the use of filters is a personal choice, and one that should be based on your own photography budget, needs and preferences to decide whether or not to invest in these types of filters.
I truly hope this article has helped you decide whether or not you want to invest in filters, and which, if any, you will start with. I’d love for you to let me know in the comments below.
That’s it for now – Keep clicking and stay caffeinated
Like this post? PIN it so you can save it for later.
More Helpful Landscape Photography Articles:
- Landscape Photography Guide For New Photographers
- Tips To Improve Your Seascape Photography
- Golden Hour Landscape Photography
- Photographing Waterfalls: Tips For New Photographers
- Essential Landscape Photography Gear
- Why And How To Use A Circular Polarising Filter
- Using Neutral Density Filters To Improve Your Landscape Photos
- How To Choose The Perfect Camera: A Beginner’s Guide
- The Best Canon Lenses for Travel Photography
- Lenses For Landscape Photography: How To Choose What’s Best For You
- My Top Gear Recommendations
Don’t miss a post – sign up Here if you haven’t already
Note – Unless otherwise stated, all photos are mine and remain my copyright images – Sam Wilson Photography.