Landscape Photography Guide For Beginners
Welcome to the Landscape Photography Guide For Beginners
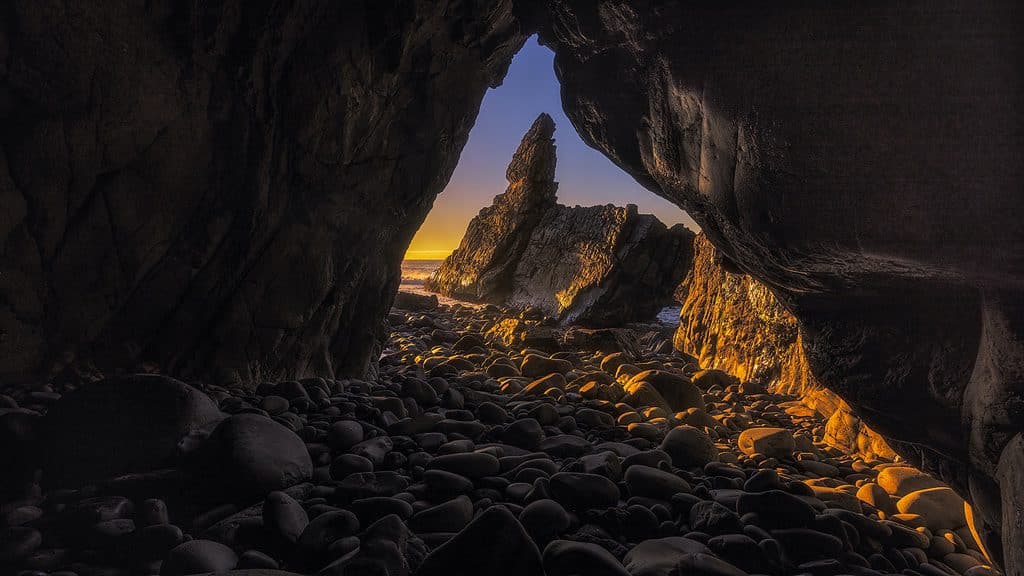
Landscape photography is my passion, and I’m excited to share what I have learned so that you can get out and capture some beautiful landscape photos.
When I first started my photography journey I believed that I would be taking perfect photos every shot in no time. How hard could it be? (Insert apology to every professional photographer out there).
Fancy new camera – check
ALL the optional extra accessories (and then some) – check
Introductory course at camera shop – check
What could possibly go wrong?
What happened next? I’m sure you can guess …
Complete and utter failure of course – I’ll admit it.
Photos were either blurry, too dark, too light, or all of the above!
All I wanted was for someone to tell me the ‘magic’ settings to get perfect photos every time.
Spoiler alert – they don’t exist, but it doesn’t have to be that hard.
This landscape photography guide has been written so that you don’t have to go through the same frustrations that I did. You can learn and improve your photography much faster (and much cheaper).
It will show you how to capture a sharp, correctly exposed image that you’ll be proud of. You will also learn how to find compositions and master other essential aspects of landscape photography.
Let’s go …
If you’d like some checklists and one page guides for free, you can grab them here –

Section One – Get Your Gear
Before we get to the actual nuts and bolts, there are a few things to get in order before you actually press that shutter with some sort of confidence.
Essential Gear
While needing some basic essential pieces of gear, it doesn’t mean you have the best of the best (trust me on this one).
When you’re starting out, it is more important to focus on learning to use the gear that you do have. You really do need to learn the fundamentals outlined in this landscape photography guide, before you upgrade to new gear.
Invest in time and education before investing in gear. This is something I wish I’d taken notice of when I started. It’s not that I wasn’t told, it was that I just didn’t listen. It would have saved me thousands, so I hope this will help you, even if it didn’t help me.
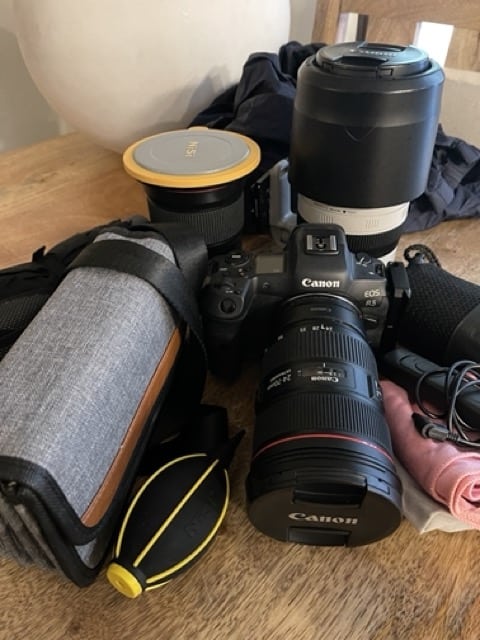
Camera
Use what camera you have when you are just starting out, whether that’s a phone, a DSLR or mirrorless. Only upgrade if you’re really enjoying your photography, want to improve your photos, AND your camera is limiting you.
This guide is not about recommending cameras, or the features you need.
What’s important is learning to use the camera you have.
Once you know what you’re needing to improve, you will know where you’re starting from. Then talk to other photographers if possible, check out Youtube, or even better, head to your local camera shop if you have one.
Lenses
If you’re working with a camera that has interchangeable lenses, then having that choice gives you the ability to change depending on what you’re trying to achieve.
A wide-angle lens is the most popular choice for landscape photography, and for good reason. They allow you to capture the grand scenes you see before you. A typical wide-angle lens is 16-35mm.
They also exaggerate the foreground, and objects in the distance will appear smaller than they do when you’re standing there.
A longer lens, on the other hand, changes the perspective and allows you to minimise distractions
Using mid-range lenses can help fill the frame and highlight specific subjects within your scene. Popular mid-range lenses are 24-70mm or 70-200mm. Some consider this 70-200mm lens to be a telephoto lens, but let’s not get caught up in semantics.
Telephoto lenses are great for capturing more detail in distant objects such as mountains, and are best for more intimate and abstract scenes. A typical telephoto lens would be something like 100-400mm.
Tripod
Seriously, I don’t think you should be able to buy a camera without burying a tripod as well. And that’s not just for landscape photography. Tripods are used in just about all types of photography.
You don’t really need to buy an expensive tripod, but I thoroughly recommend you do buy the best quality you can afford. You want it to be strong, stable and waterproof if possible.
Cameras have come a long way and you can shoot longer shutter speeds handheld, but do do any real kind of long exposure photography, I think you still need a tripod.
TRIPOD TIPS
- Does your lens have image stabilisation? This can actually cause movement when on a tripod, so turn it off.
- Extend the biggest legs first (they get thinner as you do down), and only extend as needed to keep as stable as possible.
- Use the centre column hook if you have one in very windy conditions. Attach a weight such as your backpack if you can.

L-Bracket
While a tripod is an essential for landscape photography, I also consider an L-Bracket part of my essential gear.
Tripods are primarily designed for photos to be taken in landscape orientation which can make it tricky to shoot vertical or portrait perspectives which I often like to do.
This is where an L-Bracket comes in. It’s a plate that connects to your camera where your tripod would normally go and it easily enables you to change your orientation.
You simply take the camera off the tripod and remount whenever you want to make the switch – too easy!

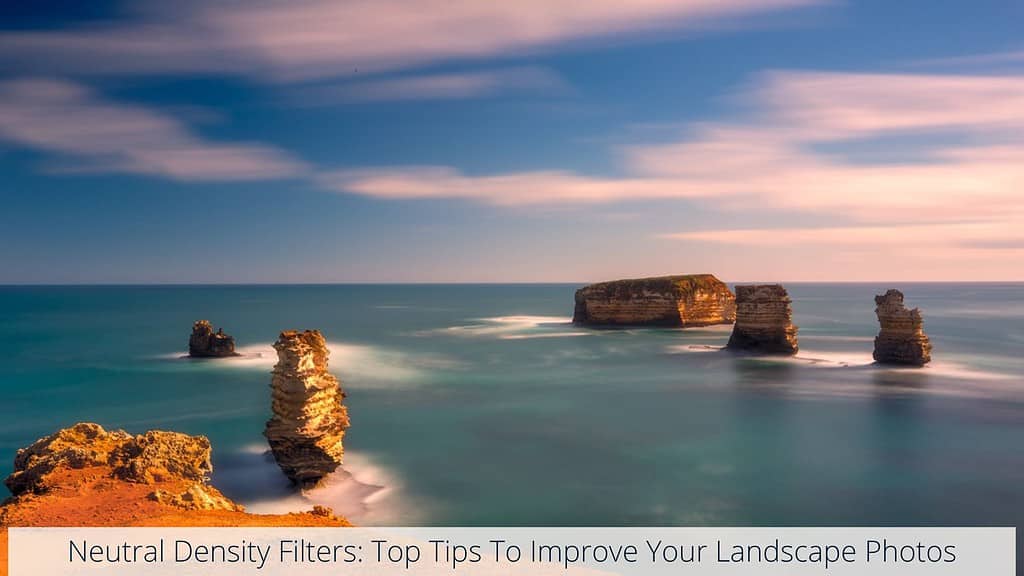
Filters (Optional But Highly Recommended)
While the use of filters in landscape photography is not exactly essential, they are strongly recommended.
The two I recommend at a minimum are Circular Polarising Filters and Neutral Density (ND) Filters.
Circular Polarising Filters , can improve colours, darken the sky and avoid glare on the water.
This article all about Circular Polarising Filters explains it in much more detail.
ND Filters reduce the amount of light getting to your sensor so you can increase your exposure time. This is crucial when trying to capture water flow at different speeds.
Other Recommended Gear
And that’s all the basic landscape photography specific equipment you need really.
Along with those, these are the things I never leave the house without –
- Camera Bag – keep your gear dry, protected and organised.
- Cleaning Kit – essential for keeping your lenses clean at all times.
- Spare Battery – don’t leave home without one.
- Memory Cards – make sure you have one in your camera and at least one spare.
- Decent Shoes – super important to keep you and your gear upright!

Know Your Gear
No matter what camera you use, you need to know how to use it. Take the time to explore the different settings and menus on your camera.
I’m not saying you need to read your camera manual from front to back – that would put most people to sleep. There are heaps of great Youtube videos if you search your camera make and model.
Start with knowing how to adjust the basics at least: Shutter Speed, Aperture and ISO.
This way, when you learn what each of these do, you will know where to access them when you’re out shooting. You don’t want to be wasting time trying to find the basic settings when you’re out in the field.
Also, learn how your tripod works and attach your tripod plate to your camera so you’re ready to go. Practice taking your camera on and off, and extending the legs with whatever different options your tripod has.
Section Two – Plan It Out
Often underestimated, the planning you do before heading out for your shoot can be as important as the shoot itself.
The vast majority of good landscape photos are a result of extensive planning. They do not happen by sheer luck.
The most important things to consider when planning your shoots are the location and the predicted weather and conditions.
“When I have found a landscape which I want to photograph, I wait for the right season, the right weather, and the right time of day or night, to get the picture which I know to be there.”
~ Bill Brandt (British Photographer)
Location, Location
Make sure you do your research before leaving for somewhere you’ve never been to before. This is even more important when it comes to seascape photography.
The internet truly is your friend here. And no, it’s not copying! It’s a way of becoming inspired and learning from those that have been there before you.
Related Post: Guide To Researching And Finding Locations
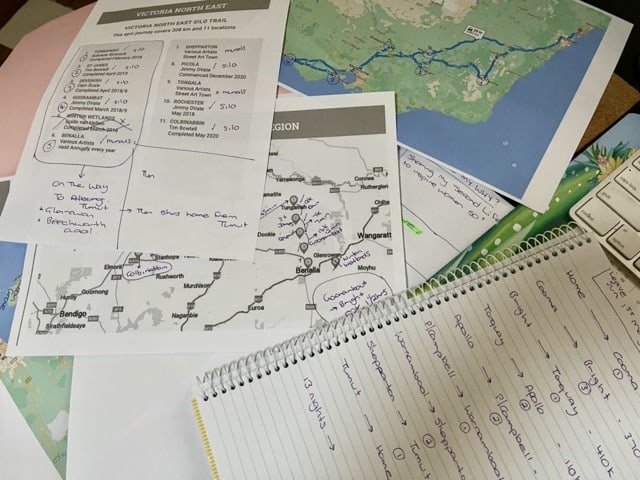
Scouting
Scouting is something that is also often overlooked when it comes to landscape photography. Time can be an issue of course, but if at all possible try and do a scout of the location in the daylight before heading to your shoot. This is particularly important for a sunrise shoot.
If it’s a sunset shoot, just allow plenty of time so you can fully explore the area and have some compositions prepared before you start shooting.
If all else fails, check out Google Earth to give you some ideas – such a fabulous tool.
Things to include on your scouting mission:
- Parking and access – particularly times if you are planning on arriving early or leaving late. You don’t want to get locked out or in if there’s gates in the case of national parks etc. I often take photos of signs etc. with my phone so I don’t forget.
- Where the sun will be rising or setting.
- Potential compositions and camera angles.
- Safety – particularly if a seascape. Things like where waves could come in, where the rock ledges are, and potential slippery spots etc.
- Use your phone to take potential shots for when you come back with your camera gear.
- Make notes in your phone if you have a memory like mine!
Grab my Pre-Photoshoot Checklist Here
Weather and Conditions
Weather can have a significant impact on landscape photography. Different conditions can provide different moods and atmosphere, and can totally transform the colours and light in your scene.
Just as important though, is it also affects whether or not it is suitable to go out and shoot at all.
Weather
Knowing the weather forecast can help you plan when to head out, but it’s also important to know how the different conditions affect your landscape photography.
Sun: Knowing the times it will be rising or setting is essential of course for sunrise and sunset photography. It’s also good to know where the sun will be in relation to the location you’re visiting.
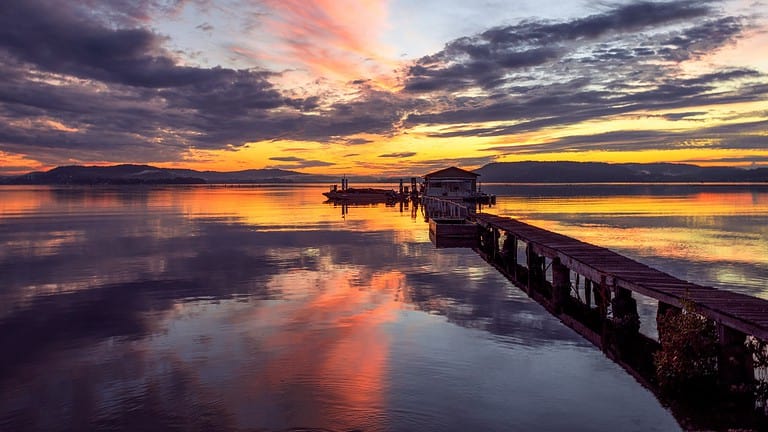
Clouds: Clouds add interest to your photos, and they can create a lovely soft light which is ideal. Storm clouds can provide a dramatic moody atmosphere. Clouds are your friend! This is particularly in the case of high clouds. These are the ones that give you those lovely wispy skies and lots of colour.
Rain: You don’t necessarily need to stay at home when it’s raining. Rain can create some great reflections and add drama and atmosphere to your photos. Waterfalls are also usually best photographed after some rain. Be mindful to keep yourself safe and protected as much as possible though.
Related Post – Rainy Day Photography
Wind: While clouds are a photographer’s friend, wind not so much. If you do have to photograph in the wind you’ll need to consider using a faster shutter speed (more on this below) and use a tripod if possible.
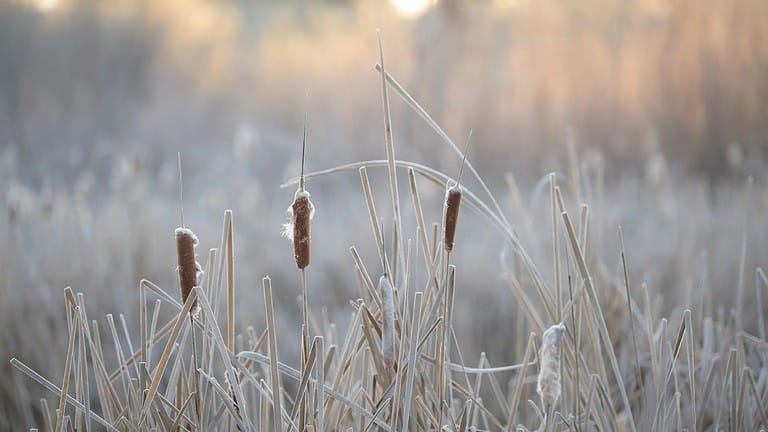
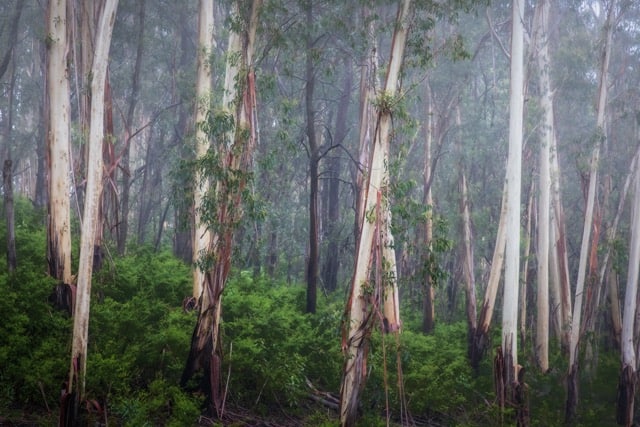
Fog: Fog can add a sense of mystery and mood to your photos, but it can also reduce visibility and contrast. If you’re photographing in a foggy area, use longer exposures to capture that beautiful atmosphere.
As they say, timing is everything, and checking the forecast will tell you the best time to head out.
Luckily there are apps available. These will help you predict the weather and conditions when and where you’re planning on going out to shoot.
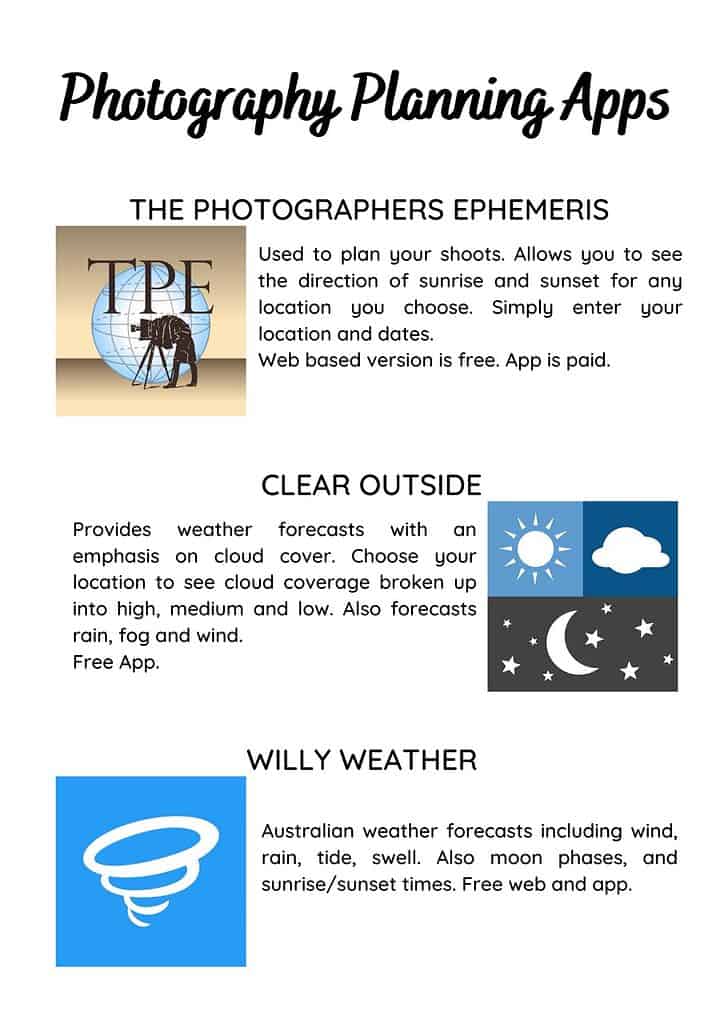
Photography Planning Apps
These are the most popular apps used by photographers to help you plan your shoots.
The Photographer’s Ephemeris: Used to plan your shoots.
This app allows you to see the direction of sunrise and sunset for any location given at the time you choose. Simply enter your location and dates – super accurate.
Clear Outside: Provides weather forecasts with an emphasis on cloud cover.
Choose your location to see cloud coverage predicted broken up into high, medium and low. Also forecasts rain, fog and wind.
Willy Weather: Australian weather forecasts, so you may need to find one local to where you’re located. Includes sun and moon times, wind, rain, tide and swell.
One final note on weather apps and checking the conditions. These are not always accurate, so unless it’s not dangerous, head out anyway. You’ll be out in the great outdoors enjoying nature, so it’s a win regardless of the conditions!
Section Three – Camera Settings 101
Exposure Fundamentals
The main goal of this landscape photography guide is to help you create a correctly exposed image that is sharp and in focus.
Let’s start with exposure.
Basically, a correctly exposed image is one that has good detail and contrast, without any areas being either too light or too dark. Remember those early photos of mine that I told you about? You don’t want to be doing that, so it’s time to learn the fundamentals of exposure.
There are three main elements to capturing a correctly exposed image. They are, in a particular order, ISO, Aperture and Shutter Speed.
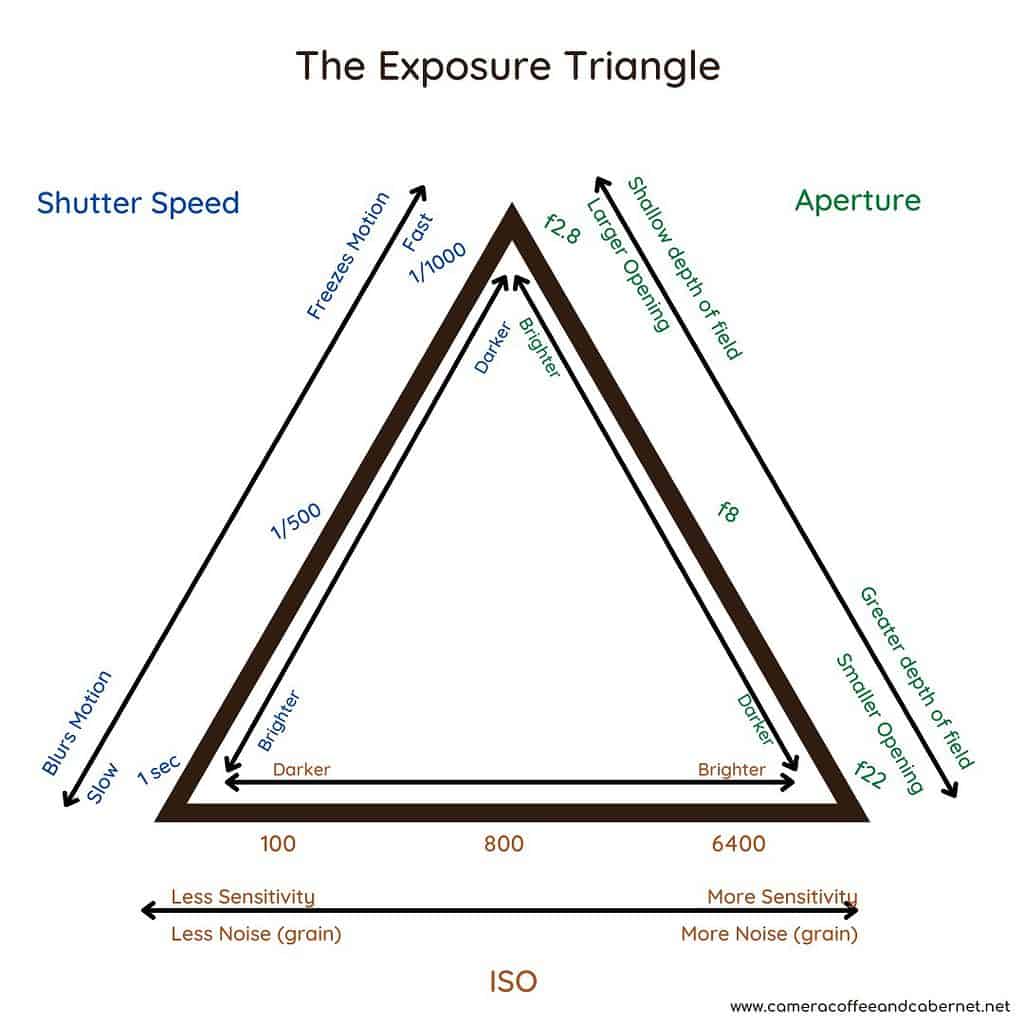
ISO
I’ll start with ISO, as when I’m photographing (mostly sunrise and on a tripod), I rarely change this.
ISO controls how sensitive the camera is to light: the higher the number, the higher the sensitivity.
Increasing your ISO number allows you to shoot in darker light without having to change any other setting.
BUT by increasing the number higher, the more grain and ‘noise’ you introduce to your photo. In most situations, this is not what you want in your photos.
Generally, when shooting landscape photography you want to keep this number as low as possible.
Aperture and Depth Of Field
The aperture is the first of the two main settings I use with my landscape photography that I change regularly.
The aperture you set controls the amount of light that is entering your camera.
It can get confusing with the technical ‘f’ numbers, but the way I remember it is: the lower the f number, the more light. The higher the number equals less light coming in. Bizarre I know, it’s the opposite of what you might logically think.
The aperture also controls the ‘depth of field’ in an image. Depth of field basically means how much of the image is in focus.
In this case, a lower number does mean a lower, or ‘shallower’ depth of field. This means less of your image will be in focus, or ‘sharp’.
Alternatively, a higher number means a larger depth of field, meaning more of your image will be sharp.
Generally for landscape photography, you are looking for your images to be relatively sharp for the whole photo. To achieve this, I generally start with an aperture of between f8 and f11.
Shutter Speed
And then there’s the shutter speed, which is the length of time that your camera is exposed to light when you press that button.
The higher the shutter speed means the photo will be taken quickly with the shutter only being only for a short time.
A lower shutter speed slows the speed of the photo being taken so the shutter will be open for longer.
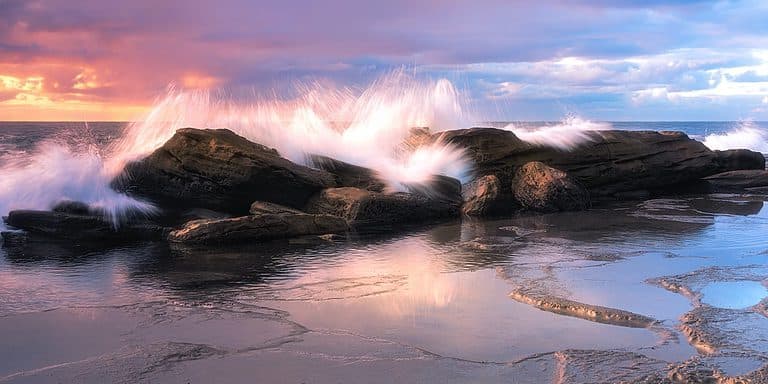
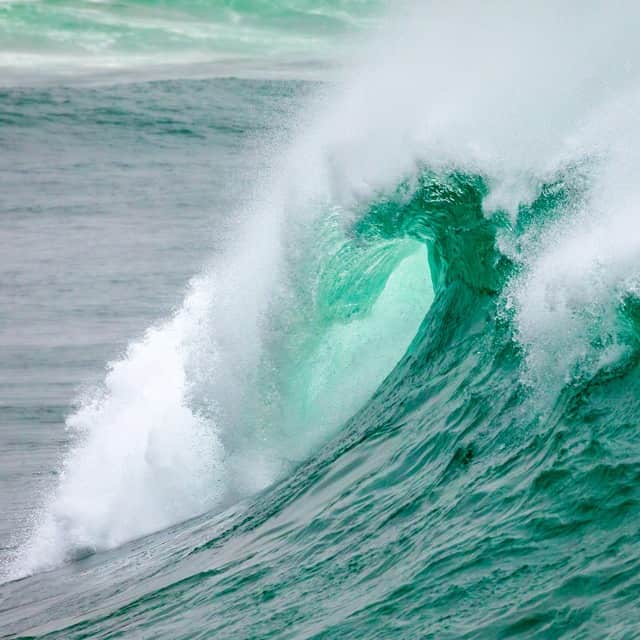
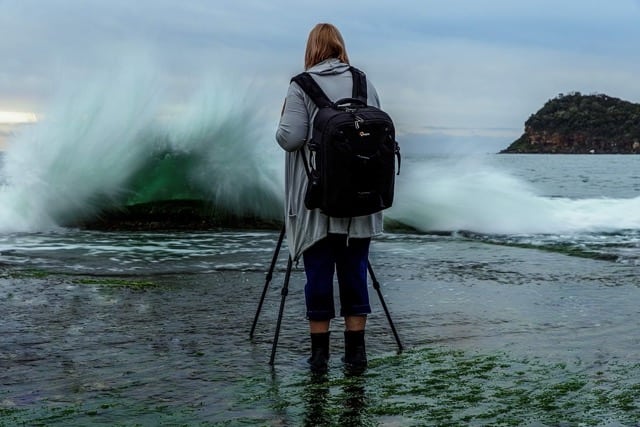
For landscape photography, this is one of the most creative choices you have. Do you want to capture sharp action, like a wave crashing, or slow movement like streaky clouds in the sky?
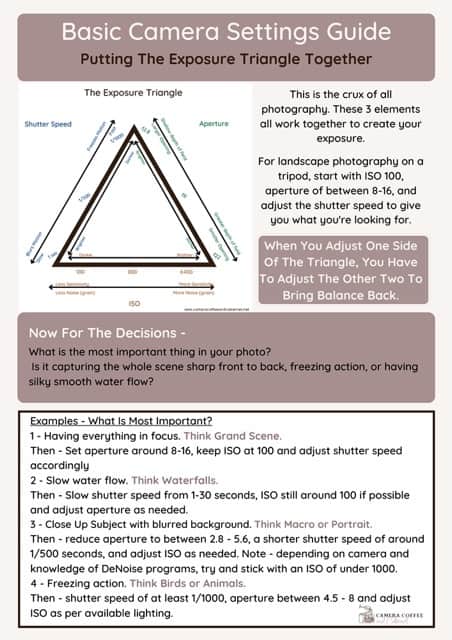
Putting It Together
So that is the essence of the exposure triangle: ISO, Aperture and shutter speed.
All three elements work together to create your exposure, so when you adjust one, you need to adjust either one or both of the other elements to compensate.
It’s one thing to understand the exposure triangle in theory, but to put it into practice can be a totally different story …
How do you put these things together into practice out in the field?
Firstly, you need to decide what is the most important thing to capture. Pick the one or two elements that can’t be compromised.
Secondly, adjust the other element(s) accordingly to achieve the correct exposure for your image.
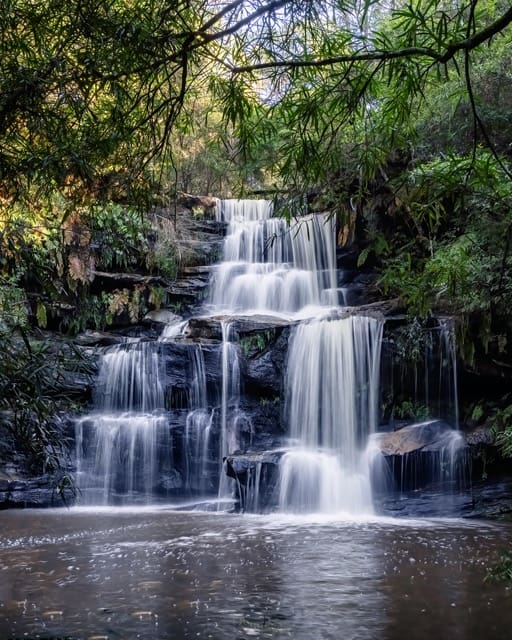
Example One: You’re photographing a waterfall. You want that water to be smooth but with a bit of detail. To achieve this you will need a shutter speed between 0.5 and 2 seconds. This can’t be compromised, so you will need to adjust your aperture and/or ISO to achieve this.
Example Two: You are shooting the ocean at sunrise. You want a grain free image that is sharp and in focus front to back. In this case you will want your ISO to be at around 100 and your aperture between f8 and f11. To achieve the correct exposure you will need to adjust your shutter speed, the only remaining element of the exposure triangle.
Clearly there are a lot more options and elements that come into play with your exposure, but this is a landscape photography guide for beginners. Start with getting your photos correctly exposed in focus and go from there.
White Balance
White balance is the process your camera uses to adjust the colours in your image to accurately reflect the scene you are photographing.
Different light sources can have different temperatures which can cause an image to appear too warm or cool. The white balance can be used to correct these imbalances so that whites appear white, rather than yellow or blue.
If you’re just starting out, I’d suggest you keep this on auto, and start to experiment once you’re more comfortable with the basic exposure triangle. Don’t try to learn everything at once.
If you are shooting in JPEG, try taking a couple of shots in either shady or cloudy white balance as this can help bring out the warmer colours. It doesn’t hurt to take a few more photos than you need – one of the many advantages of digital photography!
I usually keep this on auto as I shoot in RAW and can change this in editing.
If you are shooting in Jpeg this is one of the few things that can’t be changed, which leads me onto the next section …
RAW Versus JPEG
While you’re thinking of all these other elements, It’s time to think about the format that you are going to save your images in.
When a camera takes a photo, it can save all the RAW data as it captured it, or convert it to a JPEG file – or keep a copy of both.
Not all cameras save the RAW file, but most can, including many phone cameras.
If you really want to get images with a higher quality, then I recommend you shoot in RAW format instead of JPEG.
When you shoot in JPEG, the camera automatically processes and compresses your file. A RAW image is an unprocessed file that contains more information, which gives you more flexibility in post-production.
RAW files will be a lot bigger, and require software to edit, so you need to keep this in mind.
If you don’t have any plans to edit your photos, then you could stick with JPEG.
I would suggest you set your camera to shoot in both RAW and JPEG. This way you can easily share your photos on the go. You will also have a raw copy that you can come back to and edit at any time in the future. You can always delete them later.
Camera Modes
Camera (or shooting) Modes refer to the different settings that photographers have to select before photographing a subject. Depending on which you select, they control the main settings of aperture, shutter speed, and ISO.
They can usually be changed on a dial generally found on the top of your camera body.

The most common modes used for landscape photography include:
Automatic: The camera adjusts all the settings for you, so you don’t have to worry about things like aperture, shutter speed, and ISO. This can be a good mode for beginners to start or in situations where you need to take a photo and are unsure what settings to use..
Aperture Priority: You can adjust the aperture, and the camera will adjust the shutter speed to get a properly exposed photo.
Shutter Priority: You can adjust the shutter speed, and the camera will adjust the aperture to get a properly exposed photo. This mode is good for controlling motion in a photo.
Manual: You are in full control of all the settings; aperture, shutter speed, and ISO to get a properly exposed image.
Which Camera Mode Should You Use?
It is totally up to you of course. By all means start out on auto and see what you get.
But if you are looking to improve your images, learning how to use the different modes and adjusting the elements of shutter, ISO and aperture will help you take better images.
Manual and Aperture Priority are the two most popular modes used by landscape photographers. Have a play and check out the section on starting settings below.
TIP – if you find your mind totally blank when you are out in the field – start with auto, see what that produces and make some changes from there. This can be great if you are shooting in conditions you’ve not come across before.
Getting Sharp Photos
A sharp photo is one that is in focus and not blurred by camera or motion shake. These generally occur when you are shooting handheld at a shutter speed that is too slow for you to hold the camera steady.
Despite this obvious tip, even experienced photographers can take blurry photos if they aren’t careful when shooting, particularly handheld.
Camera shake is when a photo comes out blurry because the camera moved while the image was being captured. This usually happens with hand held images with a low shutter speed. It can also happen if it’s windy or you’re standing on something that’s moving like a boat.
Just because your camera says you can shoot a photo with a low shutter speed, doesn’t always mean you should. It doesn’t know that you’re not using a tripod or you may not be super steady when taking your images. Some can shoot steadier than others – give me a tripod anytime!
The best way to avoid this is to use a tripod, but this is not always practical. If you don’t have a tripod, see if there is somewhere close that you can sit your camera on and use a self timer. This way you’re not touching the camera as it’s taking the image.
If your lens has image stabilisation, make sure this is switched on.
If you’re out exploring and shooting hand held, then you will need to increase your shutter speed. You may need to also increase your ISO along with this so your photos don’t end up too dark.
This can cause more noise (grain) in your image, but this is better than a blurry photo!
Tips to get sharp photos:
- Hold your camera correctly – two hands, elbows tucked in, steady stance or lean against something sturdy such as a wall or pole.
- Fast enough shutter speed for handheld, or use a tripod.
- Use a tripod for slower shutter speed – this will vary on the photographer.
- The correct depth of field.
- Lowest ISO possible.
Get Focused
What do you focus on when you’re out in the field? By this I mean, physically focus your lens on to determine what will be the sharpest part of your image.
You need to decide what is the main subject of your scene that you want to emphasise, and focus on that. This is the simplest way to start, but a lot more does come into focus.
There are also choices to make in the field if your camera and lens allow for both auto and manual focus.
Many cameras also have several focus points to choose from, starting with a single point focus (on a small part of your scene) to multiple points covering the whole scene.
If you’re just starting out, I would suggest using auto focus and using a single point to focus on.
When you are ready to expand on this, Photography Life has this great in-depth article – How To Focus In Landscape Photography.
Section Four – Timing (It’s All About The Light)
Now you’ve got your gear, know where you’re going and have the basic techniques, it’s time to learn about light.
To capture really beautiful landscape images, it’s important to learn about light. Light is what creates mood in a photo and understanding it will help you immensely with your growth.
Light is obviously important in any type of photography. After all, the word ‘photography’ literally means “drawing with light’. With many types of photography, like in a studio, the photographer has control over the lighting so timing is not so important.
This is not the case with landscape photography, you can’t control the light in nature. But you can plan, and choose when you shoot to give you the nicest light.
For a complete guide to light in landscape photography, this is a great article by the Digital Photography School.
So, when is the best time to go?
Best Times To Shoot
Of course you can head out at any time to shoot landscapes, and the more practise the better. But, there are particular times that are better than others, depending on what you are trying to achieve, and when you can practically get there:
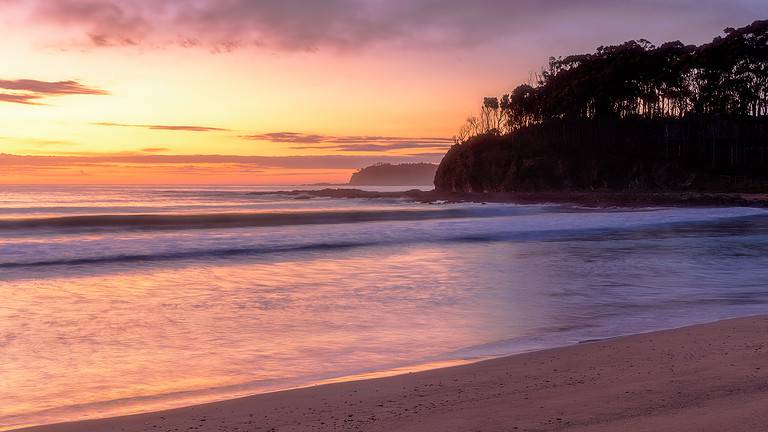
Sunrise/Sunset
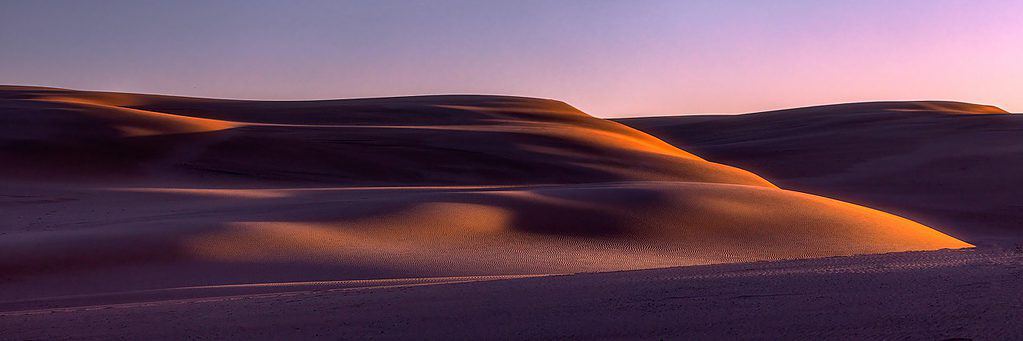
Have you ever heard of the term ‘golden hour’. This is arguably the most popular time to photograph landscapes, and for good reason – the light is just beautiful during these times.
Golden hour is the hour just before and after sunrise, and the same before and after sunset.
The rising or setting sun showcasing the environment in beautiful golden light is hard to top. Its not by accident that it’s called the ‘golden hour’.
The changing light at these times makes for purely magical images, and really, is there a better way to start or end your day than out in nature?
During The Day
Shooting in the midday light is generally not ideal for landscape photography as the light can be harsh, and dealing with shadows can be challenging.
If possible, cloudy days can be a great opportunity to get out, particularly waterfalls, as clouds help even out the light.
This is a great time, however, to scout your locations.
But, if it’s bright blue skies, and that’s your only opportunity, get out anyway – the locations and scenes are still beautiful and worth photographing!
If you’ve got filters, it’s a great time to practise with them and try some long exposure photography (a topic for another day).
It can also be an opportunity to use your telephoto lens out. Zooming in to focus more on details down below instead of that big bright ball in the sky – time to get creative!
Night Landscape Photography
Night photography, commonly called astrophotography, is a whole sub-genre on its own.
As a sunrise lover, I struggle to head out and do night photography – plus it’s wine time!
If it is something you’re interested in, then I recommend you look up David Magro. Hi is an Australian photographer who specialises in milky way photography. His work is stunning, and he offers workshops as well.
Section Five – Composition Is Queen
Technique and light will give you a ‘good’ photo, but composition is really what brings it all together and can make for an ‘AMAZING’ image.
Generally, a composition is pleasing when the viewer’s eyes move naturally around the image and the surrounding elements work together to support the main subject.
This is why what you leave out of your image is important as those that you include. Unwanted distractions take the viewer’s eyes away from your main subject and that’s definitely not what you want.
There are many composition guidelines out there, but one ‘rule’ is considered essential. Your horizon MUST be straight!
Make sure you find the settings on your camera or phone that shows you the grid when you are shooting. You can also correct this in editing, but to me (and many others) this is non-negotiable.
Most landscape photos can be broken down composition-wise into the foreground, midground and background. This sounds fairly simple, but it’s often overlooked.
This is where distractions can come in and you include things that don’t add to your image. You can use these areas in your photo to add interest or lead your viewer to your main subject.
Often we are focussed so much on what’s in the distance, that we miss what’s right in front of us. Take the time to look at ALL the elements when you are looking for your composition.
Here are some landscape photography composition tips to get you started:
Rule of Thirds
The rule of thirds is a basic composition technique where you divide your image into nine equal parts by two equally-spaced horizontal lines and two equally-spaced vertical lines.
The four points where these lines intersect are where you would try to place your main points of interest for the photo.
You can usually set this up on your camera to help you when composting your scene.
The idea behind the rule of thirds is that by placing the subject off-centre, the image will be more balanced and more interesting to look at.
It also helps to create leading lines and visual pathways that guide the viewer’s eye around the image.

Strong Foreground And Background Elements
Rather than looking straight to the horizon and the sky, try and look for some interesting elements to place in the foreground and background.
Here’s a few ideas to get you started –
- Rock formations
- Patterns like rows of trees, or fields of flowers
- Rock pools
- Moss/Algae
- Clouds
- Buildings
This is where scouting and having time to look around really pays off.
It’s important to remember that the environment is constantly changing, so things that may not have been there previously can appear and really make your shot unique.
The Horizon
One of the ‘rules’ of any photography is to avoid putting the horizon in the middle of your image. There are exceptions to this of course, but it is a good starting point.
This means you need to decide to have either more foreground or background in your image, generally more water or sky?
While there is no one answer to this, the thing to focus on is including more of what is interesting. If there’s an incredible sky, you should probably include more of that. But if it’s a boring clear sky, then try and focus on your foreground.
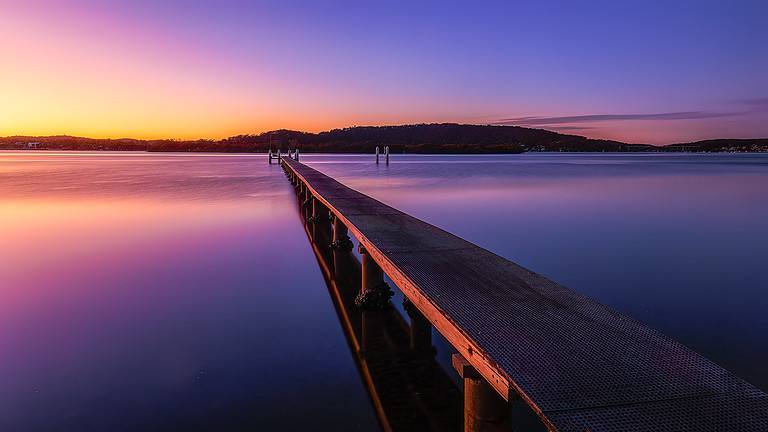
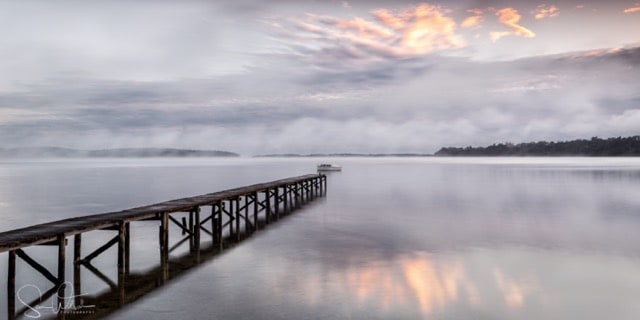
Leading Lines
Leading lines often form part of a strong composition and for good reason. They can lead the viewer into the subject of your photo.
With landscape photography this is often towards the horizon or interesting sky.
Things to look at for leading lines include jetties, fences, rows of trees, patterns in the sand or rivulets of water leading into the ocean.
Once you start looking it’s amazing what you can find.
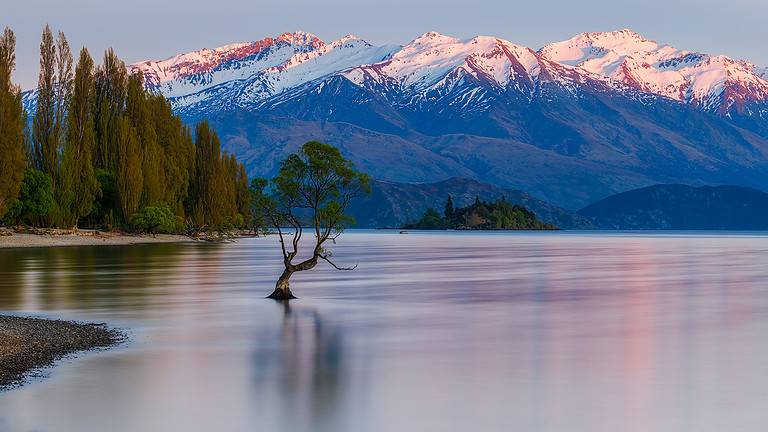
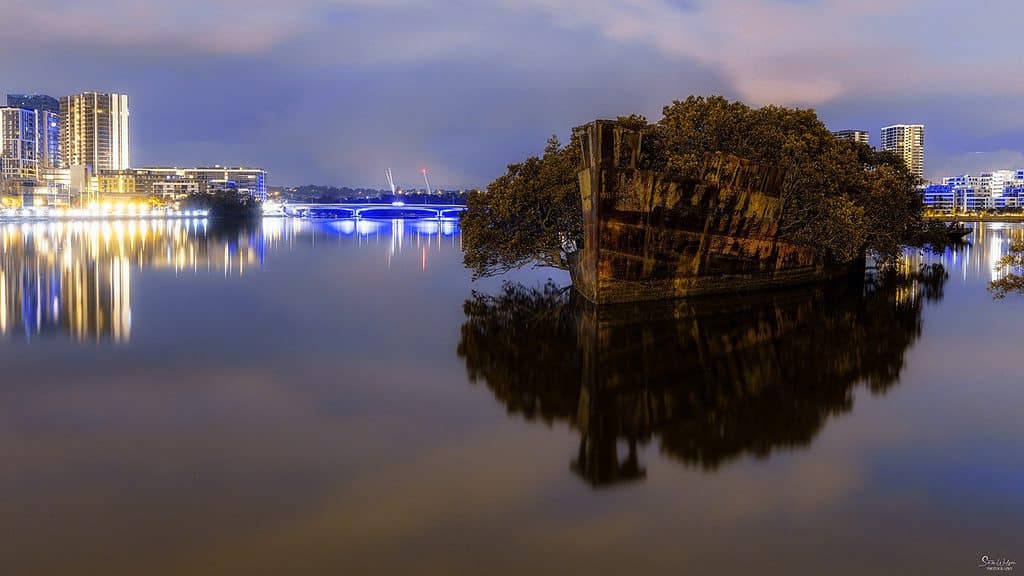
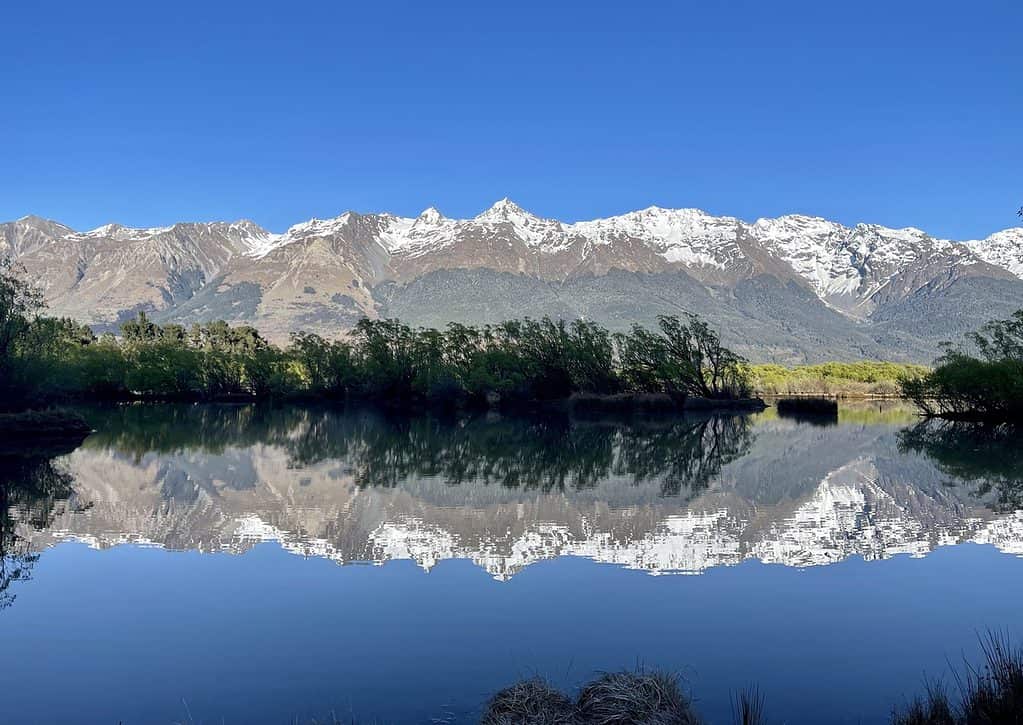
Balance and Symmetry
Balance and symmetry can create a sense of order and harmony in an image.
Symmetry is where there is a balance of elements on either side (or top and bottom of your image). Symmetry can be effective in creating a sense of harmony in your image.
Reflections are a perfect example of this.
In an image, balance refers to the overall balance of visual weight. When an image is balanced, it will feel steady and grounded, but if it’s imbalanced, it may feel unsteady and chaotic.
When considering balance in your scene consider things like light and shadow, colour, and the balance of negative and positive space.
Also considering the rule of thirds and leading lines, your framing and horizon placement to create a well balanced and visually pleasing image.
Keep it Simple
The saying ‘less is more’ is what is meant here. Have some negative space and remove any distractions in your frame. This will naturally encourage the viewer to see what YOU want them to see in your image.
It can be easy to get caught up and miss these little details that can have a big impact. So take time to look around every now and then, and even zoom in on images you’ve already shot. This will ensure you’re not including things in your images like power lines and even people.
Framing
By adding a natural frame to your image, you add depth and isolate your subject. Elements like trees, arches and windows are great to frame your main subject; and it helps direct the viewer’s eye to the subject.
Perspective
Perspective is an important aspect of photography that refers to the way in which an image shows depth, distance, and relationships between the elements in your photo.
Some ways to use perspective in your photos include:
- Moving your camera and yourself around
- Zooming in or out, or using different lenses
- Shooting from above or below
- By simply altering your perspective, you can create completely different images from the same scene
To learn more about composition, check out these ebooks by Mads Peter Iversen. Mads is an incredible landscape photographer with a great Youtube channel that I also recommend.
Head over here to see my YouTube recommendations for Landscape Photography.
Section Six – Get Out And Take Photos
Finally, it’s time to get out there with your gear and get shooting – YAY!
You’ve researched your location and arrived at the right time with the best conditions possible.
What do you do now you’re there?
Find Your Composition
You may already know this if you managed to do a scouting mission, or already have your composition in mind.
If not, it’s time to think about those composition guidelines and find your first composition. Consider the elements in the scene and how they contribute to the overall composition. Use the rule of thirds, leading lines, and other compositional techniques to create a balanced and visually appealing image.
Ensure your horizon is straight!
Don’t forget to pay attention to the light and how it is affecting your scene.
Set Up Your Camera And Tripod
Seems obvious I know, but you need to set your camera on your tripod, make sure you’ve got your memory card and battery in, and choose your lens.
Establish your focus, and make sure your lens stabilisation is turned off if you have that option.
Starting Camera Settings
Start with these suggested settings, take a test shot, and adjust as you go:
ISO: 100 (or as low as you can go). Set and forget.
Aperture: Between f8 and f16. This will help you get an image that is sharp front to back. I adjust this to help get the shutter speed I’m looking for, particularly when there is less light.
Shutter Speed: Once I’ve set the ISO and Aperture, This is the setting that I adjust the most to get the exposure that I’m looking for.
Going back to the exposure triangle, when you adjust one element, you will need to adjust one or both of the others to get your correct exposure.
Referring back to earlier when deciding your settings –
Firstly, you need to decide what is the most important thing to capture. Pick the one or two elements that can’t be compromised.
Secondly, adjust the other element(s) accordingly to achieve the correct exposure for your image.
Example One: You’re photographing a waterfall. You want that water to be smooth but with a bit of detail. To achieve this you will need a shutter speed between 0.5 and 2 seconds. This can’t be compromised, so you will need to adjust your aperture and/or ISO to achieve this.
Example Two: You are shooting the ocean at sunrise. You want a grain free image that is sharp and in focus front to back. In this case you will want your ISO to be at around 100 and your aperture between f8 and f11. To achieve the correct exposure you will need to adjust your shutter speed, the only remaining element of the exposure triangle.
TIP – program some basic settings on your camera before leaving home. This can make it easier to get started, particularly if you’re heading out for sunrise and it’s dark!
Review Your Images As You Go
Take your shot and check your camera’s screen and make any necessary adjustments.
Now, your camera’s screen can give you an indication, it’s not always accurate. This can be because the screen itself is backlit. This means that it can look brighter than it really is, particularly in low light.
This is where your histogram comes in.
Understanding The Histogram
A histogram is a visual representation of the tonal values in your image.
At a glance, it enables you to see the amount of dark, light and midtones present in an image.
You can use it to tell if an image is well exposed. This is more accurate than your camera’s screen as it doesn’t change based on the screen brightness, or the conditions you are viewing it in.
Basically, you check the histogram to check that your image contains values from the shadows right through to the highlights.
Ideally, you don’t want the graph pushed right over to either the right or left side.
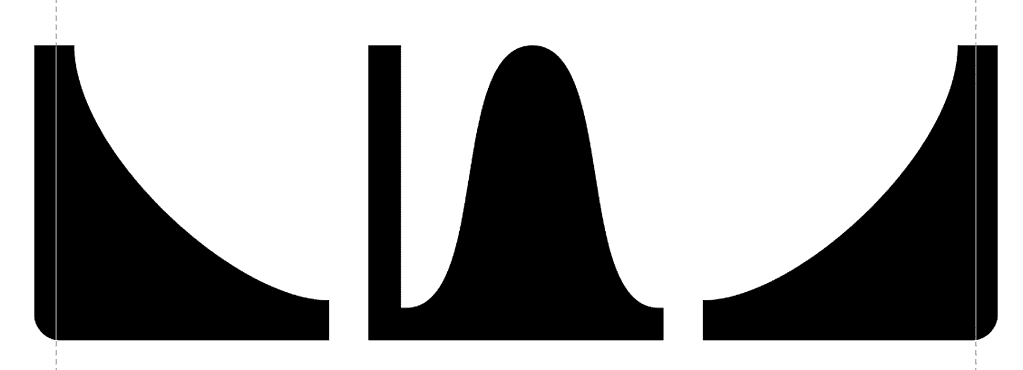
Spikes to the left show that these parts of your image have no detail left in the blacks. Spikes to the right show that those parts of your image have no details left in the whites.
This means that there is a loss of details in those areas of your image. You are trying to achieve an exposure where there are no spikes on either edge of your histogram.
If you see your histogram spiking to the left, you should try increasing your exposure. You will do this by either using a longer shutter speed, reducing your aperture number, or increasing your ISO.
Alternatively, if you see your histogram spiking to the right you need to reduce your exposure. To do this you will either shorten your shutter speed, increase your aperture number, or decrease your ISO.
This can be difficult to achieve in situations such as sunrise where there are both very bright AND dark areas in the scene. This is known as high dynamic range and can be very frustrating for beginner landscape photographers.
While it is ok to have slight spikes on either side of the histogram, you want to minimise this as much as possible. This is where you can experiment with filters to help you darken certain parts of your frame.
Refer to this article by Nisi Filters to get you started with using filters.
It may not be possible to get the correct exposure in one image. The simplest way around this is to take two separate images. One is exposed for the darker areas, and the other for the brighter ones. These two images can then be blended in an editing program such as Photoshop or Lightroom.
While this is not a particularly difficult technique to get started with, it is beyond the scope of this landscape photography guide. This article by Adobe may help you get started with this – Photo Merge In Lightroom.
Take More Images Than You Think You Need
Get that first composition out of the way, then move around, and see what else you can find.
Take lots of photos – that is the beauty of digital photography.
You don’t want to get home and be sorry you didn’t photograph something – you only regret the photos you didn’t take!
NOTE: There are as many ways to do this as there are photographers, so bear in mind I’m just sharing how I approach my landscape shoots.
There’s so much to think about when you’re learning, so I created this prompt sheet you can download for free.
Don’t forget when you’re out in the field – download this Landscape Photo Prompt Sheet (and more) and save it to your phone.
Section Seven – After The Shoot
Once you get home, it’s time to upload your images and see what magic you’ve created.
But don’t forget some basic maintenance for your gear first:
Clean Your Gear
Clean your camera and lenses as you go to keep as much dust or salt off as possible, and clean thoroughly when you get home.
Most cameras these days will cope with a bit of water without long-term issues, but salt will corrode and destroy your camera if not cleaned off as soon as possible.
And this includes your tripod! Even if it’s a waterproof one, you need to give it a good clean to remove all that salt and sand. The easiest way I have found is to extend it fully outside and give it a good hose. Let it dry while it’s still extended before putting it away ready for your next outing.
When travelling and may not have access to a hose, I’ve often used the shower in my accommodation for this. It works a treat!
Post-Shoot Workflow
Establishing a simple post-shoot workflow will ensure your photos are organised, backed up safely and ready to share at any time.
The basic steps to this workflow are:
- Transferring your images from camera to computer
- Importing your images
- Organising and sorting
- Processing
- Backing up
- Printing or publishing your images online
For a complete guide check out this article – Developing A Photograph Workflow.
Section Eight – What Next
I truly hope you’ve found this landscape photography guide helpful and it has given you the bug.
I could have gone on so much longer, but really wanted to focus on the basics.
As I said at the beginning, the goal of this guide was to help you capture sharp, correctly exposed images that you’ll be proud of.
If you’re looking for more inspiration, or more details to shoot different, situation, then check out these other articles:
- Golden Hour Landscape Photography
- Seascape Photography
- Guide to Waterfall Photography
- How To Capture Sunstars
- How To Photograph Autumn Colors: 7 Simple Beginner Tips
- Rainy Day Photography
- Local Photography – Explore Your Own Backyard
- Travel Landscape Photography
- Landscape Photography YouTube Channels – Education And Inspiration
- Editing Tools And Resources
- Building Confidence In Your Photography
- Finding Your Photography Style
- Learning From Photography ‘Fails’
- 7 Important Things That Nobody Tells You About Photography
- Inspiring Photography Ideas To Try
- Creative Photo Printing Ideas
- What I Wish I Learned Earlier
- Photography Tours –
- Revisiting Same Location
- Photography Location Guides
Conclusion
Finally – just get out and do it!!!
There is no better way to learn than to practise, fail, learn from these ‘fails’ – and repeat!
Don’t rush it – landscape photography is usually fairly relaxed (except those few minutes the sky explodes), so don’t pack up and leave until you’ve photographed everything you can think of.
Try not to be disappointed if you don’t get the conditions you were hoping for. You’re still out enjoying our beautiful world, so try and enjoy it and use it to learn new techniques.
Where are you planning on heading out to? Please let me know in the comments below.
I truly hope you’ve enjoyed this post.
That’s it for now – Keep clicking and stay caffeinated
Like this post? PIN it so you can save it for later
Don’t miss a post – sign up Here (if you haven’t already) if you’d like to receive my weekly emails.