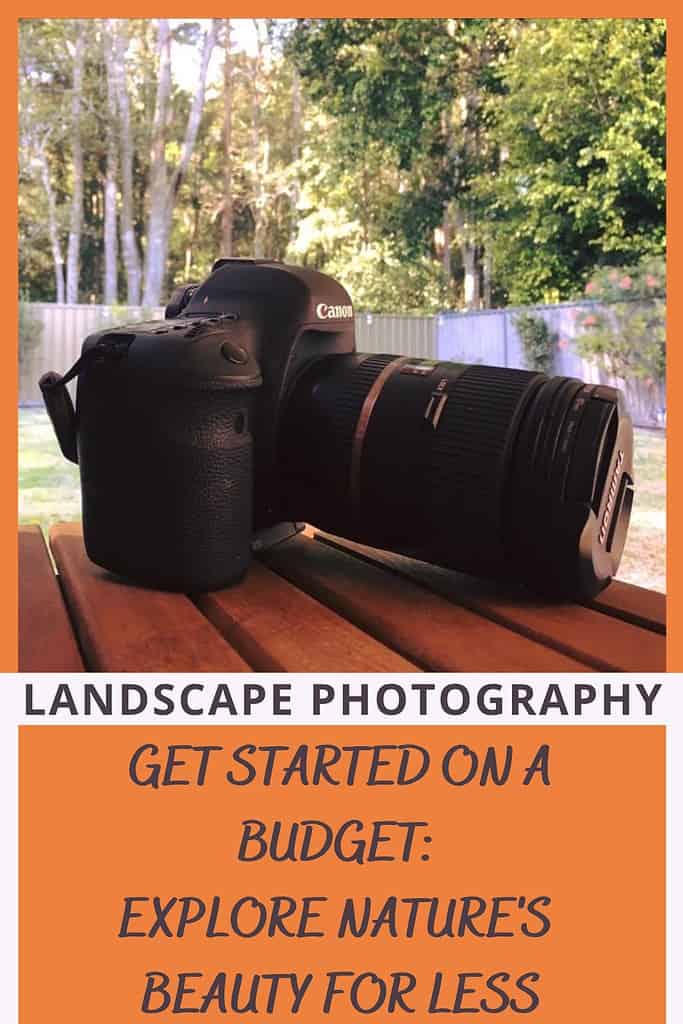
Landscape Photography On A Budget: 9 Best Tips On Getting Started
Welcome to this article all about starting landscape photography on a budget.
If you’re new to photography or looking to improve your skills without spending a fortune, this guide is for you.
You can definitely start with landscape photography on a budget. As cliche as it sounds, photography is like a journey – you don’t need a luxury car to explore new places and discover incredible landscapes. Just like you don’t need expensive gear to capture the beauty of the world around you.
In this article, we’ll walk you through the essential equipment you’ll need for landscape photography without spending a fortune.
We’ll also show you how photographing local to where you live is a great place to start.
And if you’re looking to travel to new places to expand your photography horizons, we’ll provide some budget-friendly tips and techniques to help you get there without breaking the bank.
Starting a new hobby or investing in new gear can be intimidating, but don’t worry – we’re here to help. Our tips and advice will help you take stunning landscape photos without spending a fortune. So let’s get started!

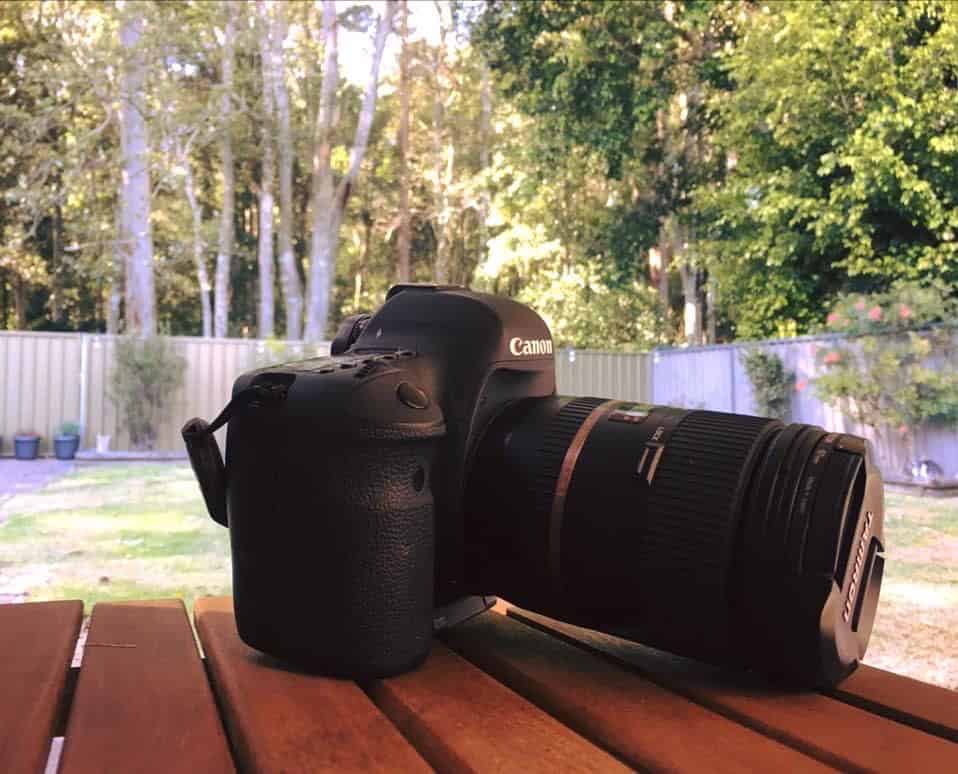
1 – The Photographer Creates the Image, Not the Camera
“It is the photographer, not the camera, that is the instrument.” ~ Eve Arnold (photojournalist). “
This is something that took me way too long to get – All The Gear And No Idea truly was my motto!
You don’t necessarily need the best and most expensive of everything, especially when you’re just starting out! Yes it’s nice to have the extra features that come with more expensive gear, but you don’t need it when you’re just starting.
Choosing the right camera for landscape photography is crucial, but with so many options out there, it can be tough to know where to start. Luckily, it doesn’t have to be complicated.
Here are some key factors to consider when shopping for a camera that won’t break the bank:
Sensor: Full-frame sensors are the gold standard for landscape photography as they capture more detail and offer better dynamic range. But if you’re just starting out, don’t feel like you need to break the bank. Crop sensors are more affordable and can still produce great results.
Resolution: While a high-resolution camera will give you more detail in your images, it’s not the be-all and end-all. Don’t get bogged down in the numbers game – a camera with around 16-24 megapixels should be more than enough for most beginner landscape photographers.
Features: Look for a camera that has features that are important for landscape photography. This might include things like weather-sealing (important if you’re shooting in rainy or dusty environments), high ISO performance (which allows you to shoot in low light without sacrificing image quality), and long exposure capabilities (great for capturing flowing water or starry skies).
Battery life: There’s nothing worse than running out of juice in the middle of a shoot, so make sure your camera has a decent battery life.
Weight and size: If you’re planning on travelling distances to your shooting locations, you might not want to be lugging around a heavy camera. Look for a camera that’s lightweight and compact, but still offers good image quality.
Image-capture experience: Is the camera easy to use? Are the buttons and dials intuitive? Does the camera feel comfortable in your hands? Is the viewfinder high-quality? These factors can all impact your ability to capture great landscape photos.
Remember, the camera is just a tool – it’s your creativity and vision that make the difference in your landscape photography. So don’t get too hung up on specs and numbers – choose a camera that feels good in your hands and inspires you to get out and shoot.
TIP – Don’t discount second hand gear. If you do your research you can find some really good bargains!
2 – The Essential Tripod
As you probably already know, a tripod is a must-have tool for landscape photography. It helps to keep your camera steady and avoid blurry shots. Here’s what you need to know about choosing a tripod for your landscape photography adventures:
Stability: When choosing a tripod, the most important factor is stability. You want a tripod that can support the weight of your camera and lens and keep it steady even in windy conditions. Look for tripods with sturdy legs made of aluminium or carbon fibre that can lock into place.
Height: You’ll also want to consider the height of the tripod. Ideally, you want a tripod that can be adjusted to your height, so you don’t have to hunch over or strain your neck to see through the viewfinder. Look for tripods with adjustable legs and a centre column that can be extended.
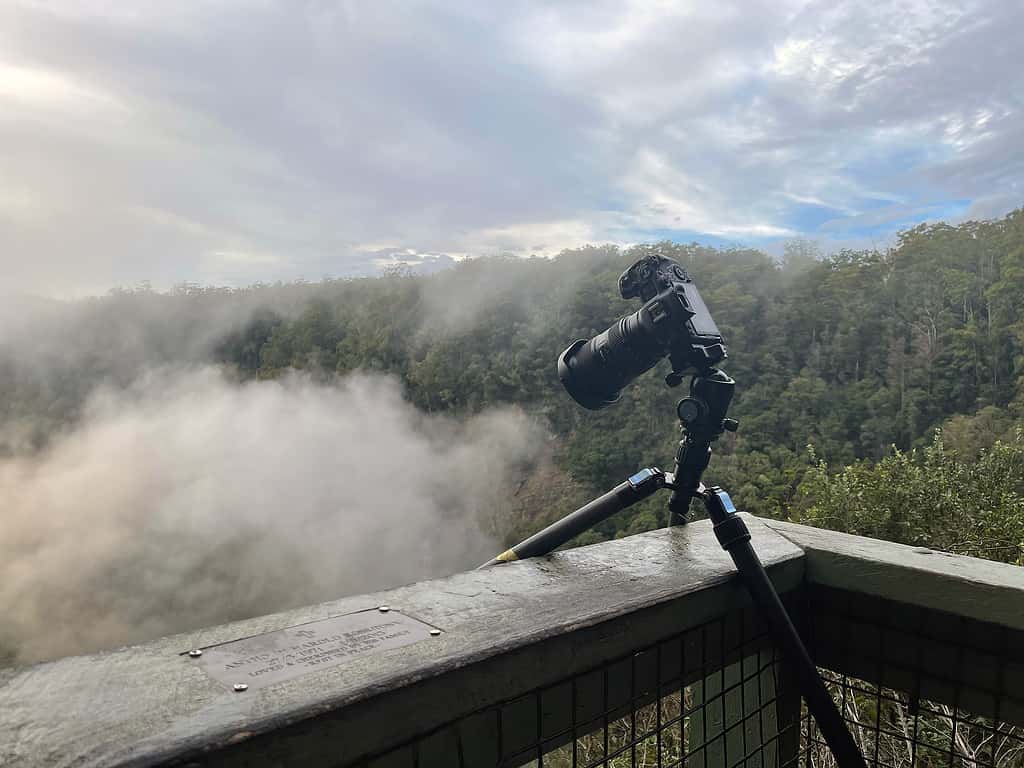
Weight: Another important factor is weight. A heavy tripod may be more stable, but it can also be a hassle to carry around. Look for a tripod that is lightweight and portable, so you can easily take it with you on your photography adventures.
While a good tripod may cost more, it’s worth considering investing in one if you plan to photograph in different weather conditions or windy locations. By taking care of a quality tripod, it can last you for many years, making it a smart long-term investment for landscape photography.
A good tripod can be expensive, but you don’t necessarily need to break the bank. Look for a tripod that fits your budget but still meets your needs. This is one thing that is worth investing in if you plan to be out in any kind of weather or windy conditions.
A decent tripod will last you for years if it’s quality and you take care of it.

3 – What Lenses you REALLY Need
Just like the camera body, lenses do play a crucial role in landscape photography. But with so many options out there, it can be overwhelming to know where to start.
Here are the three main types of lenses that are generally chosen for landscape photography:
Wide-angle lenses: These lenses are like magic wands for landscape photography. They have a short focal length, which allows you to capture a wide field of view. Basically, you’ll be able to fit more of the beautiful scenery in your shot.
Mid-range lenses: These lenses are great for capturing more detailed shots of landscapes. With a medium focal length, you’ll be able to capture more texture and patterns in your photos, like waterfalls or waves.
Telephoto lenses: If you’re wanting to zoom in on specific elements within a landscape, telephoto lenses are the way to go.
With a long focal length, these lenses allow you to capture distant landscapes and give you the ability to isolate specific elements within the landscape, like a single tree or rock formation.
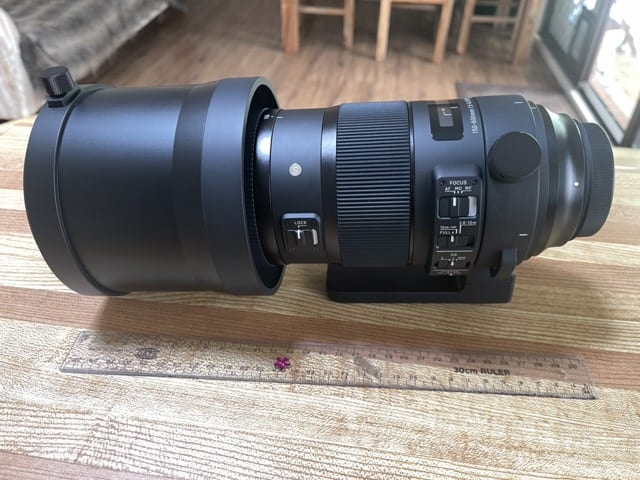
As a beginner, you’ll want to think about which type of lens you’ll need most based on the landscapes you’ll be shooting. If you’re wanting to capture those wide, epic landscapes, a wide-angle lens is your best bet.
I hear you, you want them all. I get it, but lenses can be expensive.
So, if you’re looking for a budget-friendly option, a good mid-range zoom lens is a great all-around choice. With a focal length like 24-70mm or 18-55mm, you’ll have enough versatility to capture a wide range of landscapes without breaking the bank.
4 – Filters – Yes or No
I’m sure you’ve already heard about filters and how ‘amazing’ they are. But, are they necessary for your photography?
In this section, we will discuss the three types of filters that beginner photographers on a budget should consider:
Circular Polarising Filter: This filter reduces glare and reflections from non-metallic surfaces, such as water and foliage, which can create a more vivid and clear image. It can also enhance the colour saturation and contrast of your images, especially in sunny conditions.
Neutral Density Filter: This filter reduces the amount of light that enters the camera without altering the colours in the scene, allowing you to use slower shutter speeds even in bright conditions. It can be useful for capturing movement in water or clouds, or creating motion blur in your images.
Graduated Neutral Density Filter: This filter is especially useful for capturing high-contrast scenes, such as a bright sky and dark foreground. It reduces the brightness of the sky while keeping the foreground well-exposed, creating a more balanced exposure.
While there are many other types of filters available, these three filters are essential for landscape photographers who want to create stunning images on a budget.
But if I had to prioritise them and buy one at a time, the first one would definitely be the CPL. This would be closely followed by a Neutral Density Filter.
For the full run down on all of these filters, including the pros and cons of each, check out this article: Do You Need Filters For Landscape Photography.
Investing in quality filters will not only enhance the quality of your images but also save you time and effort in post-processing.
5 – Keep Accessories to a Minimum
With countless photography accessories available, it’s easy to get overwhelmed and end up with gear you don’t need.
Don’t get caught up in the hype. Focus on these essential accessories that will help you get you started:
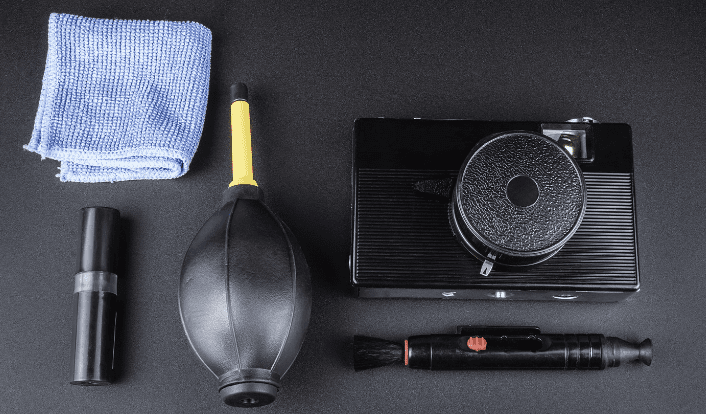
Cleaning kit: Keeping your camera and lenses clean is important for capturing sharp, high-quality images. A cleaning kit typically includes a blower, lens pen, microfiber cloth, and cleaning solution. It doesn’t have to be expensive, and you can find some affordable options that work just as well.
Spare batteries: Running out of battery in the middle of a shoot can be frustrating, so it’s always a good idea to have a spare battery or two on hand. You don’t necessarily need to buy the official brand batteries, but make sure they’re compatible with your camera.
Memory cards: You’ll need a memory card to store your photos, so it’s essential to have a spare one in case you fill up the first one. Make sure to check your camera’s memory card compatibility before purchasing one.
L-bracket: An L-bracket is a handy accessory that allows you to switch between portrait and landscape orientation without having to adjust your tripod. It’s not a must-have accessory, but it can make your workflow more efficient.

Torch: A small torch or flashlight can be useful when shooting in low light conditions or for light painting. You can find affordable options that fit in your camera bag.
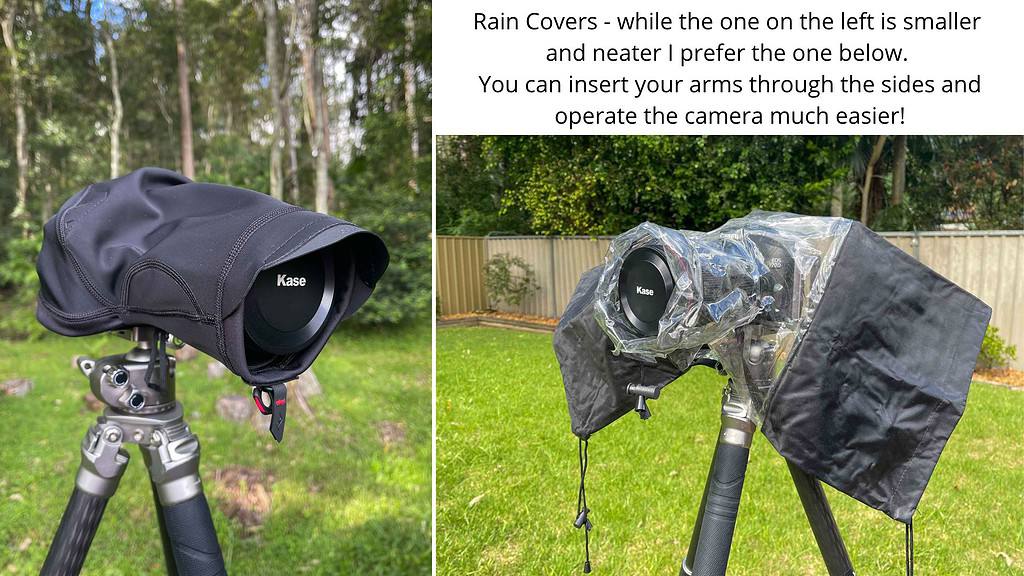
Weather protection: Weather can be unpredictable, so it’s always a good idea to have some protection for your gear. A rain cover or waterproof bag can keep your camera and accessories dry in wet conditions.
With these essential accessories in your bag, you’ll be on your way to taking amazing landscape photos. When you’re ready to move forward, take a look at our article “Landscape Photography Accessories Every Photographer Should Have In Their Bag” for even more tips and recommendations to improve your skills.
6 – Explore your own Backyard
As a new landscape photographer on a budget, you may be eager to travel far and wide in search of stunning vistas.
However, there is a lot to be said for exploring your local area first. Not only will this save you money on travel expenses, but it will also give you a chance to hone your photography skills in a familiar setting.
Start by researching your local area and identifying any parks, nature reserves, or scenic spots nearby. Then, plan some visits to these places with your camera in tow. You might be surprised at the beauty that can be found right in your own backyard.
Exploring your local area also gives you the opportunity to revisit locations at different times of day or in different weather conditions. This can help you develop your skills in working with different lighting and weather situations, and also allow you to capture a variety of images of the same location.
So get out there and start exploring your local area! You never know what hidden gems you might find, and you’ll be building your photography skills at the same time.
Recommended Reading: Local Photography – Play Tourist Where You Live
7 – Budget Travel Tips
As a new landscape photographer on a budget, it’s important to think about how you can travel without spending too much money. Here are some tips that can help you save some cash while still enjoying your travels:
- Choose your destination carefully. Try to pick places that you can drive to instead of flying, because flying can be really expensive. If you have to fly, look for good deals on airline tickets and book early to save money.
- Travel during off-peak times. This means you should visit places when there are fewer tourists around. That way, you’ll be able to save money on things like flights, accommodation, and activities. Plus, you’ll be able to enjoy the scenery without having to fight for space with other people.
- Stay in affordable accommodation. Instead of staying in fancy hotels, look for cheaper options like Airbnb, hostels, or even camping. Do you have a friend you could travel with and share the costs?
- Cook your own meals. Eating out can be really expensive, so try to cook your own meals as much as possible. You can buy food from local markets and grocery stores to save money. Plus, cooking your own food can be a fun and rewarding experience!
Remember, you don’t have to spend a lot of money to have a great travel experience.
By following these tips, you’ll be able to save money and still have an amazing time exploring new places and taking beautiful photos of the landscapes you discover!
8 – Editing on a Budget
Editing your landscape photos is an important step in creating stunning images. Here are some tips for editing on a budget:
Use free editing software. There are free editing software options available such as GIMP, along with free trials from a lot of the paid programs as well. These programs offer many of the same features as paid software without the cost.
Some of the free trials you can try include Photoshop and Luminar. These free trials can give you the opportunity to see which suits your needs better.
You can definitely get started with editing on a budget. With a little trial and error with some different programs, and progress as your budget and skills grow.
9 – Free Online Resources
As a new landscape photographer on a budget, you might not have a lot of money to spend on expensive courses.
Luckily, there are many free online resources available to help you improve your photography skills and take your photos to the next level. Here are some of the best free online resources for landscape photographers:
YouTube tutorials: YouTube is a great place to find free tutorials on all aspects of landscape photography, from composition to editing.
Here are my recommendations: Best Landscape Photography Youtube Channels
Photography blogs: There are many photography blogs out there that offer tips, techniques and tutorials on landscape photography like this one of course for beginners.
For more inspiration and educational articles I recommend:
By taking advantage of these free online resources, you can improve your landscape photography skills without breaking the bank.
Conclusion
I hope this guide on landscape photography on a budget has inspired you to explore new locations and techniques for capturing stunning shots.
Remember that great photos don’t always require expensive gear.
With the right techniques and a bit of creativity, you can take amazing landscape photos even with just a basic setup.
Don’t be afraid to explore the world around you and discover new locations to capture amazing shots.
And if you have any questions or comments, I’d love to hear from you.
Feel free to leave a comment below and let me know your thoughts or share your own tips for taking great photos on a budget.
That’s it for now – Keep clicking and stay caffeinated
Like this post? PIN it so you can save it for later
Other Posts You Might Like:
- How To Choose The Perfect Camera: A Beginner’s Guide
- First 10 Things To Do When You Get a New Camera
- How To Choose The Best Tripod For Landscape Photography
- Lenses For Landscape Photography: How To Choose What’s Best For You
- Landscape Photography Accessories
- Skill and Vision in Landscape Photography: More Important Than Gear
- Best Apps for Planning and Scouting Landscape Photography Locations
- Local Photography – Play Tourist Where You Live
- Revisiting Same Location
- How To Find Photography Locations
Don’t miss a post – sign up Here if you haven’t already
Note – Unless otherwise stated, all photos are mine and remain my copyright images – Sam Wilson Photography.