15 Tips to Improve Your Landscape Photography Composition
Landscape photography is a wonderful way to capture the beauty of the natural world and create stunning images that showcase its many wonders.
But achieving the perfect shot can be challenging as I’m sure you’ve discovered. It’s not as simple as just snapping a picture of a pretty scene – don’t we all wish!
Understanding the basics of exposure is essential for capturing a good photo. But it is the composition of the image that can truly make it stand out.
To really capture the essence of a landscape, it’s important to understand composition. Composition refers to how the elements within an image are arranged and affects the final result. It truly can be the difference between an ordinary snapshot and a truly impressive image.
For beginners, learning about composition may seem intimidating, but don’t worry. With the right tips and techniques, it can be a fun and rewarding experience.
In this article, we’ll explore 15 essential tips that will help you improve your landscape photography composition skills. This will help you capture stunning images that showcase the beauty of nature.
So if you’re looking to take your landscape photography to the next level, read on. You will discover some great tips that will help you create beautiful and engaging images.

1 – Scoping Out the Scene: Discovering Your Composition
When you first arrive at a location for landscape photography, it can be tempting to try and capture everything in one shot. However, this approach can quickly lead to feeling overwhelmed by the sheer beauty and diversity of the scene in front of you.
Unless you’re taking panoramic images, which involve stitching together multiple shots, it’s difficult to capture the complete essence of the scene in a single frame. Instead, take a moment to scope out the scene and identify the elements that catch your eye.
Walk around the location and observe the landscape from different angles. Look for unique textures, patterns, and shapes that can add visual interest to your photograph. Pay attention to how the light is falling on the landscape and how it affects the mood and atmosphere of the scene.
It’s important to think about the story you want to tell with your photograph. What is the main subject or point of interest you want to capture? Is there a particular feeling or emotion you want to convey through your image?
By answering these questions, you can begin to narrow down your composition and choose the elements that best support your intended message.
Remember, you don’t have to capture everything in one shot. Consider taking a series of images that capture different aspects of the landscape. This approach can help you create a visual narrative that showcases the beauty and diversity of the location.
TIP: Another useful tool for finding interesting compositions and angles is your mobile phone. Use its camera to take quick snapshots of the scene from different perspectives. This helps you to see what works best before setting up your camera equipment.
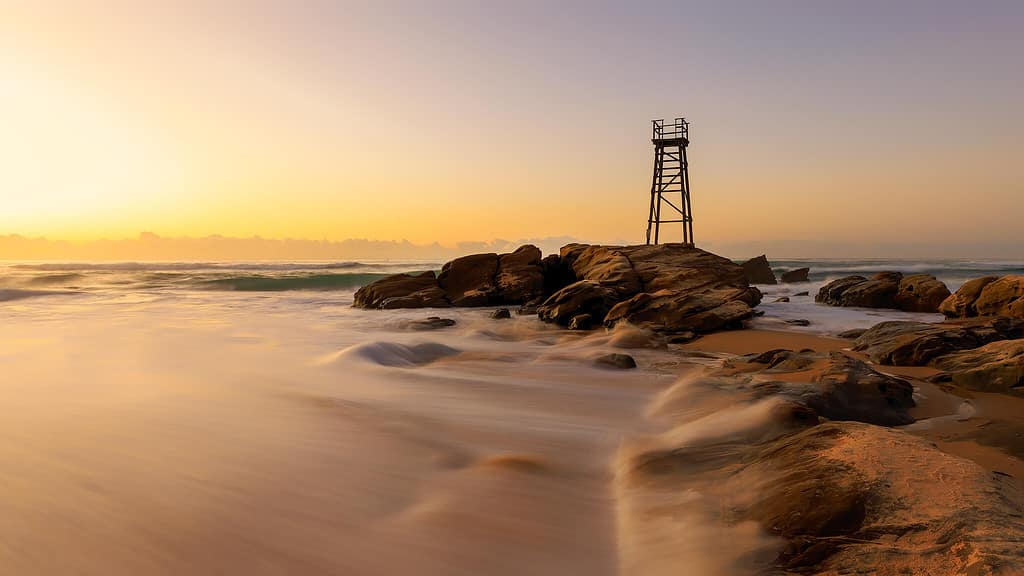
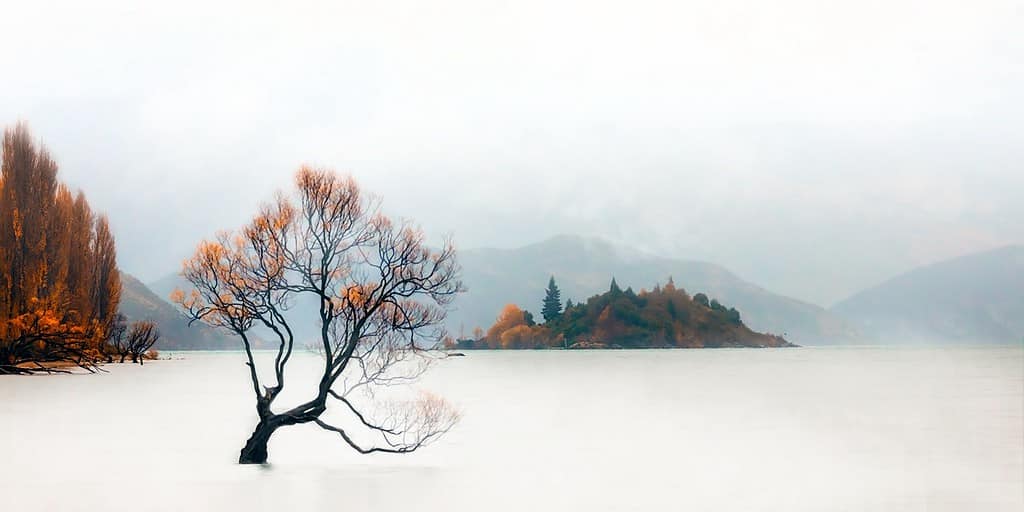
2 – Identifying Your Hero: Finding the Focal Point
Every landscape photo needs a focal point – a main subject that draws the viewer’s attention.
Look for something that stands out from the rest of the scene, such as a tree, a building, or a rock formation. This is your hero.
Once you’ve identified your hero, think about how you can position your camera to capture it in the most effective way possible. Placing the focal point off-centre can create a more dynamic composition and lead the viewer’s eye through the photo.
Keep in mind that the focal point doesn’t have to be the only subject in the photo. Including other elements in the composition can help add context and tell a story.
However, be careful not to overcrowd the photo and distract from the focal point.
Remember, the focal point should be the hero of your photo and create a sense of visual interest.
3 – Vary Your Compositions: Move Around the Scene
When I first started, I was guilty of staying in one spot and taking endless photos from the same angle. It wasn’t until I started exploring different perspectives and moving around the scene that I realised the true potential of the location.
So, my advice to you is to move around and experiment with different compositions.
Even small changes in your position can make a big difference in the overall feel of your image.
It’s amazing how a few steps to the left or right can completely change the elements in your shot.
Moving around also allows you to take advantage of different lighting and shadows in the scene. As the sun moves across the sky, the light and shadows on the landscape will change. This provides new opportunities for unique and visually striking compositions.
By exploring different compositions, you’ll be able to create a diverse and interesting set of images from each location. So, don’t make the same mistake I did. Get out there, move your feet, and see what you can create!

4 – Think Grand and Intimate: Nail Your Main Composition Then Get Creative
When you arrive at a stunning location, it’s easy to feel overwhelmed by the whole scene in front of you.
It’s important to take a step back, assess the surroundings, and then focus on nailing your main composition. This could be a sweeping vista, a dramatic sky, or a unique feature that draws your attention.
Once you’ve captured your main shot, don’t be afraid to get creative and explore the smaller details of the scene.
This is where the “think grand and intimate” approach comes into play. It’s about finding the balance between capturing the grandeur of the landscape and the intimate details that make it unique.
To achieve this, try moving in closer to the landscape and looking for interesting patterns, textures, and shapes. These details can provide a fresh perspective and add depth and interest to your images.
Remember, there’s no right or wrong way to approach your composition, so take your time and experiment with different ideas.
And don’t be afraid to try something new or push the boundaries of traditional landscape photography. It’s the unique and creative shots that will set your images apart and leave a lasting impression on your viewers.
So, think grand and intimate, and let your creativity flow!
5 – The Importance of Foreground, Midground, and Background in Landscape Photography Composition
When it comes to creating a dynamic and visually engaging landscape photo, it’s important to consider the foreground, midground, and background elements in your composition. These three elements can help create a sense of depth and provide context to your photo.
The foreground is the area closest to your camera, and it’s often where you’ll place your primary subject or focal point.
Adding foreground elements like rocks, flowers, or grass can help create a sense of depth and lead the viewer’s eye into the photo.
The midground is the area between the foreground and background, and it helps to connect the two. This can be anything from a river or a road to a line of trees or a field.
Finally, the background is the area furthest from your camera, and it can be anything from a mountain range to a dramatic sky. Including a background element can help add scale and drama to your photo.
Remember, the key to using foreground, midground, and background effectively is to create a sense of depth and provide context for the viewer. Experiment with different elements and perspectives to find the composition that works best for your photo.
6 – Simplifying Your Composition: Less is More
When it comes to capturing stunning landscape photos, simplicity can often be the key.
In landscape photography composition, it’s important to avoid clutter. Focus on the elements that truly enhance the overall aesthetic of the photo.
This is where the phrase “less is more” truly applies.
A great way to simplify your composition is by using a wide aperture, which will blur the background and create a shallow depth of field.
This technique can help to draw attention to your subject and create a sense of separation from the rest of the scene.
Another way to simplify your composition is by limiting the number of elements in your photo. Instead of trying to capture everything in the scene, focus on a few key elements that tell a story and create a sense of visual interest.
Remember, simplicity is often the key to an effective composition in landscape photography.
A clean and simple composition can often be more impactful than a busy one.
By simplifying the scene to just one or two main elements, you can create a stronger and more impactful composition.
7 – Check Your Edges to Avoid Unwanted Surprises
By keeping your composition clean and uncluttered, you can draw the viewer’s eye to the main focal point of your shot.
But there’s a danger in getting too caught up in the moment and forgetting to check your edges. It’s all too easy to accidentally cut off an important element of the scene or include unwanted distractions that detract from the overall impact of your image.
To avoid this, take a few moments to carefully scan the edges of your frame before you press the shutter button. Make sure there are no distracting elements, such as stray branches or unwanted clutter, creeping into the shot. And don’t forget to check the corners of the frame to ensure you’re not accidentally cutting off an important part of the scene.
Another useful tip is to shoot a bit wider than you actually need, giving yourself a bit of room to crop in post-processing. This can be especially useful if you’re not entirely sure about the final composition of the shot, or if you need to make adjustments to the image later on.
So, remember to keep things simple, and always check your edges before you shoot. By doing so, you can avoid unwanted crops and create more impactful images that truly capture the beauty of the landscape.
8 – Keeping it Straight: The Importance of a Level Horizon
Ah, the dreaded crooked horizon – a classic rookie mistake that I, embarrassingly enough, made for way too long.
A level horizon is crucial in landscape photography. Use the grid lines on your camera’s screen or viewfinder to make sure your horizon is straight. A crooked horizon can be distracting and take away from the overall quality of the photo.
You’d think it would be an easy thing to get right, but it’s surprisingly tricky to judge by eye alone. Luckily, I finally got over this hurdle when someone showed me how to use the level in my camera. Who knew such a simple tool could make such a big difference?
So, if you’re anything like me (and let’s be honest, I hope for your sake you’re not), don’t rely on your eyes to judge the level of the horizon. Take advantage of those handy grid lines on your camera’s screen or viewfinder instead. Trust me, your landscape photos will thank you for it.
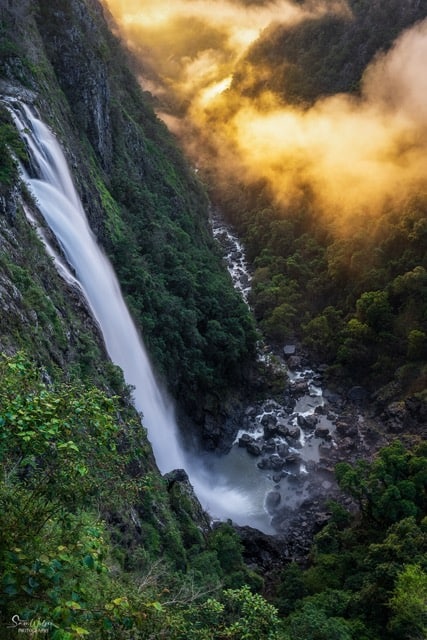
9 – Camera Settings and Composition: Finding Balance
When it comes to landscape photography composition, finding the right balance between your camera settings and your overall vision is crucial. By adjusting your camera settings, you can enhance your composition and bring out the best in your scene.
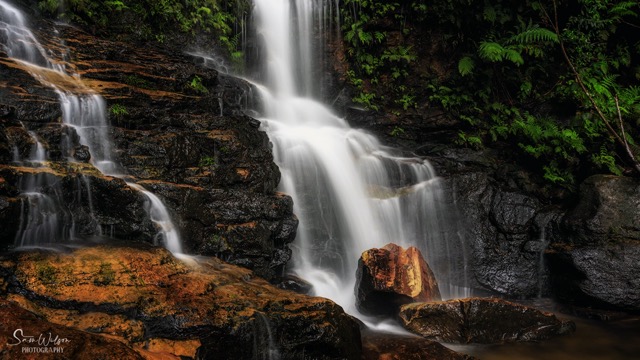
For instance, if you’re photographing a waterfall, using a slower shutter speed can create a silky smooth effect that highlights the flow of the water. On the other hand, if you’re capturing a bird in flight, using a fast shutter speed can freeze the motion and create a dynamic sense of energy in your composition.
It’s also important to consider your aperture settings. A wide aperture can create a shallow depth of field and draw attention to your main subject, while a smaller aperture can create a greater depth of field and capture more detail in your scene.
Lastly, don’t forget to adjust your ISO settings. Using a low ISO can help reduce noise and create a cleaner, more polished look, while a high ISO can be useful in low light situations.
Finding the right balance between these camera settings and your composition is key to creating stunning landscape photos that truly capture the beauty of the world around us. So don’t be afraid to experiment with different settings and see what works best for your unique vision.
If you’d like to learn more about recommended camera settings for landscape photography, then check this article out: Camera Settings For Landscape Photography: Complete Guide.
10 – Using Leading Lines: Leading the Eye
Leading lines are like little arrows in your landscape photos, pointing your viewer’s eyes straight towards your focal point. It can be anything from a river, a path, a fence, or even a line of trees.
The key is to position yourself and your camera to take advantage of these lines to create a sense of depth and visual interest.
For example, let’s say you’re photographing a beautiful mountain range. Look for a leading line in the foreground, like a winding river or a snaking road, that leads the viewer’s eye towards the majestic mountains in the distance.
Or if you’re in a forest, try finding a line of trees that creates a pathway for the viewer’s eye to follow towards the main subject of your photo.
But be careful not to overdo it with leading lines. They should enhance your composition, not distract from it.
So make sure the lines you choose work well with the rest of the elements in your photo.
11 – Experimenting with Angles and Distances: Playing with Perspective
Playing with perspective is one of the most exciting ways to add a creative touch to your landscape photography.
By experimenting with different angles and distances, you can change the way the viewer sees the scene and create a unique viewpoint that stands out.
For instance, if you’re photographing a beach, why not get down low and capture the waves crashing on the shore from a different perspective?
Or if you’re taking a picture of a city skyline, try finding a higher vantage point to capture the city from a bird’s-eye view. The possibilities are endless, and the results can be truly amazing.
Another way to play with perspective is by tilting your camera and creating diagonal lines, which can add a sense of movement and energy to your composition.
This technique works especially well when photographing natural elements like waterfalls or rivers.
By tilting your camera, you can capture the flow and movement of the water, adding an extra dimension to your photo.
Remember, the key to mastering perspective in your landscape photography composition is experimentation. Don’t be afraid to try different angles and heights until you find the one that works best for your scene.
12 – Finding Symmetry: Balancing Your Composition
Symmetry is a powerful tool to create balance and harmony in your landscape photography. To achieve symmetry, you want to make sure that the elements in your photo are aligned in a balanced and orderly way.
One way to do this is by using the grid lines on your camera to ensure that the horizon is level. You can also look for a strong central point of interest to anchor your composition around, like a mountain peak or a tree.
A great example of symmetry in landscape photography is a reflection of a mountain range in a lake. By positioning your camera to centre the reflection and making sure the horizon is level, you can create a sense of balance and tranquillity.
Alternatively, you could capture a perfectly symmetrical row of trees by positioning yourself so that they are perfectly aligned and using the rule of thirds to create a visually balanced composition.
Remember, the key is to experiment and find what works best for the particular landscape you’re shooting. With some practice and creativity, you’ll be able to create striking and harmonious compositions that stand out from the crowd.
13 – Creating a Frame Within a Frame: Framing Your Subject
One way to enhance your landscape photography composition is by creating a frame within a frame. This technique can be achieved by using natural elements, such as trees or arches, or man-made objects, such as windows or doors, to frame your subject.

Another way to create a frame within a frame is by using a shallow depth of field. By focusing on your subject and blurring the foreground and background, you can create a natural frame that draws the viewer’s eye towards the subject. This technique works especially well with portrait or close-up shots, where the subject is the main focus of the image.
For instance, when taking a photo of a mountain range, you could use the natural surroundings, such as trees or rocks, to create a frame within the frame. This can add depth and visual interest to the photo while keeping the focus on the main subject of the image.
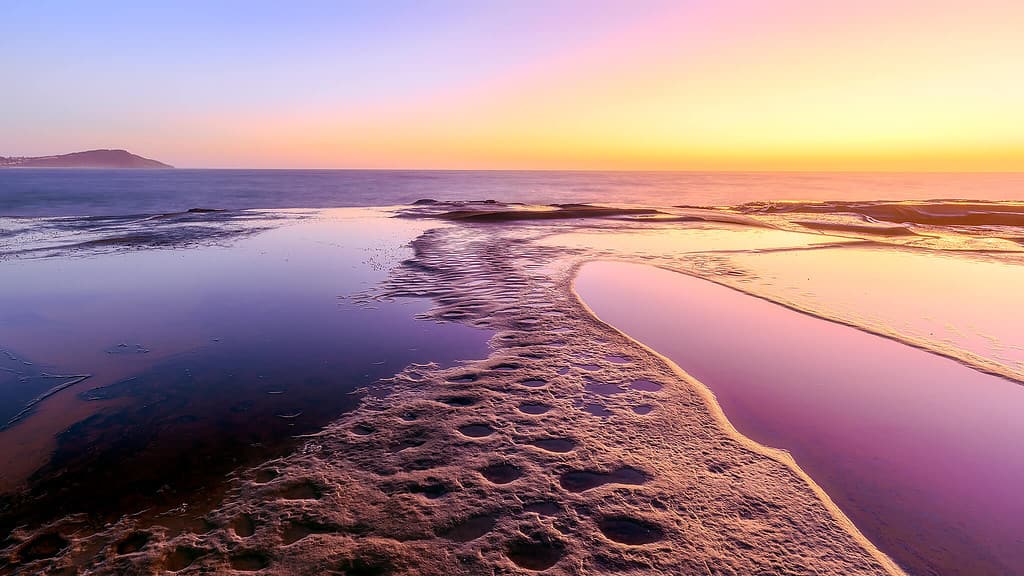
14 – Paying Attention to Colour: The Importance of Color in Composition
When it comes to creating stunning landscape photos, paying attention to colour is essential. Colours have the power to evoke different moods and emotions in viewers, and understanding how to use them effectively can help you create more impactful images.
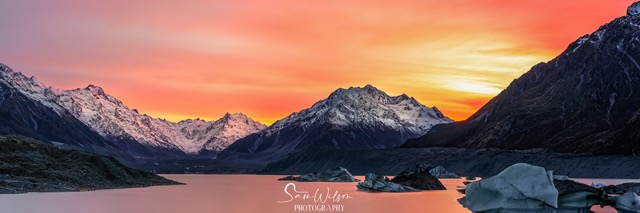
One way to use colour in landscape photography composition is to consider the colour temperature of your scene.

Warm colours like red, orange, and yellow can add energy and excitement to your photos, while cool colours like blue and green can create a sense of calm and tranquillity.
By paying attention to the colours in your scene, you can use them to create a mood that fits the feeling you want to convey.
Another way to use colour in landscape photography composition is to look for complementary colours. Complementary colours are those that are opposite each other on the colour wheel, such as blue and orange or yellow and purple. Using these colours together in your composition can create a sense of balance and harmony.
Contrasting colours can also be used to create a striking composition. Contrasting colours are those that are opposite each other on the colour wheel, or those that are very different from each other.
By placing contrasting colours together in your composition, you can create a focal point that draws the viewer’s eye and adds visual interest to your image.
It’s also important to pay attention to the saturation and intensity of your colours.
Highly saturated or intense colours can be overwhelming and detract from your subject, while muted or desaturated colours can create a more subdued and calming atmosphere.
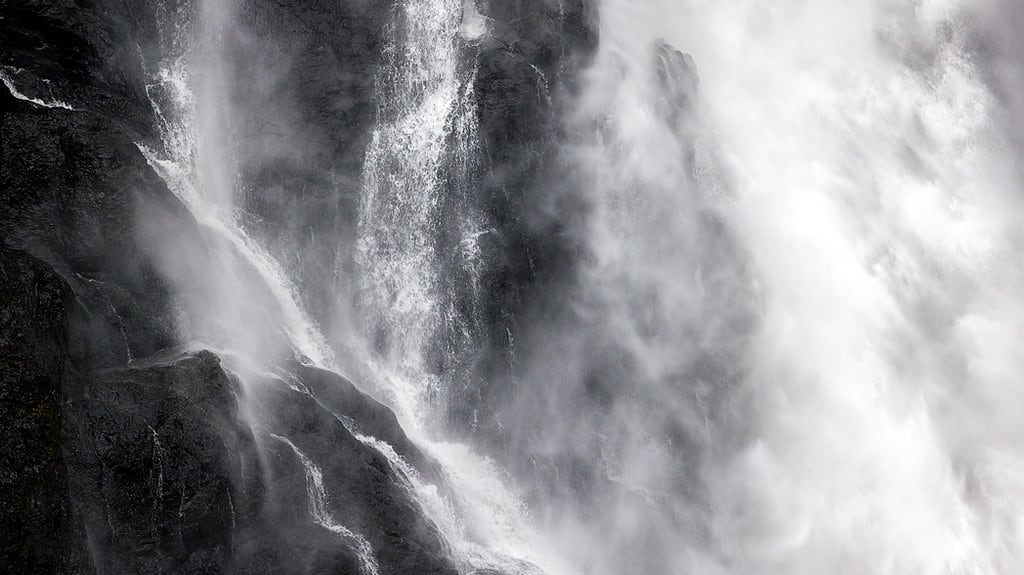
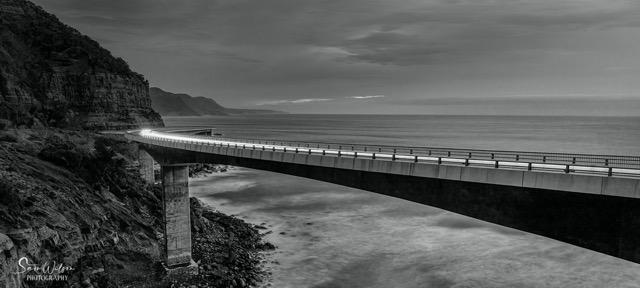
Monochrome in Landscape Photography Composition: Using Black and White
While colour is an important aspect of landscape photography composition, don’t discount shooting in black and white. Black and white images can create a sense of timelessness and can be used to convey a mood that may not be possible with colour.
When shooting in black and white, it’s important to pay attention to the tonal range of your scene. This means paying attention to the different shades of grey that make up your image. By playing with contrast and shadows, you can create a more impactful black and white image.
One of the benefits of shooting in black and white is that it allows you to focus more on elements in your composition and disregard colour to a certain degree.
Without the distraction of colour, you can pay more attention to the shapes, lines, and textures in your scene, allowing you to create a more compelling composition.
Amateur Photography has written a great article diving deep into black and white photography: Complete guide to black and white photography.
In conclusion, colour is an important aspect of landscape photography composition, and paying attention to the colours in your scene can help you create more impactful images. However, black and white photography can also be a powerful tool for creating stunning landscape photos, and experimenting with different tonal ranges can help you create more compelling compositions.
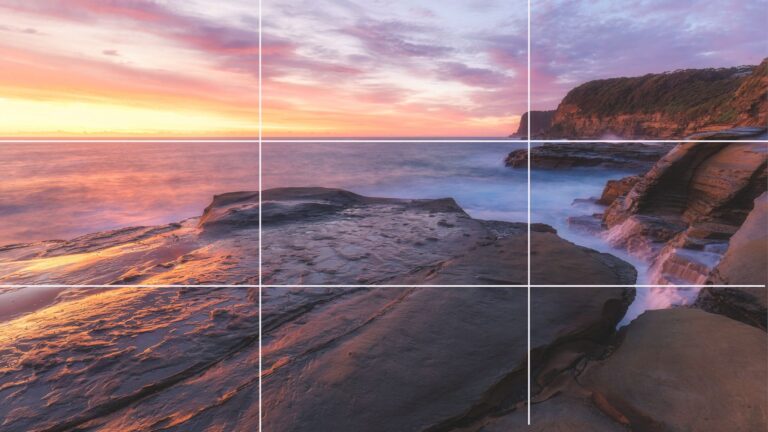
15 – The Rule of Thirds And Beyond: Dividing Your Frame
The rule of thirds is a basic but essential technique to learn as a basis for your landscape photography composition skills. It involves dividing your frame into thirds horizontally and vertically, creating intersecting points where your subject can be placed. This helps to create a more dynamic and balanced image.
To use this rule, divide your frame into thirds both vertically and horizontally, creating nine equal parts. Then, position the main elements of your photo along those lines or at their intersections, rather than in the centre of the frame. This creates a more dynamic composition and helps to draw the viewer’s eye towards your subject.
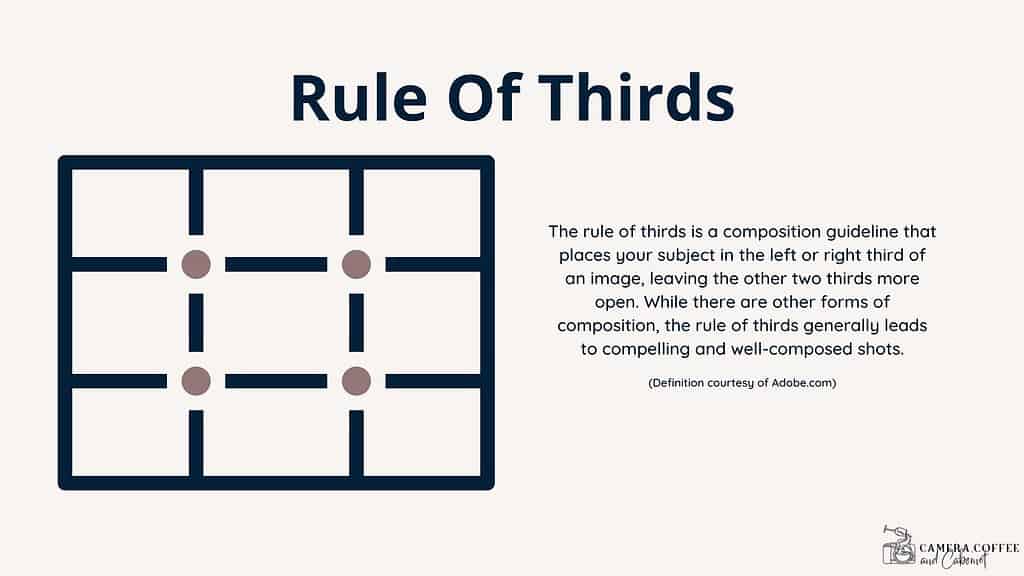
For example, imagine you are taking a photo of a beautiful mountain range. Instead of placing the mountains directly in the centre of your frame, try aligning them along one of the horizontal lines using the rule of thirds. You could also place a tree or other element of interest along one of the intersection points, which will draw the viewer’s eye towards it and create a more balanced composition.
However, there are also other composition techniques that can be used to add interest and variety to your photos.
The Golden Ratio and More
The golden ratio, for example, involves dividing your frame into a ratio of approximately 1:1.618, creating a spiral that can draw the viewer’s eye towards your subject. Leading lines, on the other hand, involve using lines within the image to guide the viewer’s eye towards the subject.
Another popular grid is the Diagonal Method, which divides your frame diagonally with a line from one corner to the opposite corner. This method can be particularly effective for creating a sense of movement or leading the viewer’s eye through the image.
Experimenting with different grids can help you create more interesting and dynamic compositions, so don’t be afraid to try them out and see what works best for your subject and style.
Breaking the Rules: Embracing Creativity in Landscape Photography Composition
While understanding the basic principles of composition, such as the rule of thirds, is essential for improving your landscape photography, it’s also important to remember that rules are meant to be broken.
As you become more comfortable with these principles, it’s time to start experimenting and pushing your boundaries to create unique and creative compositions.
Don’t be afraid to try new things, such as using unconventional angles or breaking the symmetry of your scene.
These techniques can add a dynamic and interesting element to your photos. You may even discover your own personal style and vision as a landscape photographer.
Remember, there are no hard and fast rules when it comes to composition.
While the principles of landscape photography composition provide a solid foundation, it’s ultimately up to you to explore and create your own style.
So don’t be afraid to break the rules and try something different. Who knows, you may even surprise yourself with the stunning results.
If you’re looking for some inspiration to get those creative juices flowing, check out my photography project. It’s full of ideas that include composition projects to get you going!

FAQ’s
What Is Composition In Landscape Photography
Composition in landscape photography refers to the arrangement of elements within a scene to create an attractive and visually pleasing image. It’s like creating a visual story by deciding what to include and exclude from the frame.
There are many techniques and guidelines to follow, such as the rule of thirds, leading lines, and framing, but at the end of the day, it’s the photographer’s artistic vision that determines the final composition.
What Makes A Strong Landscape Composition?
A strong landscape composition is one that effectively communicates the photographer’s intent and captures the viewer’s attention.
There are many different elements that can contribute to a strong composition, including the use of leading lines, the rule of thirds, and the incorporation of foreground interest. However, the most important factor is the photographer’s ability to create a visual narrative that draws the viewer into the scene and evokes a sense of emotion or awe.
A strong composition should also be well-balanced, with all elements in the frame working together to create a cohesive and impactful image.
How do I know when I’ve achieved good composition in my landscape photography?
There is no one-size-fits-all answer to this question, as good composition is subjective and can depend on various factors such as your personal style, the subject matter, and the mood you are trying to convey. However, a well-composed landscape photograph typically has a clear focal point, a sense of balance and symmetry, leading lines or other visual cues to guide the viewer’s eye, and an overall sense of harmony.
What is the best way to position my camera for landscape photography composition?
The best way to position your camera depends on the specific scene and composition you are trying to achieve.
However, a good starting point is to use the rule of thirds as a guide and to look for leading lines, natural frames, and other elements that can add interest and depth to your composition.
You may also need to adjust your camera height and angle to find the best vantage point and avoid distracting elements in the foreground or background.
Can I break the “rules” of composition in landscape photography?
Yes, you can definitely break the rules of composition in landscape photography to create a more unique and creative image.
However, it’s important to understand the “rules” first so that you know how and why you are breaking them.
By experimenting with different compositions and techniques, you can develop your own style and find what works best for you.
How can I improve my sense of colour in landscape photography composition?
Improving your sense of colour in landscape photography takes practice and experimentation.
Start by paying attention to the colours in your scene and how they interact with each other. Look for complementary colours, contrasting tones, and other colour relationships that can enhance your composition.
You may also want to experiment with post-processing techniques such as adjusting colour saturation or using colour filters to create different moods and effects.
Conclusion
And that’s it! You’ve learned 15 tips to improve your landscape photography composition.
By applying these techniques and experimenting with different ideas, you’ll soon find your own unique style that captures the beauty of the world around you.
Remember, photography is a journey of continuous learning and growth.
It’s easy to get overwhelmed with all the information, but don’t worry if you don’t get it right the first time, or even the second or third. Keep practising, take risks, and don’t be afraid to make mistakes – it’s all part of the process.
Now, I’d love to hear from you. Which of these tips did you find most helpful in improving your landscape photography composition? Share your thoughts and experiences in the comments below.
And don’t forget to keep exploring the wonderful world of landscape photography composition!
I truly hope you’ve enjoyed this post.
That’s it for now – Keep clicking and stay caffeinated
Like this post? PIN it so you can save it for later
Other Posts You Might Like:
- Landscape Photography Guide For Beginners
- Camera Settings For Landscape Photography
- Do You Need Filters For Landscape Photography
- Photographing Waterfalls: Tips For New Photographers
- Essential Landscape Photography Gear
- Skill and Vision in Landscape Photography: More Important Than Gear
- Landscape Photography Composition: The Power of Leading Lines
- Landscape Photography Composition: How to Use the Rule of Thirds
- Layers and Foreground Interest In Landscapes For Better Photos
Don’t miss a post – sign up Here if you haven’t already
Note – Unless otherwise stated, all photos are mine and remain my copyright images – Sam Wilson Photography.