Camera Settings For Landscape Photography: Complete Guide
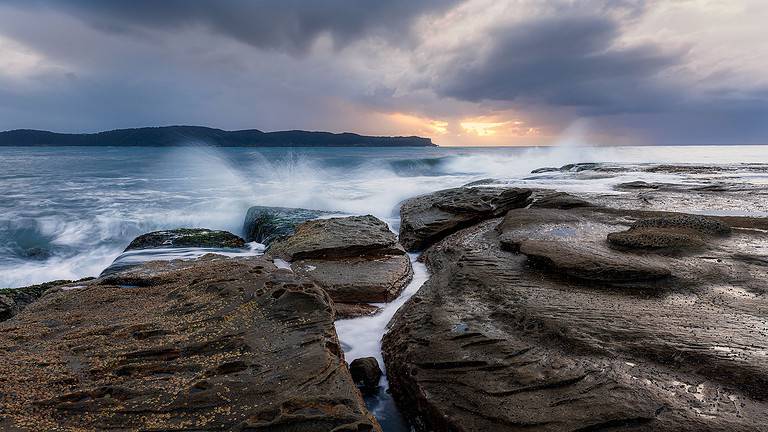
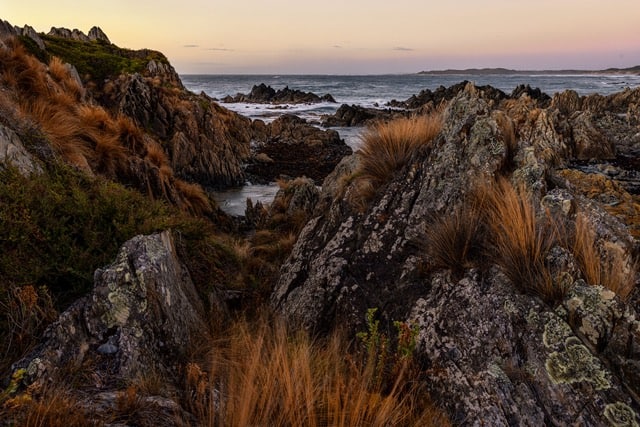
One of the things I love about landscape photography is being out there in nature. Whether that’s at a beach or waterfall, there’s something special about trying to capture the beauty of nature. Particularly at sunrise where I watch the sun pop its first rays over the horizon.
But let’s be honest, photographing these breathtaking scenes can be quite challenging when you’re first starting out. There is so much to take in and so many settings to think of.
The lighting conditions constantly change with the weather and time of day. This means you need to adjust your camera settings accordingly.
So, I’d love to share with you the best landscape photography settings you should be using to capture those stunning shots.
The best camera settings for landscape photography start with shooting in manual mode. Set your ISO to the lowest possible, Aperture to F8-F11, and adjust your shutter speed to achieve the correct exposure. Your settings will change depending on the scene, so let’s look in more detail.
Understanding how to adjust your camera’s settings can make a big difference in the outcome of your photos. From aperture to shutter speed, ISO to white balance, there are many settings to consider when taking landscape photos.
In this article, we will explore the essential camera settings for landscape photography and provide steps to help you elevate your photography skills.

Set and Forget – Before You Go
There are some things you can prepare before you even leave home. This will give you less things you need to think about when you’re out in the field. There is so much to try and remember!
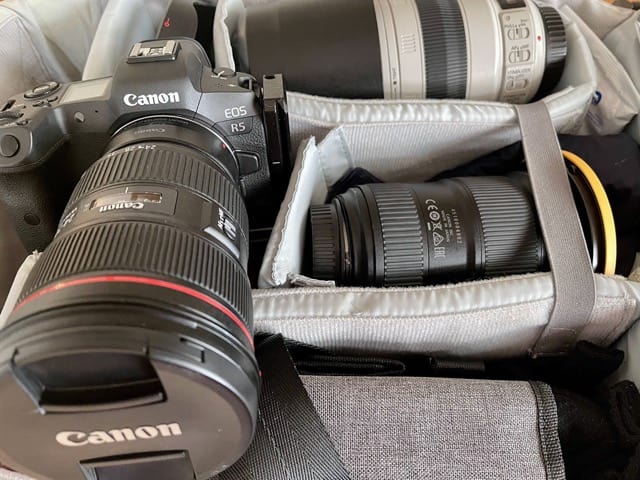
Pack Your Gear
- Camera and Lens
- Tripod
- Filters – consider a Circular Polarising Filter and a couple of Neutral Density Filters. These are not essential but highly recommended. Read more: Do You Need Filters For Landscape Photography?
- Camera Bag – keep your gear dry, protected and organised.
- Torch – leave this out and have it in your pocket if you’re heading out for sunrise.
- Cleaning Kit – essential for keeping your lenses clean at all times.
- Spare Battery – don’t leave home without one.
- Memory Cards – make sure you have one in your camera and at least one spare.
- Decent Shoes – super important to keep you and your gear upright!
Check out this guide on Essential Landscape Photography Gear for a complete rundown on all essential equipment.

Program Camera Settings Before Packing
These are the basic settings you can set when you first buy your camera.
Make life easier for yourself when you are out shooting and program the following in:
- Format: RAW
- Mode: Manual
- White Balance: Auto
- Metering Mode: Evaluative
- Autofocus: Single Point
- Drive Mode: Single shot with a 2-second timer
Setting up the above before you leave home means you really just need to worry about setting up your composition. Then pop your camera on your tripod and adjust your shutter speed before you start shooting.
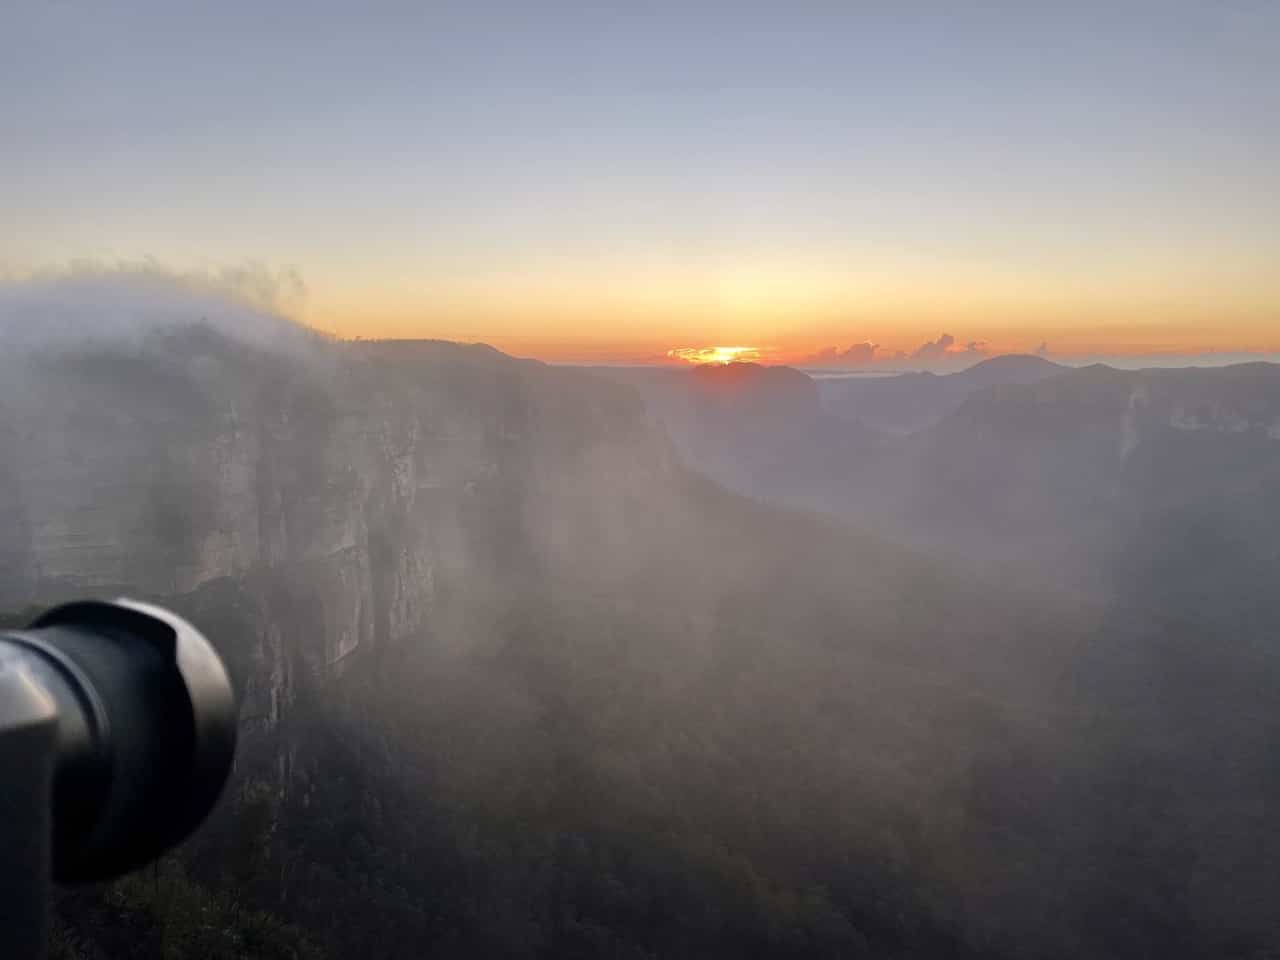
This can be particularly helpful when you are shooting a sunrise (my favourite) as it’s usually dark. Anything you can do beforehand is a bonus.
Now onto a breakdown of each of the essential settings to master for landscape photography.
Shoot in RAW
If you love your landscape photography like I do, you will want your images to be of the highest quality with the most detail possible. That’s why shooting in RAW format is the way to go.
RAW files contain more information than JPEG files, giving you greater control over the final image’s quality, detail, and size. This makes them a great choice for landscape photography, where you want to capture as much detail as possible.
RAW files may initially appear less colourful or saturated than other formats like JPEG. This is because the camera doesn’t apply as much processing to the file.
However, with some basic post-processing, you can easily enhance the colour, detail, and dynamic range of your RAW images. This will result in stunning and vibrant final images.
So, shooting in RAW format can help you capture the best possible landscape photos.
For an in depth comparison of RAW versus JPEG, check out this article by Photography Life
Use Manual Mode
Exploring Camera Modes for Landscape Photography
There are several options that can be helpful in landscape photography, including both manual and automatic modes.
In Auto mode, the camera makes all the exposure and focus adjustments for you. This can be useful if you’re new to photography or want to quickly capture a scene without worrying about settings.
Another automatic mode is Aperture Priority mode. This allows you to control the aperture setting while the camera automatically adjusts the shutter speed for correct exposure. This mode can be helpful in landscape photography when you want to control the depth of field in your photos.
Similarly, Shutter Priority mode lets you control the shutter speed while the camera automatically adjusts the aperture for correct exposure. This mode can be useful when you want to control the motion in your photos.
Best Choice –
Manual mode gives you complete control over all settings. This gives you complete control over the exposure and create a specific look or mood in your photos.
Shooting in manual mode can seem intimidating at first, but it’s a crucial step in improving your photography.
When you shoot in manual mode, you have complete control over your camera’s aperture, shutter speed, and ISO. These are the three key factors that determine how your image will look. This means that you can adjust these settings based on the specific lighting conditions and creative vision for your shot.
This is especially important when photographing landscapes where lighting conditions can change quickly.
Water and clouds, for example, can create movement in the scene, making it difficult for your camera’s automatic settings to accurately capture the moment. With manual mode, you have the flexibility to adjust your settings on the fly and create the perfect exposure.
Another benefit of shooting in manual mode is that it allows you to truly understand how your camera works and how different settings can impact your images.
By experimenting with different settings and seeing the results for yourself, you’ll start to develop an intuition for how to achieve the look you want in any given situation.
This knowledge will help you take your photography skills to the next level. You’ll be able to confidently capture the shots you want, no matter the conditions.
Setting the White Balance
White balance is a camera setting that helps you adjust the colours in your photos to make them look more natural.
If the white balance setting on your camera is not set correctly, the colours in your photos may look too warm or too cool.
It’s important in landscape photography because you want the colours in your photos to look like they do in real life. By using the correct white balance setting, you can make your photos look more accurate and pleasing to the eye.
White balance settings for landscape photography are:
Daylight/Sunny: This setting is best used when shooting in daylight or bright sunlight.
Cloudy: This setting is best used when shooting on a cloudy day, as it adds warmth to the photo.
If you are shooting in RAW format, leave the White Balance set to auto in your camera as this is easy to adjust in post-processing.
If you are shooting in JPEG it isn’t as easy to adjust later, so it is best to determine the correct white balance when you are shooting.
As I shoot in RAW, I just leave the white balance set to auto: one less thing to think about when out in the field.
Metering Mode: Evaluative
Metering Modes At A Glance
These are a feature on your camera that helps you get the right exposure for your photos.
When you take a photo, your camera looks at the light in the scene to figure out the best settings to use, like how long to keep the shutter open or how much light to let in. Metering modes let you control how the camera looks at the light in the scene.
There are three main metering modes you can choose from:
Matrix/Evaluative: This mode looks at the light across the entire scene and figures out the best settings based on that information. It’s a good general-purpose mode that works in most situations.
Centre-weighted: This mode looks mostly at the light in the centre of the scene and uses that information to help set the right exposure. It’s good when you want to take a photo of something in the centre of the scene.
Spot: This mode looks at a very small area in the centre of the scene, usually around 1-5% of the whole frame. It’s useful when you want to take a photo of something specific in the scene.
Which metering mode you use will depend on the lighting in your scene and what you want your photo to look like. With a bit of practice, you’ll be able to choose the right mode to get the best exposure for your photos.
Evaluative metering is a great metering mode to use in landscape photography because it considers the overall lighting of the scene.
This is especially helpful for landscape photos, which often have a wide range of light and shadow. This mode calculates the best exposure for the entire scene, and it’s another thing that I tend to set and forget.
Keep in mind that the camera doesn’t always get this right, so it can be good to experiment with different metering modes to see which one works best for a particular scene.
Single Point Autofocus
It is so important to have your camera focus on the right place in your photos. The best way to make sure you’re focusing on the right place, and not let your camera decide, is to set your Focus Mode to Single Point Autofocus.
In Single Point Autofocus mode, you can choose exactly where in the scene you want the camera to focus. This is helpful in landscape photography because you may want to focus on a specific point, such as a tree or a rock formation, rather than letting the camera decide where to focus.
Additionally, Single Point Autofocus can be more accurate than other autofocus modes in certain situations. For example, if you have a scene with a lot of similar subjects, such as a field of flowers, other autofocus modes may struggle to determine where to focus.
Single Point Autofocus allows you to choose exactly where you want the camera to focus, which can lead to sharper, more detailed photos.
Overall, setting your Focus Mode to Single Point Autofocus is a great way to have more control over your focus in landscape photography and can help you get sharper, more detailed photos of your chosen subject.
Basic Focus Modes
When it comes to focus modes in cameras, there are a few common options to choose from that can be helpful in landscape photography.
One option is Single Point Autofocus, which allows you to choose exactly where in the scene you want the camera to focus. This is helpful when you have a specific subject you want to focus on.
Another option is Continuous Autofocus, which is useful when you want to track a moving subject, such as a bird or animal. This mode will continuously adjust the focus as the subject moves, ensuring that it stays sharp throughout the shot.
Finally, there’s Manual Focus, which gives you complete control over the focus of the lens. This mode can be helpful when you want to be very precise with your focus, such as in macro photography.
Choosing the right focus mode for landscape photography depends on the specific situation and what you want to achieve in your photos. It’s always a good idea to experiment with different focus modes and see which one works best for your needs.
Drive Mode: Single shot with a 2-second timer
Set your Drive Mode to Single shot with a 2-second timer to take one shot at a time without you touching the camera when it takes the shot.
This is a good idea for landscape photography because it can help reduce camera shake and ensure sharper photos.
When you press the shutter button to take a photo, there is a chance that your finger movement can cause the camera to shake, resulting in a blurry photo.
By using the 2-second timer, you can take your finger off the shutter button and let the camera stabilise before the photo is taken. This can help reduce camera shake and result in sharper, clearer photos.
Also, using the Single shot mode means that the camera will only take one photo at a time. This can be helpful in landscape photography because it allows you to take your time to compose your shot and ensure that everything is in focus before taking the photo.
Overall, setting your Drive Mode to Single shot with a 2-second timer is a great way to reduce camera shake and ensure sharper, clearer photos in landscape photography.
Now it’s time to look at each of the settings to adjust when you’re at your shoot.
Different Drive Modes Snapshot
When it comes to drive modes in cameras, there are a few common options that can be useful in landscape photography.
One option is Single shot mode, which means the camera will take one photo at a time. This can be helpful in landscape photography when you want to take your time to compose the shot and ensure that everything is in focus before taking the photo.
Another option is Continuous shooting mode, which allows the camera to take multiple photos in quick succession while you hold down the shutter button. This can be useful in situations where you want to capture movement or action, such as waves crashing on the beach or a bird taking off in flight.
There’s also a Self-Timer mode, which delays the shutter release by a set amount of time, usually 2-10 seconds. This can be helpful in landscape photography when you want to reduce camera shake and ensure sharper photos.
Overall, choosing the right drive mode for landscape photography depends on the specific situation and what you want to achieve in your photos. It’s always a good idea to experiment with different modes and see which one works best for your needs.
Time To Shoot: Adjust As You Go
Now that we’ve covered everything you can set up before you go, it’s time to get into the specific camera settings you’ll need to know to capture beautiful landscape photos.
So, let’s take a look at the different camera settings you’ll need to know, such as ISO, Aperture, Shutter Speed, and more.
Although it may seem overwhelming at first, don’t be discouraged – with practice and patience, you’ll become more comfortable adjusting these settings in different situations.
Just remember, these settings will vary depending on the lighting conditions and environment you’re shooting in, so don’t be afraid to play around with them until you find the perfect balance.
ISO: 100 or the lowest your camera will go
Using the lowest possible ISO is a must in landscape photography to ensure clean, noise-free images and capture the highest dynamic range possible.
This one really is non-negotiable, especially when using a tripod (which is an absolute essential).
The dynamic range of your photos is important when capturing landscapes, as it’s the difference between the brightest and darkest areas of your image. By using the lowest ISO possible, you’ll be able to capture the full range of tones, resulting in a more detailed and dynamic photo.
Plus, keeping your ISO low can help reduce noise and graininess in your photos, especially in low-light conditions. This will give you cleaner and sharper images that really showcase the beauty of the landscape.
A little more info on ISO
ISO refers to the camera’s sensitivity to light.
A low ISO means the camera is less sensitive to light, resulting in cleaner and sharper images. On the other hand, a high ISO means the camera is more sensitive to light, which can result in grainy or noisy photos, especially in low-light conditions.
Using a low ISO can also help you achieve more accurate and natural colours in your landscape photos. By minimising the camera’s sensitivity to light, you reduce the risk of overexposure and colour distortion, resulting in a more accurate representation of the scene you’re capturing.
One thing to keep in mind is that using a low ISO typically requires longer shutter speeds when you are photographing landscape photos in low light (the best time!), which can result in blurry photos if your camera isn’t stable.
That’s where a tripod comes in handy. By using a tripod, you can stabilise your camera and capture sharp, well-defined landscape photos even with longer shutter speeds. More on that soon.
Aperture: F8 to F11
All about Aperture
This is an important setting on your camera that controls the amount of light that enters the lens. Think of it like the pupil of your eye – just like how your pupil dilates to let in more light in a dim room, the camera’s aperture widens to let in more light when it’s dark and narrows to let in less light when it’s bright.
In landscape photography, aperture is especially important because it can help you create the desired depth of field in your photos. Depth of field refers to how much of the image is in focus, from the foreground to the background.
A narrow aperture (or high f-number) will result in a deep depth of field where everything in the scene is in focus, from the flowers in the foreground to the mountains in the distance. This can be great for landscape shots where you want everything to be sharp and in focus.
On the other hand, a wide aperture (or low f-number) will create a shallow depth of field, which is useful if you want to focus on a specific element of the landscape, like a flower or a rock, while blurring the background. This can create a beautiful, dreamy effect in your photos.
It can take some practice to get the hang of using aperture to achieve the desired effect in your landscape photos, but one general rule of thumb is to use an aperture between f/8 and f/11.
This is because, in landscape photography, you typically want most of your image to be in focus, from the foreground to the background. By using an aperture in this range, you can achieve a deep depth of field that keeps everything sharp and in focus.
Of course, this isn’t a hard and fast rule, and you can still experiment with different apertures to achieve different effects, but using an aperture in this range is a good starting point for getting those stunning landscape shots.
Shutter Speed
Now that you’ve set your ISO and Aperture, it’s time to set your shutter speed so you are ready to take your photos.
You should be using a tripod so you can use the speed that is needed to balance your exposure.
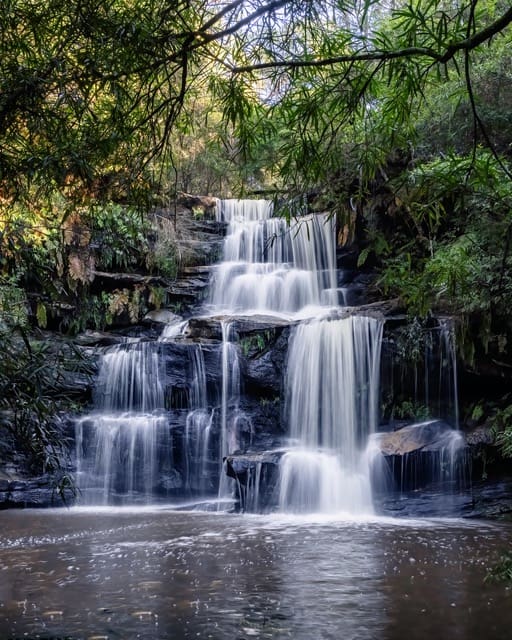
Us landscape photographers love the effect of intentionally blurring moving water or clouds and this is achieved by using a longer shutter speed.
To blur motion, I usually choose a shutter speed between 1/10th and 10 seconds. I choose a speed based on how fast the water is moving and how much texture I want.
Depending on the light and conditions you may also need to adjust your aperture or use filters to get both the shutter speed you want and a correct exposure.
Shutter Speed 101
When you take a photo, your camera’s shutter opens and closes to let light onto the camera sensor. The shutter speed setting controls how long the shutter stays open. This is measured in seconds, or fractions of a second. For example, a shutter speed of 1/60th of a second means that the shutter is open for 1/60th of a second, while a shutter speed of 1 second means that the shutter is open for a whole second.
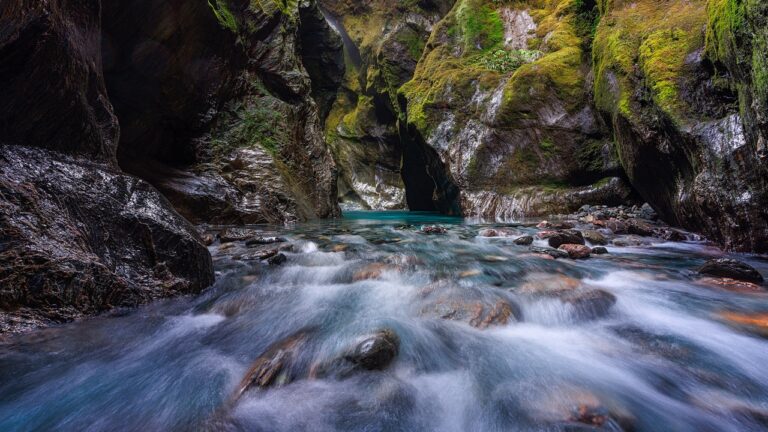
In landscape photography, shutter speed is a crucial element because it can help you capture the beauty of motion. A slower shutter speed can create a dreamy, ethereal effect in a landscape photo.
For example, using a slow shutter speed when photographing waterfalls can create a stunning effect where the water appears silky smooth as it flows over the rocks. Similarly, using a slow shutter speed when photographing clouds can create a beautiful effect where the clouds appear to be moving across the sky.
On the other hand, a faster shutter speed can be used to freeze motion and keep details sharp. This can be useful when photographing landscapes with a lot of movement, such as a windy beach or a field of flowers swaying in the breeze.
In summary, shutter speed is an important setting to understand in landscape photography, as it can help you create stunning and creative images that capture the beauty of motion. By experimenting with different shutter speeds, you can achieve a range of creative effects and add a unique touch to your photos.
Let’s look at putting this all together with the Exposure Triangle …
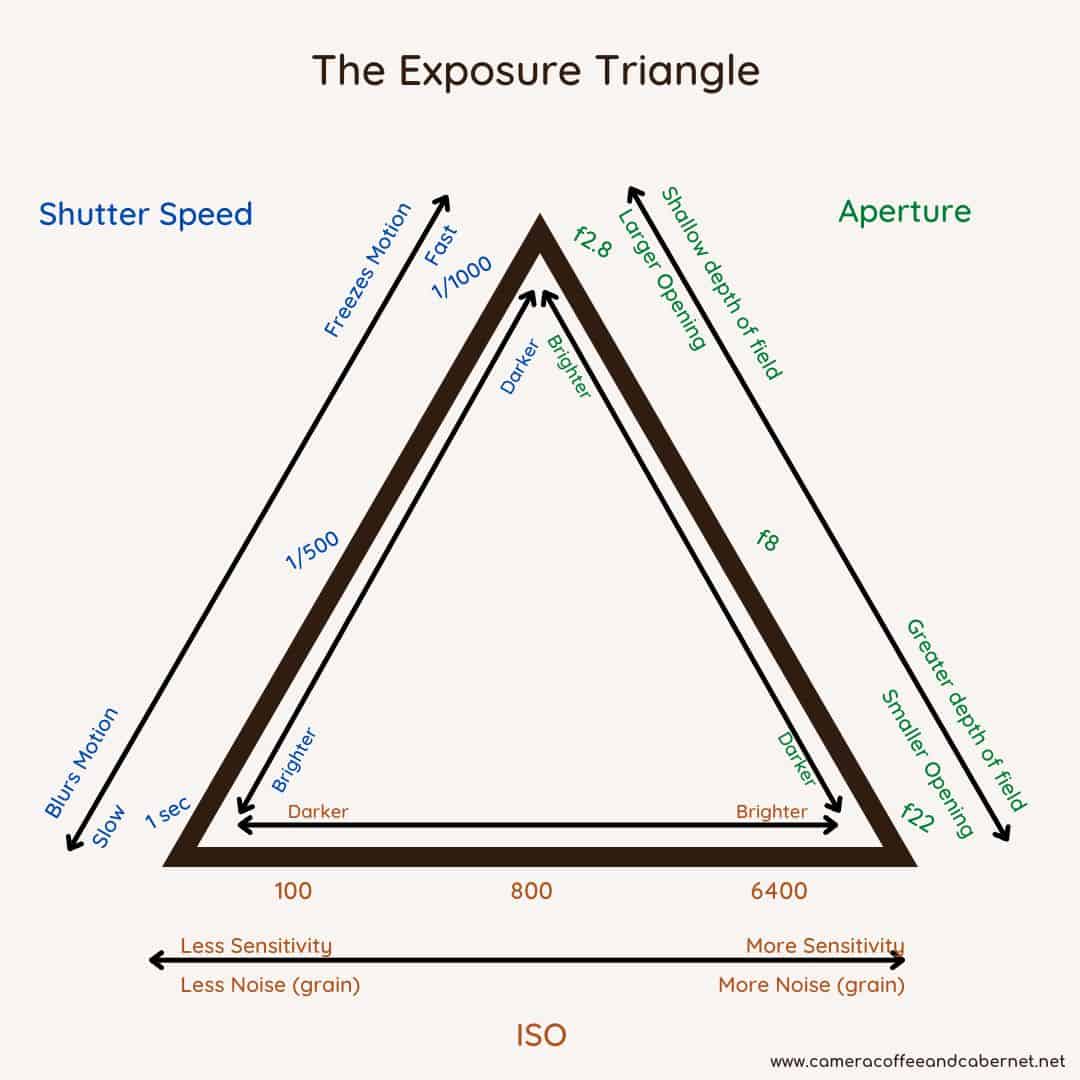
The Exposure Triangle
The exposure triangle is a tool used to show the relationship between the three elements that make up exposure – ISO, Aperture and Shutter Speed.
These three elements work together to determine the amount of light that enters your camera. By adjusting them, you control the exposure to achieve the look you are after in your photos.
So, when you adjust one element, you need to adjust either one or both of the other elements to compensate.
We have started with our ISO at 100, Aperture at say F11 and used our shutter speed to balance out the exposure.
That’s all great in theory but it may not give you the photo you are looking for, so how do you put this into practice when you’re out in the field?
Firstly, you need to decide what is the most important thing to capture. Pick the one or two elements that can’t be compromised.
Secondly, adjust the other element (s) accordingly to achieve the correct exposure for your image.
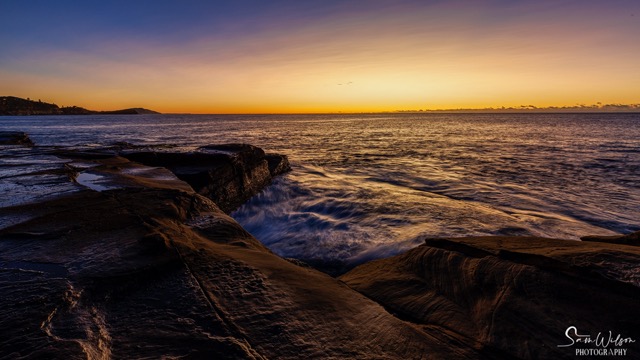
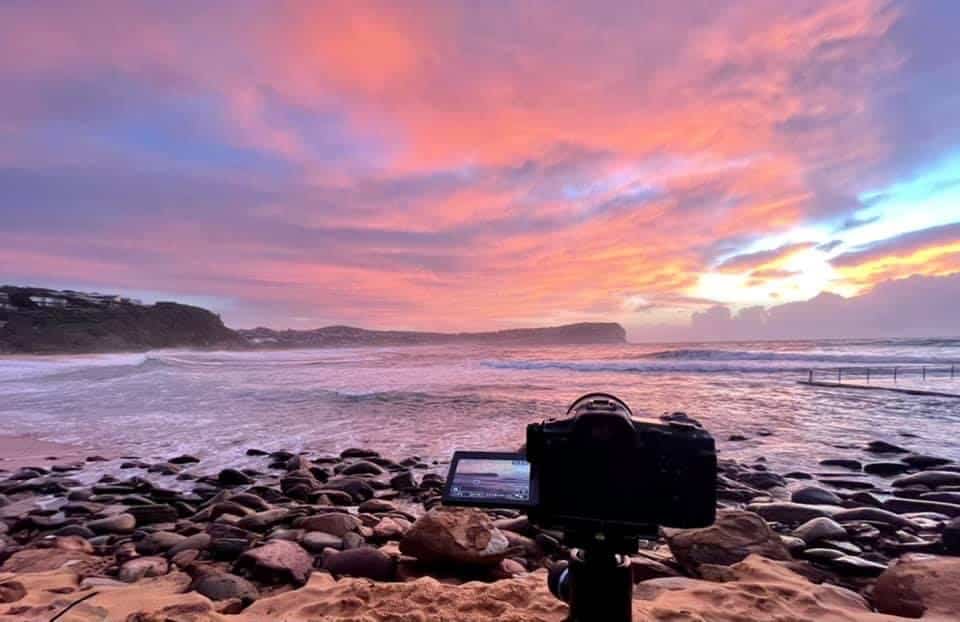
Example One
You are shooting the ocean at sunrise. You want a noise free image that is sharp and in focus front to back. In this case you will want your ISO to be at 100 and your aperture around F11. To achieve the correct exposure you will need to adjust your shutter speed, the only remaining element of the exposure triangle.
Example Two
You’re photographing a waterfall and you want that water to be smooth, but still with a bit of texture. To achieve this you will need a shutter speed between 0.5 and 2 seconds. This can’t be compromised, so you will need to adjust your aperture and/or ISO to achieve this.
This will definitely require some adjusting as you go, so don’t be afraid to take lots of photos. Check the back of your camera after each shot and keep adjusting until you get it right. This is the beauty of shooting digital images – just make sure you have a spare memory card!
But There’s More …
We have finished with the basics, but I thought I’d share some more tips to help you even more.
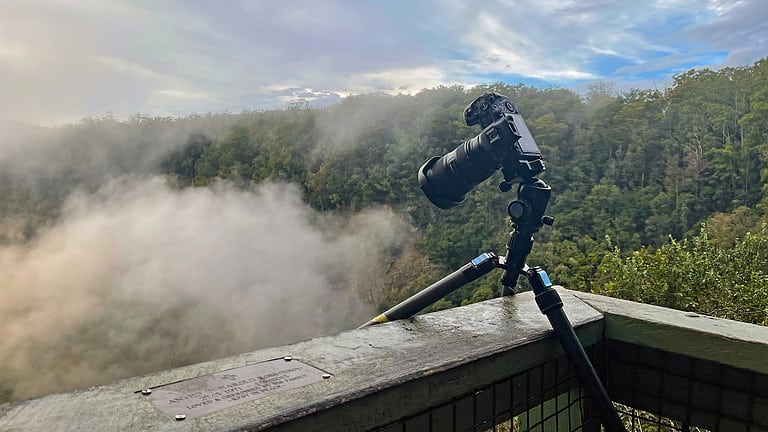
A Tripod Really Is A MUST
It has already been mentioned, but tripods really are essential for landscape photography. This is because it gives you full freedom to use longer shutter speeds for those beautiful long exposure photographs.
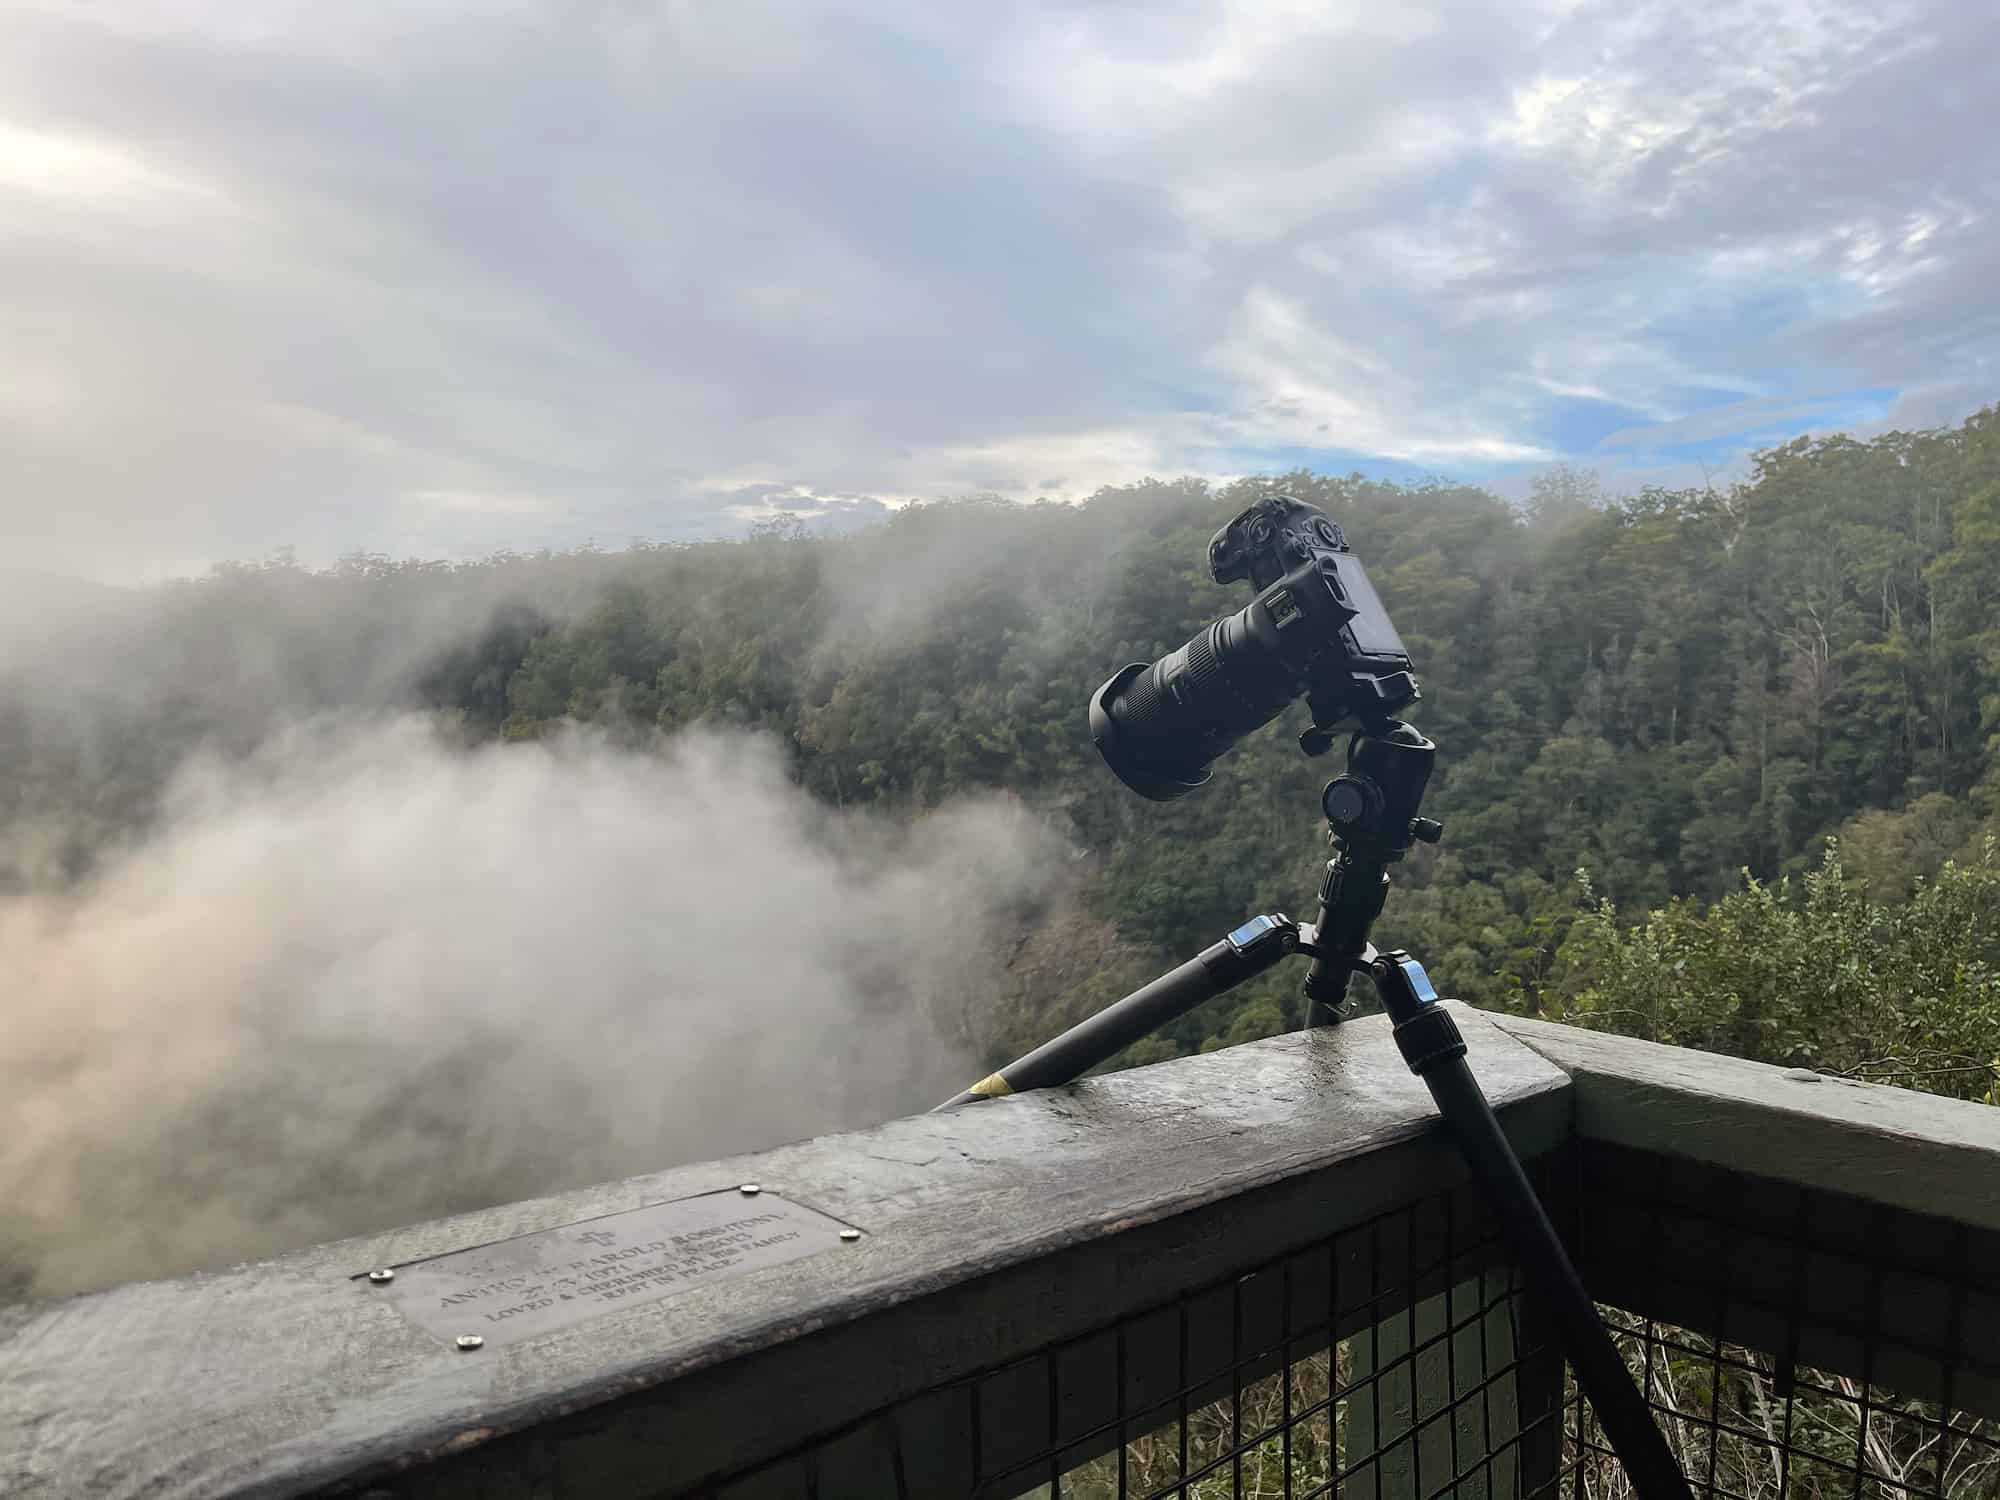
Tripods are also essential for taking multiple photos to then put together in either panorama, exposure blending and stacking images for multiple effects. It’s very difficult to take multiple images without some movement.
A tripod ensures you can take multiple images in exactly the same spot so you can put them together in post-processing.
While shooting panoramas is not going to be covered here, we will talk about exposure blending and why doing this is very helpful for landscape photographers.
Exposure Blending
When shooting landscapes, it can be very difficult to achieve a correct exposure in one image due to the huge differences in the scene’s lighting.
In situations such as sunrise you will be faced with very bright areas (the sun) AND dark areas (usually the foreground). This is known as high dynamic range and can be very frustrating for new photographers.
The simplest way around this is to take two separate images. One is exposed for the darker areas, and the other for the brighter ones. These two images can then be blended in an editing program such as Photoshop or Lightroom.
While this is not a particularly difficult technique to get started with, it is beyond the scope of this guide, but check out this video to get you started:
Using Filters
There will be times when you are shooting landscapes and you won’t be able to get as long an exposure as you would like.
This commonly occurs during the day – you might want to get some movement in the clouds but if it’s a nice sunny day you won’t be able to do that without overexposing your image.
Or the same thing can happen at a waterfall. This is where filters come in. They can help to enhance your images by reducing glare, enhancing colours, and controlling exposure.
Filters are essentially accessories that are placed in front of your lens to alter the way light enters the camera. The most commonly used filters in landscape photography are polarising filters, neutral density filters, and graduated neutral density filters.
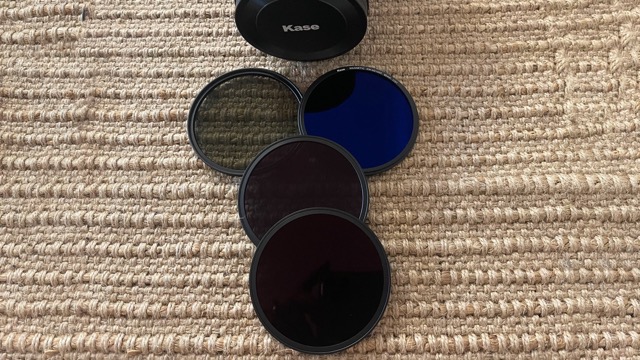
Kase Magnetic Filters: check price on Amazon
Polarising filters are great for reducing glare and enhancing colours. Neutral density filters reduce the amount of light entering the lens, allowing for longer shutter speeds in bright daylight. Graduated neutral density filters balance exposure between the sky and foreground when there’s a significant difference in brightness.
Use filters whenever you need to enhance or control the light entering your lens. For example, use an ND filter to slow down your shutter speed and capture motion blur of waterfalls or use a polarising filter to enhance colours and reduce glare in sunsets.
Related Post: Do You Need Filters For Landscape Photography
Final Thoughts
So, in a nutshell, the best camera setting for landscape photography depends on various factors such as the time of day, weather conditions, and what you’re trying to capture.
The key takeaway is to keep experimenting with different settings and techniques until you find what works best for you.
You’ll get better and better with practice, so don’t worry.
To give yourself a head start, you can try using the settings listed below as a starting point each time you go out to shoot.
Of course, you’ll still need to experiment and adjust as needed, but these settings can give you a good foundation to work from:
Exposure mode: Manual
Drive mode: Single shot
ISO: 100
Aperture: f/11
Shutter speed: Varies
White balance: Auto, daylight, shade, or cloudy
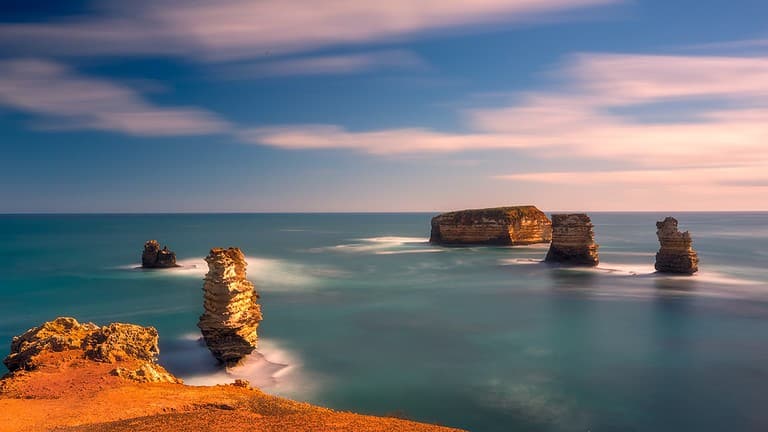
One of the best things about landscape photography is that there are so many different landscapes to photograph and explore.
So grab your gear, head outside and try these settings. I’m confident they will get you off to a great start!
Remember, photography is all about having fun and being creative, so don’t be afraid to try new things and see what works best for you! And please let me know in the comments below, I’d love to know how you go.
That’s it for now – Keep clicking and stay caffeinated
Like this post? PIN it so you can save it for later
Other helpful articles:
- Landscape Photography Guide
- Seascape Photography: A Complete Guide
- Sunrise Photography: Best Camera Settings and Tips for Beautiful Photos
- Sunset Photography for Beginners: Tips and Best Camera Settings
- Landscape Photography Composition: The Power of Leading Lines
- 7 Important Things That Nobody Tells You About Photography
- How To Photograph Autumn Colors: 7 Simple Beginner Tips
Don’t miss a post – sign up Here if you haven’t already
Note – Unless otherwise stated, all photos are mine and remain my copyright images – Sam Wilson Photography.