Sunset Photography for Beginners: Tips and Best Camera Settings
This article is all about sunset photography. If you’re looking to improve your sunset photography skills, this guide has you covered. Discover the best camera settings, tips on exposure, filters, composition and more to capture stunning sunset images.
If you’re interested in sunset photography, learning how to create beautiful sunset images is a must for all landscape photographers.
There’s just something about those warm, vibrant skies that make for truly stunning shots.
Sunset photography is a fantastic way to capture the beauty of nature and create stunning images.
However, it can be challenging to take the perfect shot, especially if you’re a beginner.
But don’t worry, you don’t necessarily need the fanciest equipment to take captivating photos of a sunset. What you do need is to know the best camera settings and a few smart techniques to enhance the beauty of the scene before you.
If you’re feeling a bit lost on how to start and feeling a little overwhelmed, don’t worry.
We’ve got you covered with some essential tips on how to get better results. From adjusting your camera settings to finding the right composition, we’ll help you take your sunset photos to the next level.
So let’s get started and discover the magic of sunset photography!

1 – Preparing for Sunset Photography
While spontaneous sunset shots can be stunning, the best ones are often the result of careful planning and preparation.
So, it’s always a good idea to scout out your location beforehand whenever possible. Look for spots where you can capture the sun as it dips below the horizon line and also consider incorporating an interesting foreground subject and even create a starburst effect in your shots.
Keep in mind that the window of opportunity for sunset photography is often brief. Therefore, it’s best to plan ahead and make sure you arrive at least an hour before the sun is due to set. That way, you’ll have plenty of time to set up your equipment, plan your composition and experiment with different shots before the golden hour begins.
Don’t forget to check the weather forecast as well. Different weather conditions can create unique patterns and colours in the sky during sunsets. While clear days can still offer stunning colours, some clouds in the sky often make for more dramatic and captivating shots. Dust and smoke in the air can also result in incredible sunset photos?
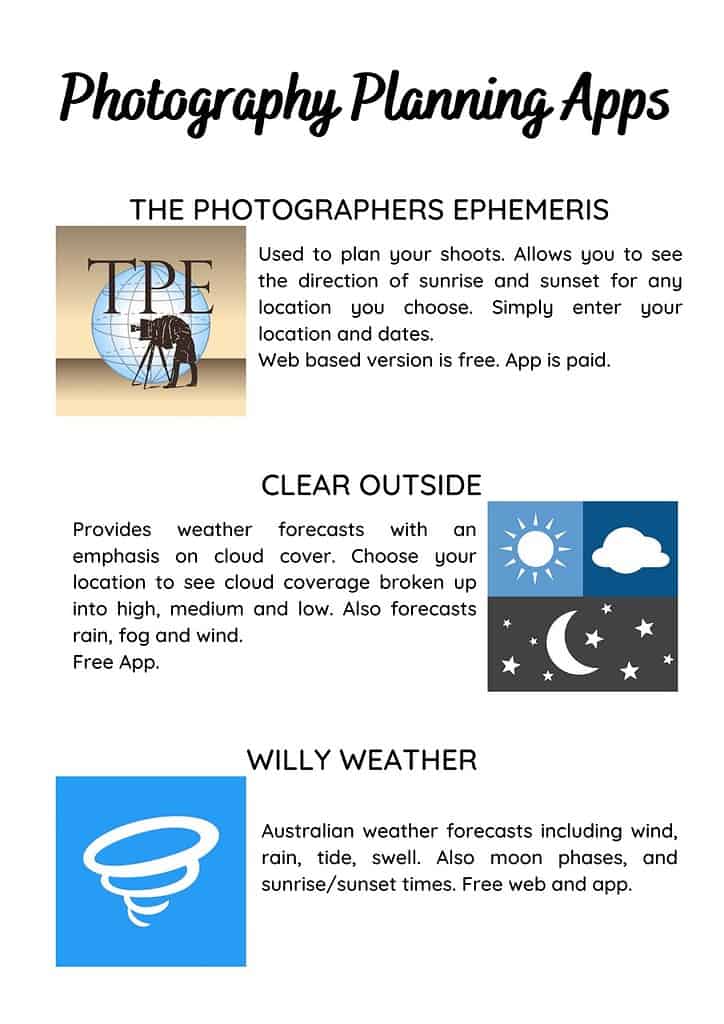
The above apps are all essential when planning photography shoots.
To make sure you’re ready to capture the perfect shot, don’t forget to bring the right equipment. A tripod is essential for tack sharp shots, and lenses with a range of focal lengths can help you create a variety of different compositions. And, of course, it’s always a good idea to bring along extra batteries to ensure you don’t miss the shot of the day.
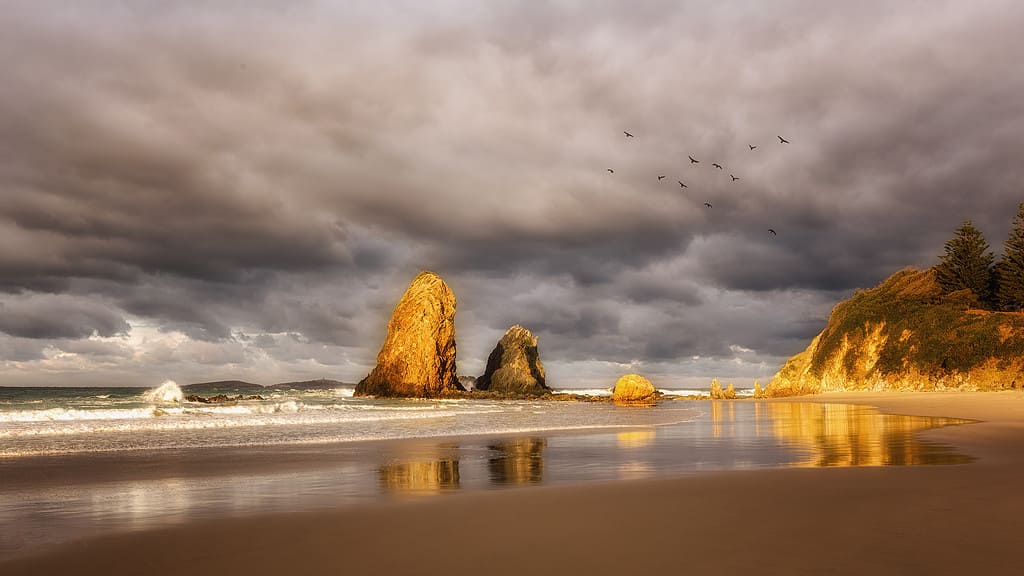
Long Exposure Sunset Photography for which a tripod is essential
2 – Camera Settings to Improve Your Sunset Photos
In sunset photography, your technique and camera settings matter more than having the most expensive gear.
The good news is that beginners and budget-minded photographers can still get great results.
When it comes to camera settings for sunsets, it’s all about maximising depth of field and adjusting for the bright light of the sun shining into the camera.
If you’re new to sunset photography, try using your camera’s aperture priority mode. Look for the “A” or “Av” on your camera’s settings dial. Aperture priority mode allows you to set the aperture, and your camera will automatically adjust the shutter speed for you.
If you want to have more control over your camera settings and get more creative with your sunset photos, don’t be afraid to try out manual mode.
While it can seem daunting at first, manual mode allows you to fine-tune your settings and capture stunning sunsets with the perfect exposure.
Let’s get to the best settings to start capturing beautiful sunset images:
FREE Photography Resources Bundle: Includes 9 handy reference sheets and checklists including Exposure Basics, Planning Shoots, Photography Workflow and much more. Simply download to your phone for reference no matter where you are!

Aperture:
Set your aperture to a high number (between f/11 and f/16) to get the largest possible depth of field and to keep as much of the scene in focus as possible.
A higher f-stop (between f/16 and f/22) can also create a stunning starburst effect in your sunset photos.
If you’re interested in learning more about how to create beautiful starbursts in your sunset photos, check out my article on the topic: Creating Beautiful Starbursts in Your Photos. You’ll find in-depth tips and techniques to help you achieve this stunning effect in your own photography.
ISO:
Keep your ISO as low as possible to avoid graininess.
As the sun sets and the scene gets darker, consider lowering your shutter speed to allow more light in, instead of increasing your ISO. Since you will likely be using a tripod for sunset photography, camera shake won’t be an issue.
Remember to adjust your shutter speed as needed to ensure correct exposure.
Shutter Speed:
The ideal shutter speed for sunset photography will depend on the specific conditions you are shooting in, such as the brightness of the sun and the movement of any foreground elements.
As a general rule, start with a shutter speed of around 1/125th of a second and adjust accordingly. A slower shutter speed can create a dreamy effect in your photos, but be sure to use a tripod to avoid blur from camera shake.
Remember, these settings will just give you a good starting point. Experiment with different combinations to find what works best for the specific scene you are photographing.
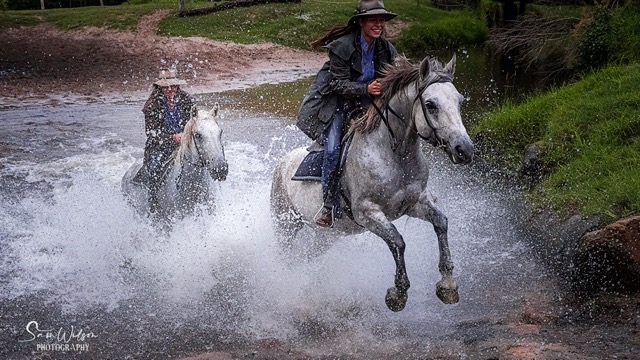
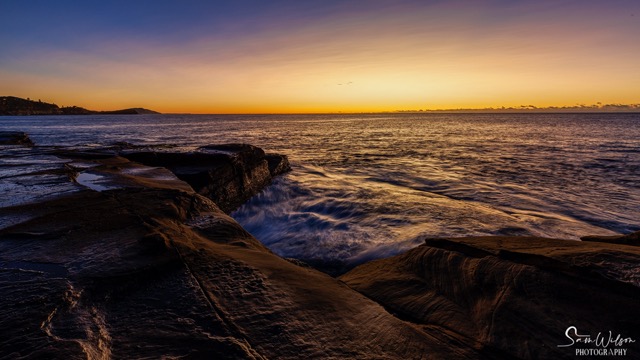
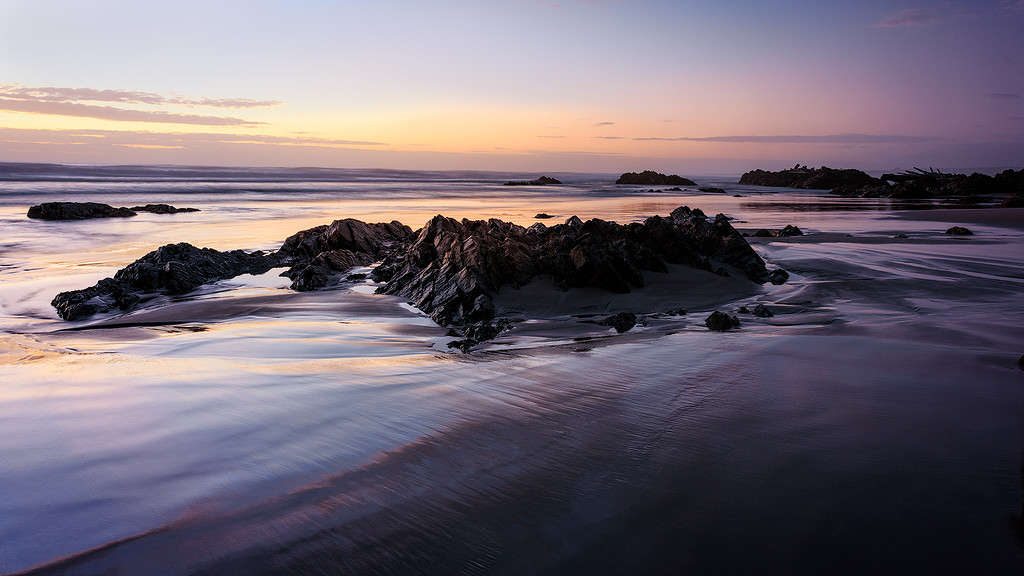
Using a longer shutter speed here to help smooth the water – and of course a tripod is essential!
3 – Best Camera For Your Sunset Shoot
If you’re new to photography and wondering if the camera you currently have is capable of capturing beautiful sunset photos, then I have some good news for you!
Any camera that offers manual control over settings can do a pretty good job of capturing sunset pictures.
That being said, there are certain camera features that make some models better for landscape photography, including sunset shots. One of the most important features to keep in mind when photographing sunsets is dynamic range, which refers to the range of light and dark areas a camera can capture within a single frame.
A wide dynamic range is essential for ensuring that your sunset photos don’t turn out blown out with little detail in darker areas, or underexposed with little detail in the bright areas.
With this in mind, choosing a camera with excellent dynamic range is a great way to ensure your sunset photos turn out stunning.
4 – Choosing the Right Lens for Gorgeous Sunset Pictures
When it comes to sunset photography, you don’t necessarily need a specialised lens to capture stunning images. Many landscape photographers have achieved great results with just a basic kit lens.
However, using different types of lenses can bring a new perspective and creative options to your sunset photography.
Wide-angle lenses, typically around 16-35mm, are a must-have in any landscape photographer’s collection and are incredibly popular with sunset photographers. These lenses allow you to capture a wider view of the surrounding area in your sunset photo, making them ideal for showcasing the full beauty of the sunset. Additionally, they can shrink the sun relative to the rest of the frame, which helps to balance the contrast in your shot and produce more even exposures.
On the other hand, a telephoto lens, typically around 100-400mm, can be used to great effect in sunset photography by making the sun look larger and isolating a smaller portion of the landscape.
This type of lens is perfect for highlighting a specific element in your sunset scene, such as a particular cloud formation or the silhouette of a tree. However, it’s important to remember that the telephoto lens acts as a magnifying glass, so it’s essential to avoid looking directly into the sun while shooting.
Mid-range lenses, such as the 24-70mm and 70-200mm, can also be used to create stunning sunset photos by filling the frame and highlighting specific subjects within your scene. While some may consider the 70-200mm lens to be a telephoto lens, let’s not get too caught up in semantics.
The most important thing is to choose a lens that works best for your specific sunset photography goals and vision.
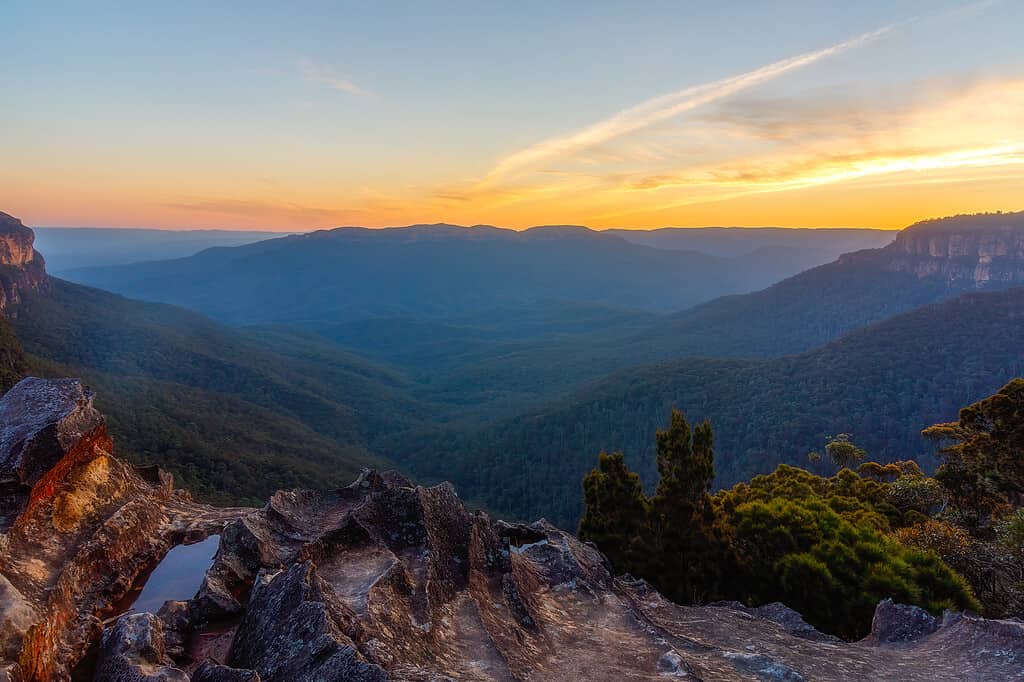
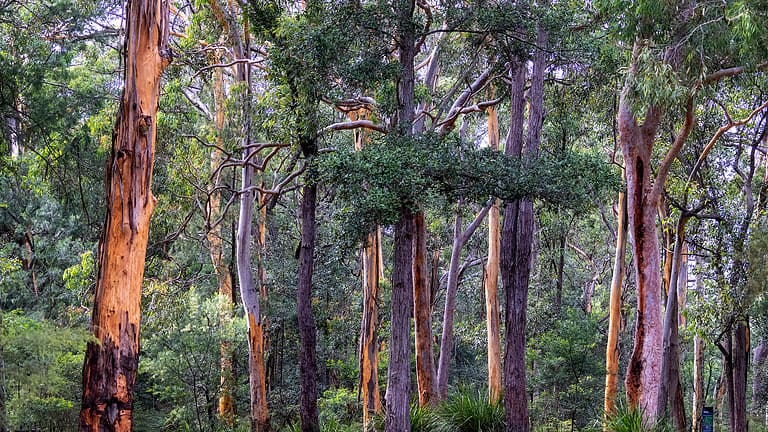
A wide-angle lens was definitely needed here to capture this scene – Blue Mountains, NSW, Australia
5 – The Importance of a Tripod for Sharp Sunset Images
As a landscape photographer, a tripod is already an essential piece of equipment, and when it comes to sunset photography, it becomes even more invaluable.
While shooting a sunset, you’ll likely want to focus on capturing the details in the scene, rather than fast-moving action. This makes it the perfect time to use a tripod, which provides stability and prevents camera shake. A tripod also allows you to experiment with long exposures, which can create a beautiful ethereal look in sunset beach photos.
When shopping for a tripod, it’s important to strike a balance between lightness for easy portability and heaviness for stability. As beaches and sunset photography are often synonymous, you may also want to consider a tripod that is resistant to corrosion from water and sand. Carbon-fibre tripods are a great option for this.
Remember, once you have a few shots you’re happy with at one tripod position, move it around and try out different angles and vantage points to get the best possible shots. Don’t get caught in the trap of not moving just because you’re using a tripod.
If you’re shooting at longer shutter speeds of 1/60s and beyond, then using a tripod is crucial. It will keep your camera stable and your images sharp.
While you don’t necessarily need a tripod for the beginning of your sunset shoot, as there will be plenty of light, as the sun sinks on the horizon, a tripod will become more and more necessary. By the time the sun has set, it will be absolutely essential.
If you forget your tripod or don’t have one, you can stabilise your camera against an object like the hood of a car or set it on the ground. Just ensure it’s as still as possible to minimise any camera shake.
Overall, tripods are essential for sunset photography, giving you the stability and flexibility needed to capture stunning sunset shots.
6 – Try Different Exposure Settings for Creative Sunset Shots
Once you’ve taken your shots with proper exposure, don’t stop there.
Experiment with different exposures to create unique and creative shots.
Start with the recommended aperture and shutter speed settings in aperture priority or manual mode, and then try underexposing by raising the shutter speed or narrowing the aperture. Alternatively, try overexposing by doing the opposite.
The key is to experiment with different settings until you find the right exposure that captures the mood and atmosphere you’re aiming for.
Sunsets offer endless possibilities for creative expression, and there is no single “right” exposure. For example, underexposing can create moody and dramatic shots, while overexposing can bring out the vibrant colours and tones of a sunset.
Personally, I tend to begin by using a faster shutter speed and wider aperture, and then progressively decrease the shutter speed as the sun dips below the horizon.
7 – Use Exposure Bracketing to Capture the High Dynamic Range
When taking photos of the sunset, the range of light in the scene can be difficult to capture in a single shot. Exposure bracketing is a technique that can help you capture the wide dynamic range of the sunset scene by taking multiple shots at different exposures.
To bracket exposures, take three shots of the same scene: one correctly exposed, one overexposed, and one underexposed. The underexposed shot captures the details in the highlights, while the overexposed shot captures the details in the shadows. The correctly exposed shot serves as a reference point for the other shots.
Once you have taken the shots, you can use post-processing software like Adobe Lightroom or Photoshop to combine the images into a single high dynamic range (HDR) image. The software will align the images and blend the different exposures to create an image with details in both the highlights and shadows.
If you’re new to blending exposures, don’t worry – it’s not as complicated as it might sound. This is a simple tutorial if you’d like to learn more about blending photos in Lightroom.
By using exposure bracketing and HDR, you can capture the full range of colours and tones in the sunset scene. This technique is particularly useful when you have a high contrast scene with deep shadows and bright highlights.
8 – Ditch the Auto White Balance Setting for Beautiful Sunsets
When you take pictures of sunsets, the colours can be breathtaking – warm, golden hues that make everything feel magical. But capturing these colours can be tricky, especially if you’re relying on your camera’s auto white balance setting.
Your camera’s white balance setting adjusts the temperature of the colours in your scene, which can have a big impact on the look of your photos.
When the white balance is set to Auto, your camera will try to figure out the colour temperature on its own. While this can work in some situations, it often doesn’t do justice to the warm, golden tones of a sunset.
That’s why I recommend ditching the auto white balance setting and using the Cloudy or Shade presets instead. These presets will warm up your photos and bring out the best in the colours of your sunset. If you want a cooler, more moody shot, you can experiment with other white balance settings.
Now, some photographers might argue that shooting in RAW and adjusting the white balance during post-processing is the way to go.
And it’s true that shooting in RAW gives you more flexibility when it comes to tweaking the white balance later on. But I think it’s worth taking the time to get the white balance right in-camera, so that you can get the best possible results straight out of the camera.
After all, who wants to spend hours tweaking white balance settings in front of a computer?
9 – Why Shooting in RAW is Key for Stunning Sunset Photos
When it comes to sunset photography, shooting in RAW is key to getting stunning results. While many photographers, especially beginners, tend to shoot in JPEG format due to its convenience and shareability, it comes at a cost. When your camera creates a JPEG, it compresses the image data and performs some basic editing. This results in less information in the file and less flexibility in post-processing.
On the other hand, RAW files contain all the image data from the moment of capture and offer several major advantages. They have more colour and tonal information, making it easier to push colours in different directions and recover detail in the shadows and highlights. This is especially important in sunset photography where you’re dealing with a wide dynamic range and vibrant colours.
While RAW files may not look as stunning as JPEGs straight out of the camera, with a little bit of editing knowledge, you can turn them into incredible images. So, don’t let the camera do the editing for you. Shoot in RAW and take control of your sunset photos.

10 – Improving Image Sharpness with Remote Release or Timer
When capturing sunset photos, it’s important to keep the camera steady to achieve maximum sharpness. Even the slightest camera shake can cause blur, which is especially noticeable in the details of the image.
One simple solution to this issue is to use a remote release or timer. By using a remote release, you can trigger the camera’s shutter without physically touching it, which eliminates the risk of camera shake. Similarly, by setting the camera’s timer, you can delay the shutter release for a few seconds, allowing you to step away from the camera and avoid any unintentional movements.
This is especially important in sunset photography, where the light can change quickly and you may need to adjust settings on the fly. With a remote release or timer, you can easily make changes to your settings without risking camera shake and losing the sharpness of your image.
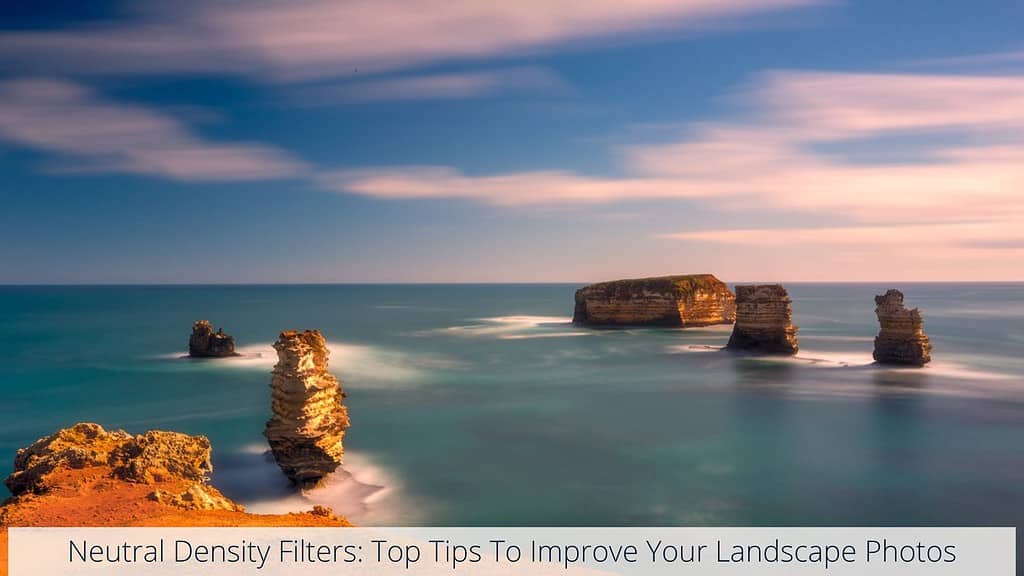
11 – Enhance Your Sunset Images with the Right Filters
If you want to take your sunset photography to the next level, consider using filters. The two types of filters that are particularly useful for sunset photography are neutral density (ND) filters and graduated neutral density (GND) filters.
An ND filter reduces the amount of light entering your camera, allowing you to use slower shutter speeds without overexposing your image. This is particularly useful during sunset when the light levels can change quickly. On the other hand, a GND filter helps to balance the exposure between the sky and the ground. This is useful when the sky is much brighter than the foreground.
Think of filters like sunglasses for your camera lens. Just as sunglasses help to reduce glare and improve contrast when you’re outside on a bright day, filters can help to reduce harsh light and balance exposure during sunset photography.
For more information on filters and how to use them in your photography, check out our comprehensive guide to filters.
12 – Composition Tips to Create Stunning Sunset Photos
When it comes to sunset photography, the composition of your shot can make all the difference in creating a stunning image.
One of the fundamental principles of composition is the “rule of thirds,” which involves dividing your frame into a 3×3 grid and placing the horizon or the main subject along one of the gridlines or intersections.
This creates a more visually interesting and balanced composition.
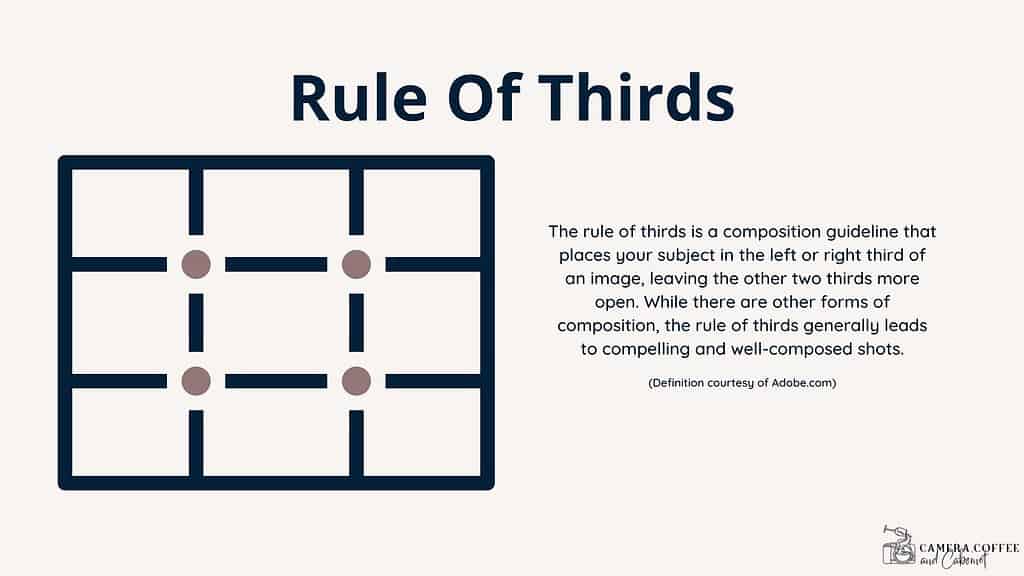
However, the rule of thirds is just the beginning. Leading lines, framing, keeping it simple, and other techniques can also greatly improve your sunset photos. Leading lines can guide the viewer’s eye to the main subject, while depth can add a sense of dimension and scale to your shot. Keeping it simple by minimising distractions in the background can also help draw attention to the main subject.
For more detailed information on composition techniques, check out my article on composition tips for beginners. Remember, rules are meant to be broken, and experimentation is key to finding your own unique style.
13 – Explore New Perspectives: Playing with Different Angles
When it comes to sunset photography, it’s easy to fall into the habit of shooting from the same eye-level perspective. However, to create truly stunning images, it’s important to play around with different angles and perspectives.
While shooting from the standard vantage point can still produce great shots, varying your angles can help you capture unique and eye-catching images. Try lowering your tripod or shooting from a higher angle to add depth and interest to your photos.
Experimenting with different angles can also help you highlight specific elements in your sunset scene, such as interesting foreground objects or dramatic cloud formations. So don’t be afraid to mix things up and try out new perspectives.
Of course, there’s no need to abandon the more conventional approach entirely – simply experiment with different angles and see what works best for you!
Of course, don’t give up the more conventional approach completely, but do try these other perspectives and see what you think!
14 – Look Beyond The Horizon Line
One of the many amazing things about sunsets is the beautiful golden light they cast.
As the sun sets, the light transforms the landscape and creates new photographic opportunities.
So don’t just focus on the horizon line. Look around and see how the light is illuminating other elements in the scene.
Experiment with capturing the golden light on mountains, trees, and other features of the landscape. You might be surprised by the stunning results you get!
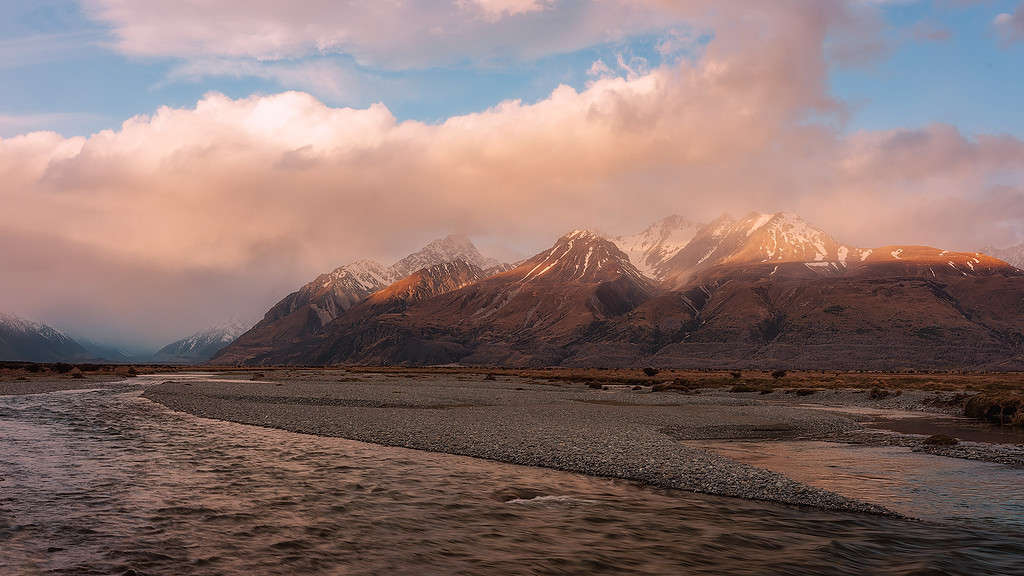
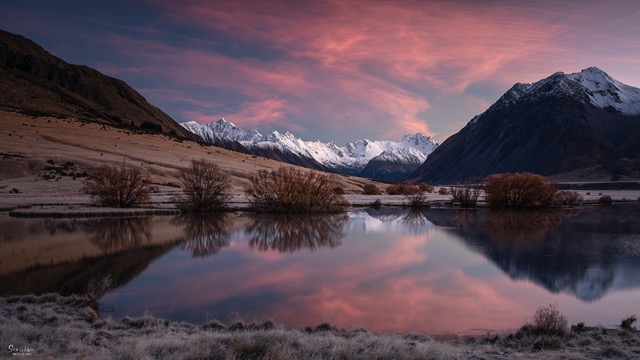
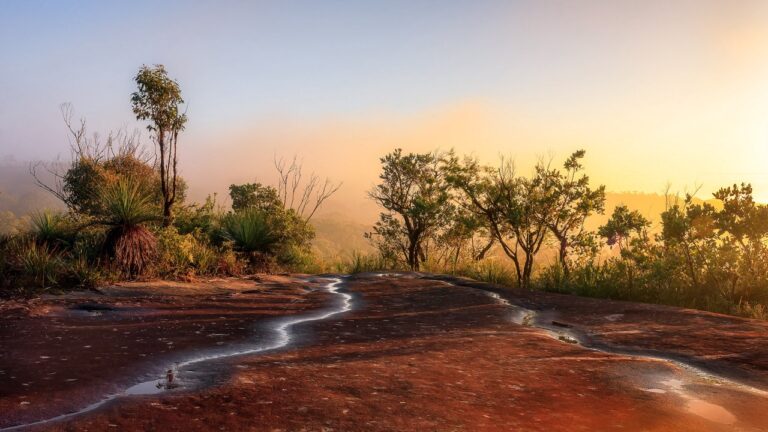
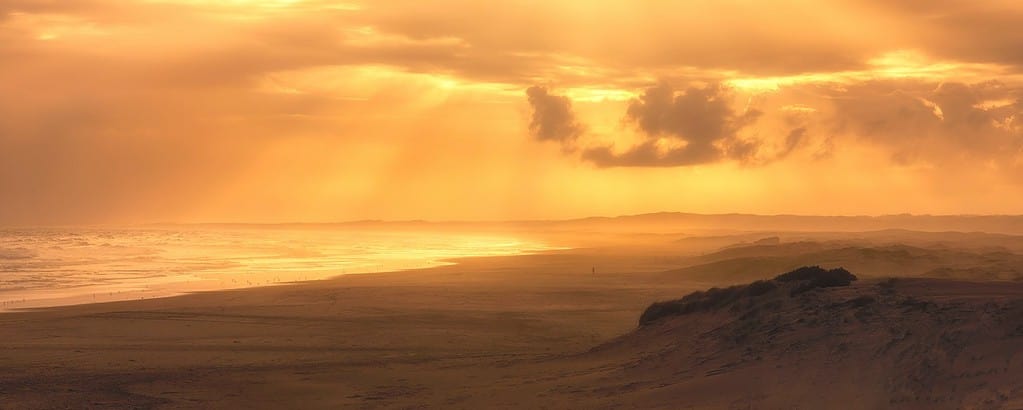
The sun was setting to the right of this image but casting beautiful golden light on the mountains
15 – Don’t Leave Too Soon: Keep Shooting after Sunset
As a sunset progresses, the colours in the sky change and create different opportunities for photos.
Don’t just take a few shots and call it a day. Stay a little longer and keep shooting as the sun goes down.
This is known as the golden hour, where the sun casts a warm, golden light on the landscape. Even after the sun has set, don’t pack up your gear just yet.
The blue hour, the period after sunset, can offer beautiful colours and light, too. Keep finding compositions and shooting until the colours have completely disappeared below the horizon line.
Remember, every minute can be an opportunity for a different shot.
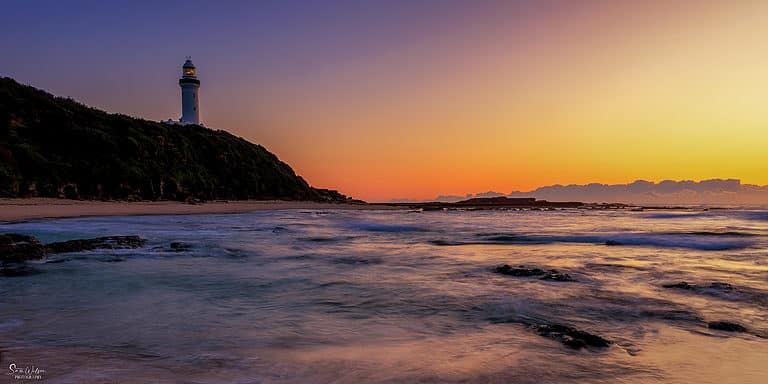
This shot was taken long after the sun had dipped below the horizon line
Conclusion
Well, there you have it! Sunset photography is one of the most beautiful and rewarding genres of landscape photography, but it does come with its own set of challenges.
I hope you found these sunset photography tips and techniques useful and informative.
Remember, the most important thing is to have fun and experiment with different techniques. Don’t be afraid to get creative and try new things, whether it’s playing with exposure, using filters, or changing your composition. And always bring your tripod for the sharpest results.
And don’t forget to shoot in RAW whenever possible – RAW files give you more control over your images and allows you to make adjustments later on.
Finally, don’t pack up too early and miss out on the blue hour – it can be just as beautiful as the sunset itself!
So grab your camera, head outside, and start capturing those breathtaking sunsets. And if you have any questions or tips of your own, please share them in the comment below – I’d love to hear from you!
That’s it for now – Keep clicking and stay caffeinated
Like this post? PIN it so you can save it for later