10 Easy Beginner Tips for Post Processing Landscape Photos
This article is all about providing some beginner tips for post processing landscape photos.
Landscape photography can be truly captivating, transforming ordinary scenes into stunning works of art. It can also be incredibly frustrating and confusing when you are trying to learn everything as a beginner.
Not only do you have to learn all about exposure, composition, and a million other camera settings, along comes post processing …
When I first started taking photos, I thought editing wasn’t necessary. I was going to learn how to take photos that would be finished straight out of camera.
I believed that the pro’s didn’t pot process their photos, so I wasn’t going to either.
But it didn’t take long to discover differently …
What I discovered is that every photo you see is edited in some way. Whether it’s taken on your phone, or camera in Jpeg it has been edited.
I quickly learned that editing your photos did not necessarily mean making them look like they belonged on another planet. It didn’t mean they had to have neon rainbows or grass that looked like it was radioactive.
But, where to start?
It can quickly become overwhelming with all the editing techniques and tools available.
Every location and every photo is different, so surely every edit is going to be different?
Yes, but the ‘workflow’, or order, that things ‘need’ to be done are essentially the same for every photo.
That’s why I’ve written this article. To help get you started on your editing journey.
Knowing where to start and what to do next will have you well on your way to enhancing your images in no time.
So let’s jump in!

1 – Always Shoot In RAW
Before you even get to editing, make sure you are shooting in RAW, and not JPEG.
Unlike JPEG, RAW files capture all the data from your camera’s sensor, which provides you with greater flexibility when editing your photos.
When you shoot in RAW, you’ll have more control over aspects like exposure, white balance, and contrast, allowing you to enhance your landscape photos to a level that simply isn’t possible with a JPEG.
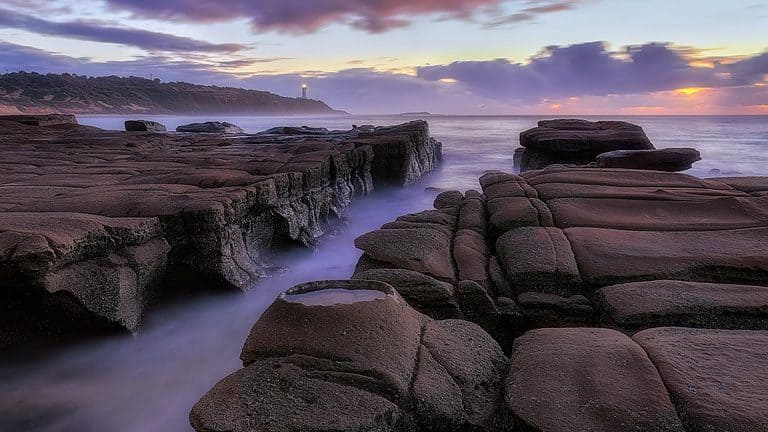
A RAW image is likely to be unimpressive when you first open it in your editing program – but as long as the exposure is within the histogram, you’re good to go.
RAW files are naturally ‘flat’, or lacking ‘pop’, and will need some adjusting no matter how ‘well’ you took the shot. It just means that as your photography improves, the less ‘editing’ your images need to bring out their potential.
While RAW images will always require some adjustments, they can be edited in so many creative ways.
2 – Get Into The Flow (Workflow)
I first learned the importance of having a workflow through a series of videos called ‘The Easy Way’, which are unfortunately no longer available but I will share how I start post processing every photo.
This article is all about basic editing tips and techniques, but for a full editing workflow, from uploading to saving and backing up, head over to this article:
3 – Lightroom Basics For Post Processing Landscape Photos
In this section, we’ll discuss some basic Lightroom tips and workflow to start your editing process.
I do most of my basic editing with Adobe Lightroom so will be using that for this article. But most editing programs have the same tools so you will easily be able to follow along if you use another post processing program.
Yes, every image is different, but here are the basic steps I take:
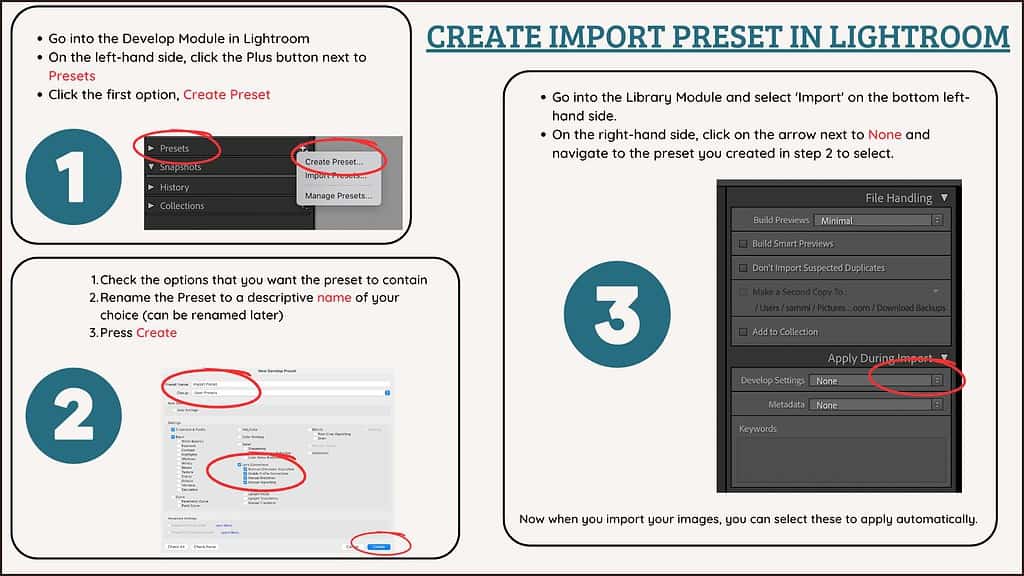
Lens Corrections
First up is to do Lens Corrections.
Tick both ‘Enable Profile Corrections’ and ‘Remove Chromatic Aberration’.
- Lens Corrections – corrects any distortions from your lens type, particularly wide-angle lenses
- Correct Chromatic Aberration – this is something that can occur on edges of objects on your image. It can look like a purple or green ‘fringe’. One click gets rid of this easily
Lightroom can detect the lens you used to make your shot, and it’ll apply lens corrections to remove any distortion, vignetting, and chromatic aberrations.
I have this set up as an import preset. This way it’s automatically done on every photo that I import into Lightroom and I never have to think about it.
Straighten The Horizon
Many people advise to crop your image straight away, but this is something I’ve learned to leave until almost last.
Cropping is a very creative compositional tool, and once you crop you lose all the adjustments you make to your image from this point. So, just straighten it for now and leave your cropping until near the end.
Next is to get your exposure, lighting and toning where you want them.
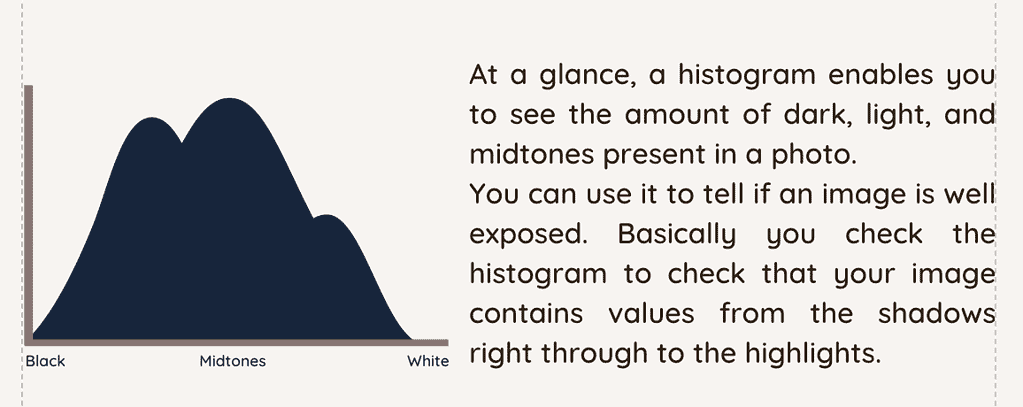
Histogram
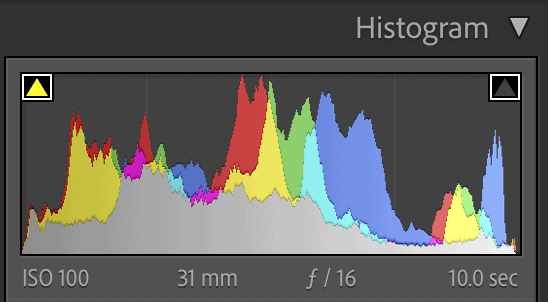
First up, make sure you have your histogram visible in Lightroom.
The histogram is something you need to keep an eye on throughout your editing process to ensure you aren’t ‘clipping’ either the blacks or whites.
To see whether this is occuring, hit ‘J’ on the keyboard to turn these warnings on. Areas that are shaded bright red will indicate clipped whites, while bright blue will indicate clipped blacks.
‘Clipping’ means that either your whites or blacks are ‘blown out’ and have no details in them. Generally you don’t want this, but small amounts can be ok depending on your taste.
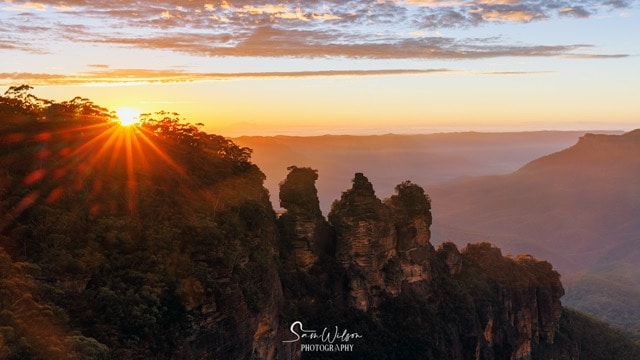
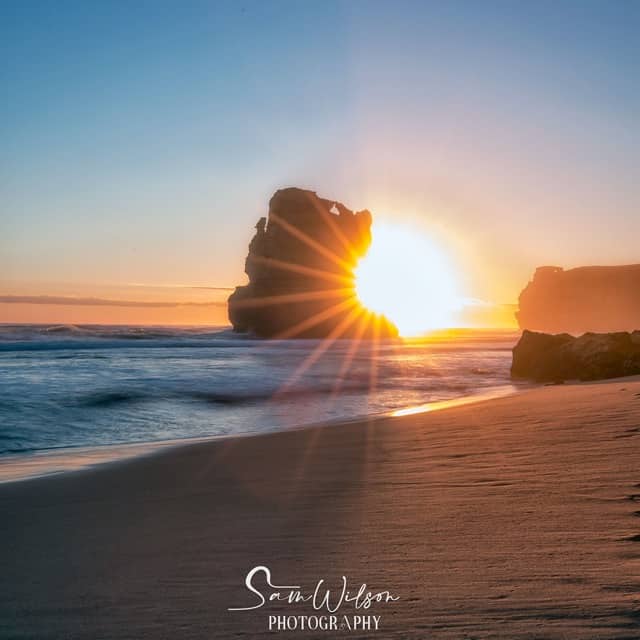
A common example of this is a portion of the sun peeking over the horizon. The sun is naturally very bright so having any detail here is virtually impossible.
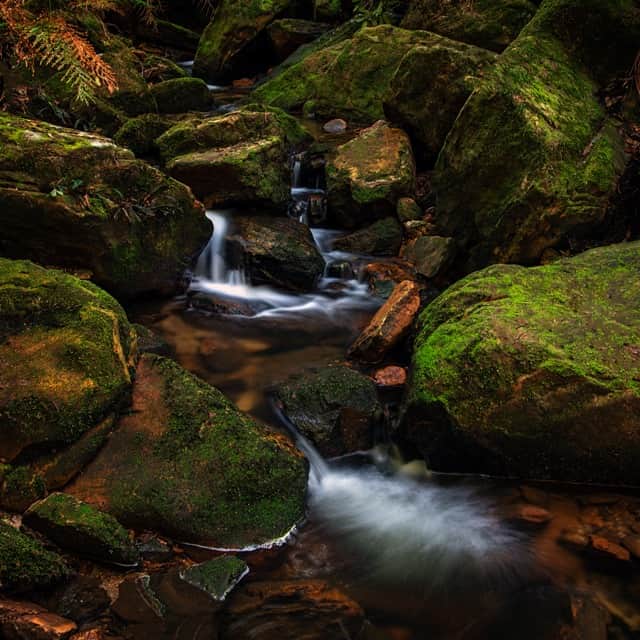
Another example of this would be in a darker environment at night or deep in the forest.
The rest of the adjustments in this section are all done in the Basics Panel of the Lightroom Develop Module.
Hit That Auto Button
Start with hitting the Auto button to give you an idea of what Lightroom thinks your image should look like if correctly exposed and toned.
This often gives you a good result, however I do find it over-exposes most images, so this will come down to your taste.
If you like the result, you can simply skip the rest of this section, but if not, let’s look at the rest of the basic sliders in the Basics Panel.
TIP: Don’t be afraid of auto – it’s a great way to learn ideas for how to start post processing your photos. Even if you don’t like the exact result, it shows you what sliders were adjusted and can get you going if you’re feeling overwhelmed.
Highlights and Shadows
This is where you can adjust the brighter and darker areas in your images. These sliders are a great way to bring back some details to those areas in your photos.
Move the Highlights slider to the left to remove any highlight clipping. This will really help to bring details and colour out in your sky.
Move the Shadows slider to the right to remove any shadow clipping. This will help to bring out details in the darker areas of your image.
Make sure you keep an eye on your histogram as you do this.
White and Black Sliders
These are similar to the highlights and shadows. Adjusting these can help remove areas that are either entirely white or entirely black.
Here you want to ensure that the range reaches just the edges of the histogram without clipping. If you have the indicators on (‘J’ on your keyboard to turn on and off), you can easily monitor this.
TIP: Hold down the Option/Alt key while using the slider and it will show you when you start to clip either the blacks or whites.
Exposure
Adjust this to alter the overall brightness or darkness of your images.
You may or may not need this once you’ve adjusted your highlights, shadows, whites and blacks. That’s why I leave it until now in my workflow to go back to this.
Your eye will tell you whether it’s too dark or bright, but if in doubt check the histogram. As with any part of the editing process, it’s completely up to your taste.


White Balance
This is used to adjust the overall colours of your image to match the light source you were photographing at the time.
It’s a setting that you can change while shooting, but I tend to use auto when shooting and then adjust as part of my post processing.
Try each of the presets in the drop down menu and see if there’s one that suits you. Daylight is generally cooler, while cloudy and shade can bring out those warm golden hour colours.
There are quite a lot of options when choosing your white balance, but don’t get too caught up in getting a perfect white balance. Ultimately it’s up to your personal preference and setting the mood that you’re looking for in your image.
Anthony has a great in-depth video on white balance for you to delve further:
Vibrance and Saturation
Adding saturation and vibrancy can enhance the colours in your photo, making them more vivid and eye-catching.
Vibrance tends to affect those colours that aren’t already over-saturated, whereas saturation will boost every colour.
Be careful with these sliders, and definitely start with vibrance.
Be careful, however, not to overdo it, as too much saturation can result in artificial and unnatural-looking images.
And that’s it. You are done with your basics of post processing landscape photos.
You may be wondering about cropping your image. That’s a very important step, and I leave that until almost last for a reason, so be sure to keep reading for that!
Depending on what your style is, and what you want to achieve, this may be all you wish to do for your editing.
These initial steps can make an incredible difference, but if there is more you’d like to achieve, then you may want to head on over to Photoshop.
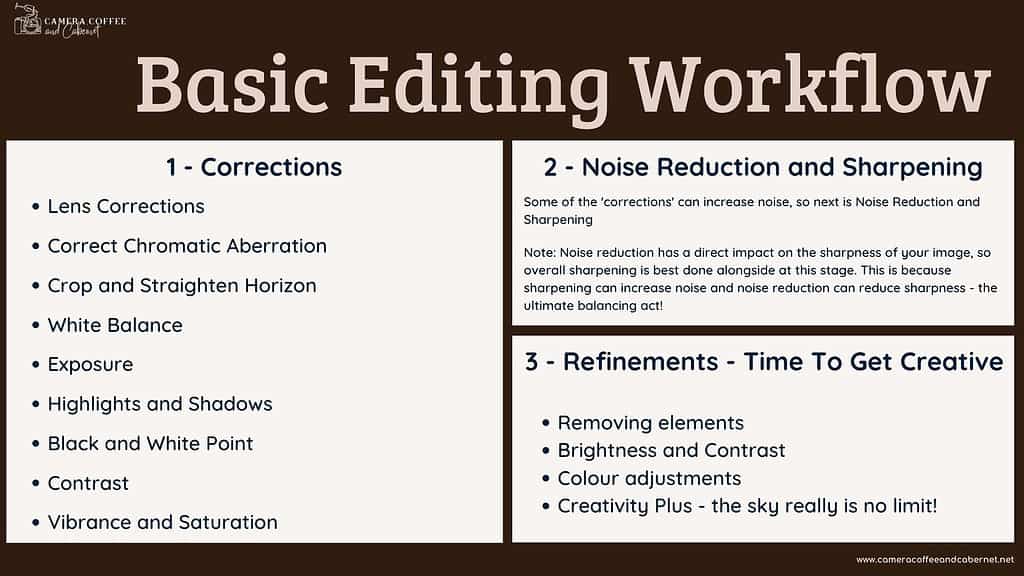
4 – Photoshop Essentials
If there are some issues such as distractions to be removed, I will then move over to Photoshop for some more advanced adjustments.
This is where you get creative and add your vision to the image. The above steps have mostly ‘corrected’ your image, and that may be all you wish to achieve.
This section is all about truly bringing your image to life, and creating what you envision.
Photoshop can be daunting, but it really does open up a whole new world.
The following techniques are the ones that I would recommend researching and getting started with:
- Removing elements – This can be as simple as removing dust spots on your sensor, powerlines, footprints, and any distractions.
- Brightness and Contrast – Increasing or decreasing these to particular areas will place either more or less emphasis where used, to help add drama and direct the viewers’ eyes where you want them to look. Very powerful tools indeed!
- Colour adjustments – be careful not to go overboard here.
- Creativity Plus – Far too many options here but think: Sky Replacements, Composite Images – the sky really is no limit – pun intended!
Sky replacement – not something I ordinarily do but it’s important to play and try things out.
5 – Selective Editing Tools
So far everything we’ve covered are considered ‘Global’ adjustments.
This simply means that they affect the whole image.
But often you only want to apply adjustments to specific areas in your image and that’s where selective editing comes in.
These tools allow you to make adjustments to specific areas in your image, enhancing the overall look without affecting the entire scene.
You can do selective editing in both Lightroom and Photoshop – as with many software applications, there are several ways to achieve the same results.
I recommend you start with researching the following and go from there:
- Lightroom’s Masking Tools – these have had a major upgrade over the last year or two and are incredibly powerful. The same tools are also available in the Camera Raw Module of Photoshop:
- Selection Tools: Become acquainted with tools like the Marquee, Lasso, and Magic Wand. These will help you select specific areas of your image for targeted edits, such as exposure or colour adjustments.
- Layering: Learn to work with layers and layer masks, essential elements for non-destructive editing. This will allow you to make changes to your image without permanently altering the original photo.
- Adjustment Layers: Use adjustment layers like Curves, Levels, and Hue/Saturation to fine-tune the appearance of your image. These adjustments can be added as separate layers, allowing you to easily experiment with different edits and revert to previous versions if needed.
Check out this video by Piximperfect for a basic introduction to how to edit landscape photos in Photoshop:
Just remember that less is often more.
Subtlety is key, and a few thoughtful adjustments can make a world of difference in your final image. Trust your instincts and ensure your edits enhance your photo without overpowering the natural beauty of the scene.
6 – Let It Marinate
Sometimes, it’s better to take a step back from your editing process and let your landscape photos “marinate” for a while.
Giving yourself some time away from the screen can help you approach the post-processing with a fresh perspective.
During this break, you might find that you’re more critical of any mistakes or aspects of the image that need improvement. As you dive back into the editing process, remember to be patient. It can take time to achieve the perfect balance of colours, light, and composition for your work.
By giving yourself time to pause and reflect, you can better evaluate your progress and make more informed decisions during the post-processing stage.
So, let your photos marinate, revisit your work with a fresh set of eyes, and see your images come to life.
7 – Final Touches
After applying the necessary adjustments to your landscape photo, it’s time to apply the final touches and prepare your masterpiece for export.
In this section, we’ll cover cropping, removing distractions, sharpening, and saving your final image.
Crop
The crop tool is essential for improving the composition of your photo and enhancing the landscape’s focus. To maintain a pleasing aspect ratio, use the Rule of Thirds grid, and try not to crop too tightly so that you preserve the grandeur of the scene.
Remove Any Distractions
Examine your photo carefully and look for any unwanted elements like dust spots, branches, or trash on the ground. Use tools like Photoshop’s removal tool to remove any distractions and keep your viewer’s focus on the landscape.
Sharpen
Sharpening your image can help enhance the details and give the photo a polished look. Be careful not to over-sharpen, as excessive sharpening can introduce unwanted noise. It’s crucial to pay attention to areas where details need to be more crisp, such as a rock formations texture or tree leaves. Also note it is not necessary on every image.
Adobe: Sharpening enhances the definition of edges in an image. Whether your images come from a digital camera or a scanner, most images can benefit from sharpening. When sharpening images, keep the following in mind: Sharpening cannot correct a severely blurred image.
Source: Adobe – 13 Jan 2022
Save And Export
After completing the final touches, save your edited landscape photo in the appropriate format for your intended use. Generally, save it in a high-quality JPEG or TIFF format for sharing online or printing.
Keep your original RAW file to revisit and edit your photo in the future if you want to try new editing techniques or styles.
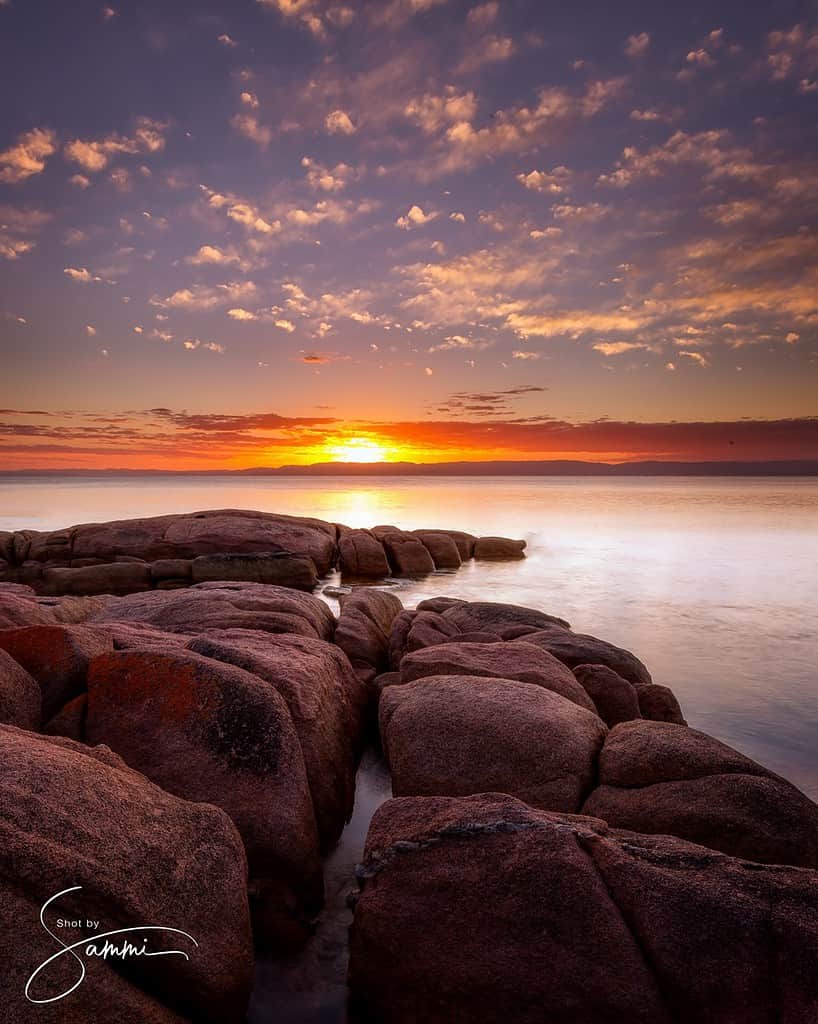
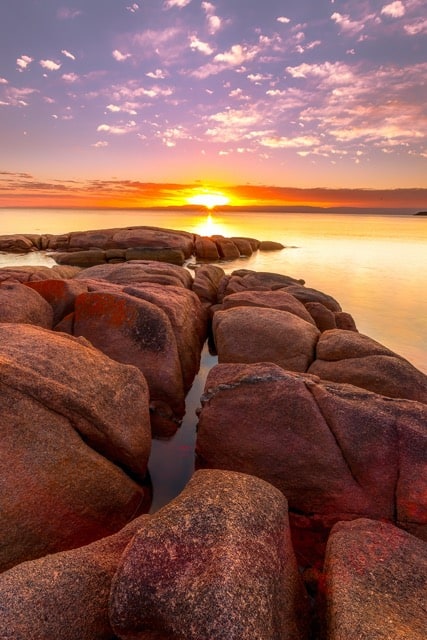
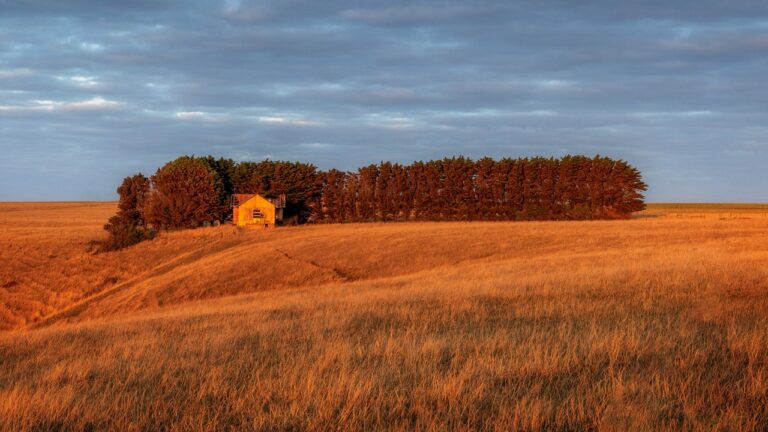
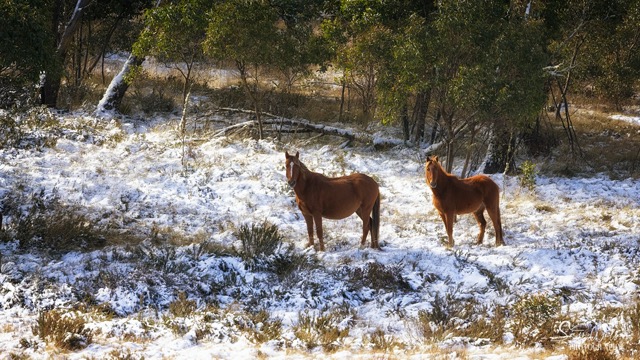
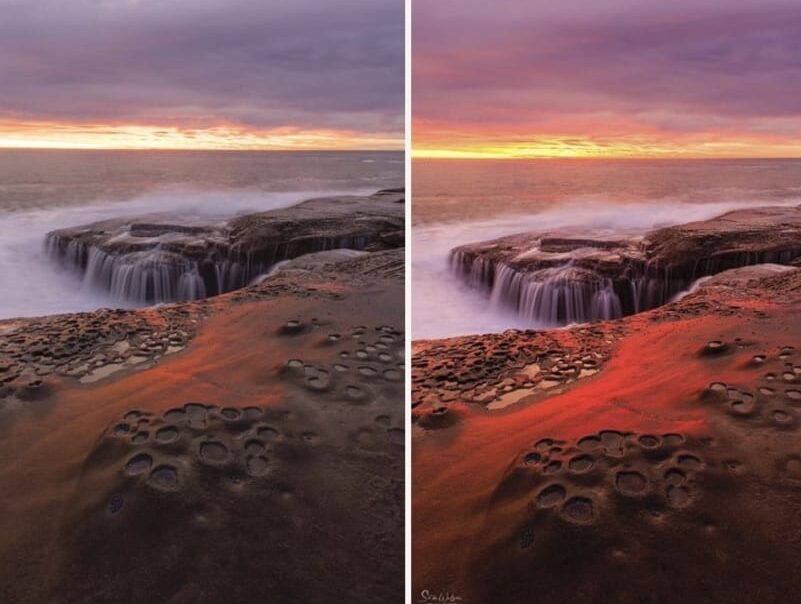
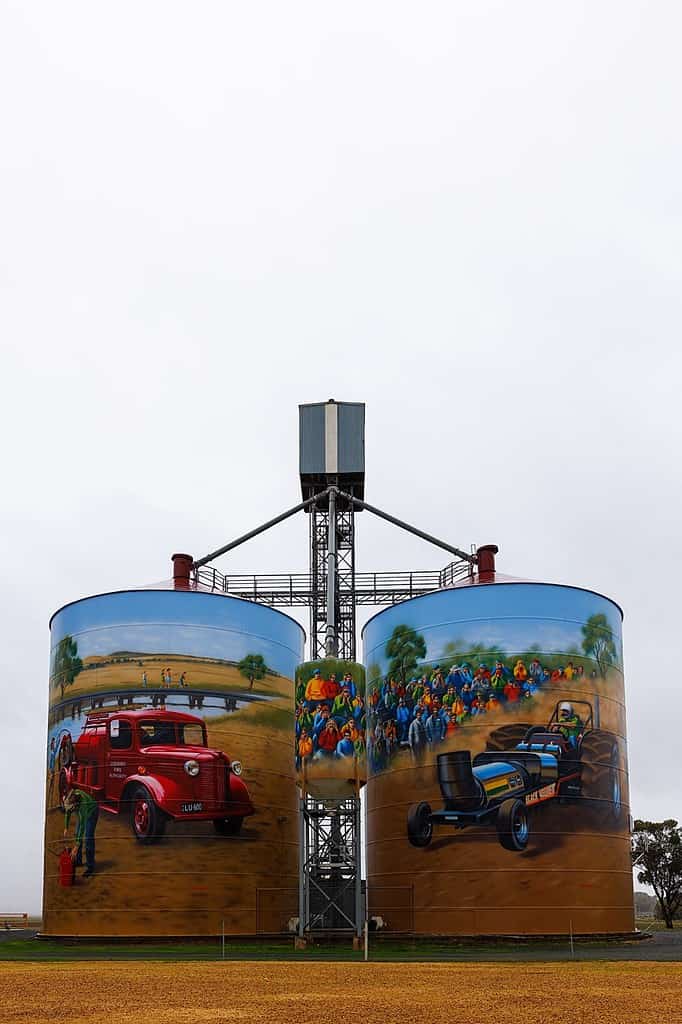
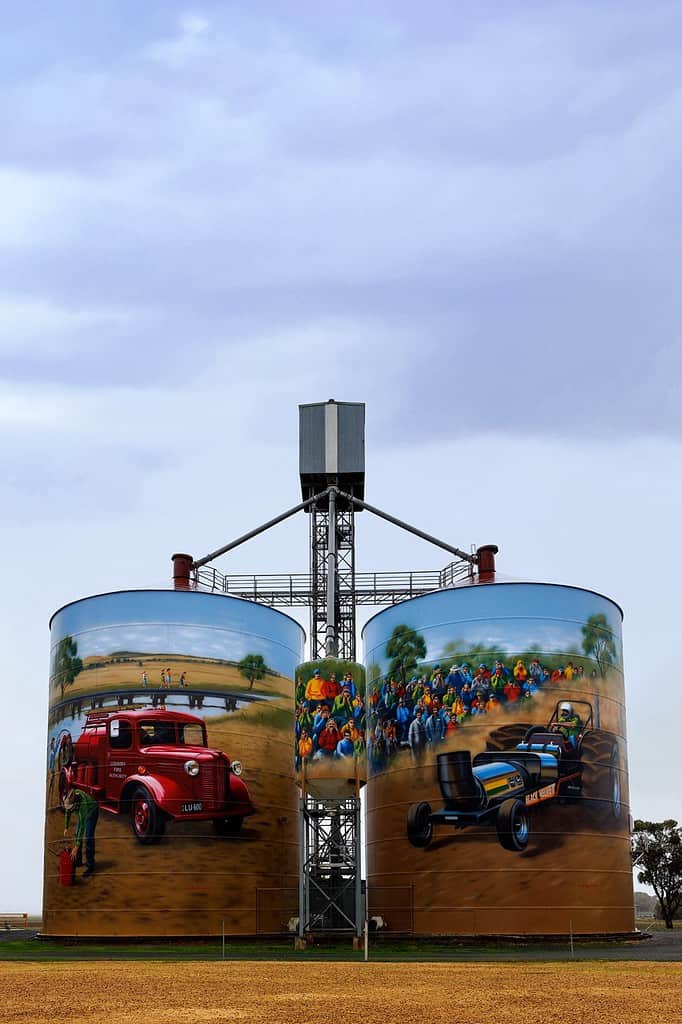
Two edits of the same photo after not just marinating, but learning more advanced techniques.
8 – Common Beginner Post Processing Mistakes To Avoid
As a beginner, you might be prone to making certain editing mistakes. To help you improve your skills, here are some common errors to avoid:
- Over-processing: While editing is essential, ensure you don’t go overboard with adjustments. Maintain the photo’s natural essence and avoid making it look unnatural with excessive modifications. I was definitely guilty of this one when starting out.
- Ignoring the histogram: When editing, pay attention to the histogram as it plays a crucial role in achieving the right exposure. Adjust tonal values accordingly to maintain proper balance.
- Poor Cropping. Cropping is an incredibly powerful way to transform your image. Always think about the story you are trying to tell. Don’t crop too tight around your main subject as negative space can be powerful. Just as important is to make sure there are no distractions around the edges that can be easily removed by cropping.
- Sharpening – Too Much or Too Little. There are many possible mistakes with sharpening. The most common is sharpening too much.
Another common photo editing mistake is to believe you can use the sharpening tool to sharpen an out of focus or blurred image. If your photo is unsharp due to missed focus or camera movement, no amount of sharpening is going to correct it. - Rushing your editing process . Editing is a process and as you progress it’s a good idea to back off for a moment and let the photo alone. It’s understandable to want to share or print your work as soon as you can, but just be a bit patient with this. When you get back to the same image after a break (even just overnight) day or two, you will see your image with fresh eyes, and may want to make some subtle changes before sharing.
- Incorrect colour balance: Adjusting colours is essential in landscape photography. However, going overboard or applying incorrect colour balance can negatively impact the final outcome. Make careful choices with your colour adjustments to achieve a more realistic and vibrant image.
- Inefficient workflow: Establishing a proper workflow will help streamline your editing process. Determine the necessary editing steps and follow a consistent sequence to enhance your efficiency.
By avoiding these common mistakes, you’ll be well on your way to editing landscape photos like a pro. Remember, practice makes perfect, so keep refining your skills, and your work will undoubtedly improve over time.
9 – Software For Post Processing Landscape Photos
It goes without saying that there are a multitude of options when it comes to choosing which software to use for editing your landscape photos.
In this section I’ll outline the software programs that I regularly use, even though I definitely don’t use all of these programs with every photo.
Adobe Lightroom and Photoshop
When starting with post processing landscape photos, Adobe Lightroom and Photoshop are excellent options.
Lightroom is great for archiving and processing raw files, while Photoshop provides more advanced adjustments.
There is no doubt that Adobe Lightroom is the most popular photo editor among photographers, whether they are beginners or advanced.
Because there are so many easy-to-use tools, it’s easy to understand why.
Lightroom is more than just a photo editor. It’s also a great organiser for your images. It keeps them all in one place and has so many options to rank, prioritise and sort your images.
Usually purchased together with Lightroom as a package is Photoshop. It is by far the most well-known editor and it has features and functions that are just hard to beat.
It can be difficult to learn which is why some beginners tend to be intimidated by it. I would encourage you to try some of the ideas in this article before giving up. You’ve really got nothing to lose except a bit of time.
If that’s you, then this next program might be just what you’re looking for.
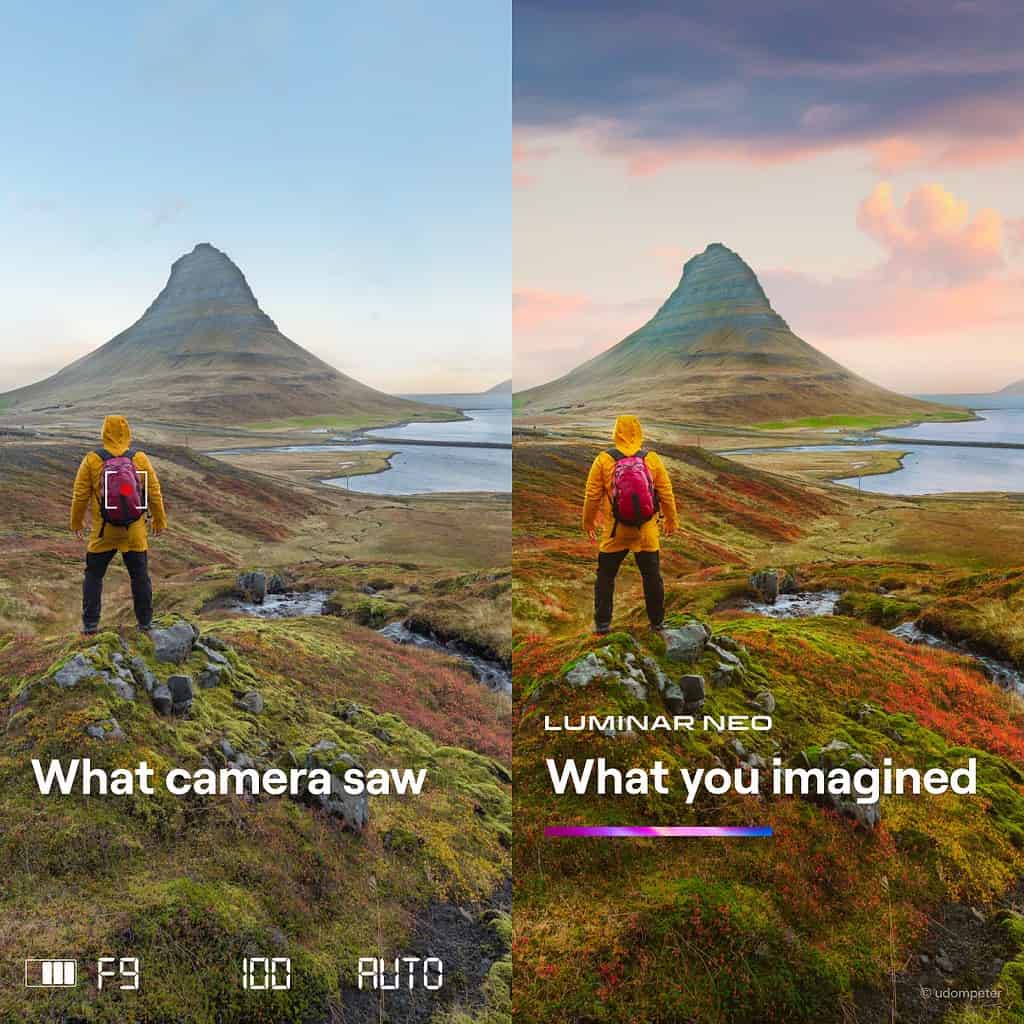
B – Luminar Neo
Luminar Neo is a fantastic software choice for editing landscape photos, particularly for beginners who want to keep it simple.
That is not to say it isn’t for advanced photo editors as well, but the interface is quite user-friendly and intuitive for beginners.
Luminar Neo offers a number of AI-powered functions including sky replacement, automatic power line removal and my favourite tool of all, AI Enhance. I often use this if I just want to do a quick edit to give an image some ‘pop’ and quickly share on social media.
The AI crop tool is also good to try out, so it’s definitely worth taking a look at.
It does rely heavily on presets and filters. These I find often give a good starting point, but usually need some tweaking so they’re not so ‘over-cooked’.
C – Nik Collection
This is getting a little beyond beginners, but is something I do use on nearly every one of my photos.
The Nik collection is a set of plug-ins for Adobe Photoshop and Lightroom, providing a range of specialised tools for photo editing. It includes various filters, such as colour adjustment and contrast enhancement, tailored to landscape photography.
Photoshop plugins (or plug-ins) are add-on programs aimed at providing additional image effects or performing tasks that are impossible or hard to fulfil using Adobe Photoshop alone.
Plugins can be opened from within Photoshop and several other image editing programs (compatible with the appropriate Adobe specifications) and act like mini editors that modify the image. ~ Source, Wikipedia
Both beginners and more advanced photographers will find the different plugins useful for editing landscape photos.
With the collection, you can find everything from basic one-click filters to advanced adjustments and precise masking.
My go to is the ColorFX module, with its numerous filters. The two filters I use the most are the graduated neutral density (to help give the sky some pop), and the White Neutraliser to balance out the colours.
HDR Efex Pro is also a stand out. This module helps you create impressive high dynamic range landscapes, but be careful as it’s very easy to overdo it.
10 – Additional Resources
In this section, you will find some fantastic resources to help you further develop your landscape photo editing skills.
These YouTube channels offer a variety of tutorials and tips to assist you in your journey to improving your landscape photo editing:
Serge Ramelli
Serge Ramelli’s YouTube channel is an excellent place to start for beginners looking to learn more about editing landscape photos.
Serge’s tutorials are easy to follow and cover various aspects of editing, such as enhancing colours, creating HDR images, and modifying the tones in your photos.
Serge primarily focuses on Lightroom which he knows inside out.
His style is very colourful, and in his own words, ‘dramatic’ – some would say overdone. But he definitely knows his stuff and teaches a good workflow to follow.
Even if you aren’t a big fan of his style, there’s a lot to learn from Serge, and he is very entertaining to watch.
He recently did a great beginners tutorial for Lightroom (the end of 2022), which I’ll share here and thoroughly recommend:
Anthony Morganti
Another fantastic resource is Anthony Morganti’s YouTube channel.
With a focus on Adobe Lightroom and Photoshop, Anthony also does regular videos covering the Nik Collection.
His videos tend to be short and to the point, yet very thorough, focussing on particular features in great bite-size chunks.
Anthony’s friendly and informative approach makes it easy for beginners to understand and apply his teachings to their own work.
PiXimperfect
Finally, there’s the PiXimperfect YouTube channel, which offers a wealth of knowledge and easy-to-follow tutorials primarily on Photoshop.
Followed by over 4 million viewers, PiXimperfect provides a variety of content, from beginner tips to more advanced techniques, making it a fantastic resource for learning how to edit your landscape photos effectively.
By taking advantage of their tutorials, there’s definitely a lot to learn here.
This recent one for beginners on Photoshop (2023) is just one great example of many:
Final Thoughts
And that’s it, my top 10 easy beginner tips for post processing landscape photos ~ I hope you find them helpful.
Remember that the more you practise (and let yourself play), the more you will progress and don’t be afraid of making mistakes. There’s always that magic ‘reset’ button in Lightroom – I couldn’t tell you how many times I’ve used that over the years.
Please check out the resources provided as there is also a lot to learn there.
Finally, never stop experimenting – good luck and happy editing!
That’s it for now – Keep clicking and stay caffeinated
Like this post? PIN it so you can save it for later
Other Helpful Articles:
- Editing Tools & Resources
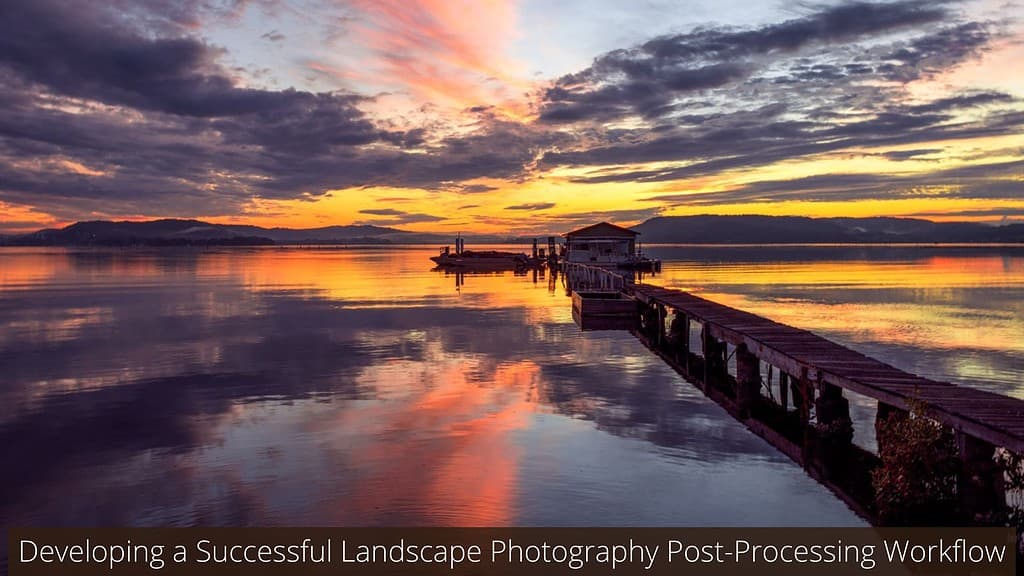
- Developing a Successful Landscape Photography Post-Processing Workflow
- Best Landscape Photography Youtube Channels
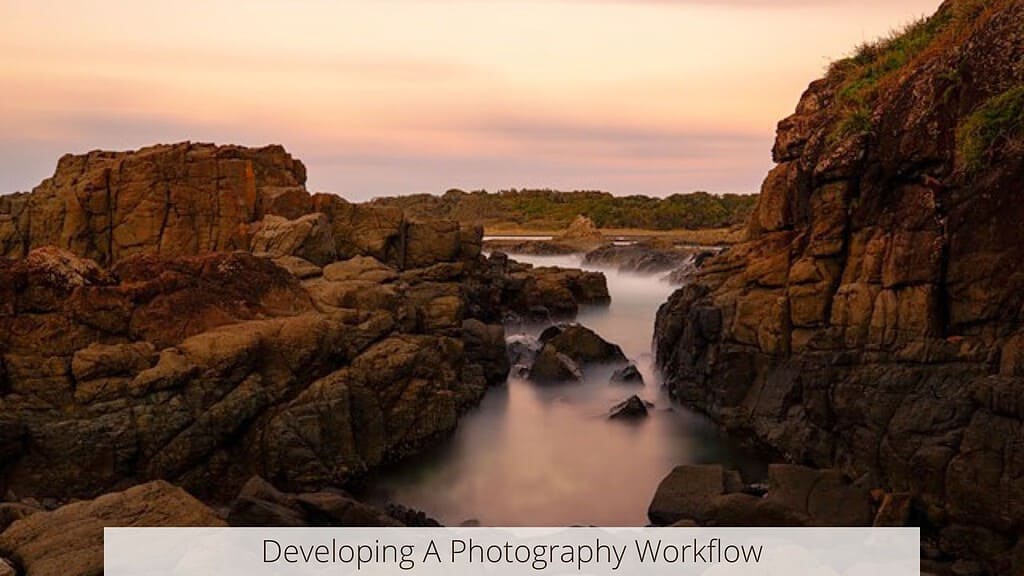
- Developing A Photography Workflow
- What Makes A Great Photo? Hint, There’s No One Magic Ingredient
- Skill and Vision in Landscape Photography: More Important Than Gear
Don’t miss a post – sign up Here if you haven’t already
Note – Unless otherwise stated, all photos are mine and remain my copyright images – Sam Wilson Photography.
Are you a beginner landscape photographer looking to improve your skills and capture stunning photos of nature?
Our ebook, ‘The Landscape Photography Handbook – Exploring the Wonders of Nature,’ is the perfect guide for you.
With 90 pages of expert advice and practical tips, you’ll learn everything you need to know to capture breathtaking landscapes like a pro.
From essential gear and camera settings to composition techniques and planning your shoot, this comprehensive guide covers it all.
Plus, you’ll discover how to develop your own style, build your confidence as a photographer, and use editing tools to enhance your images.
Get your copy today and start exploring the wonders of nature with your camera!